close icon
Gatsby

Securing Gatsby with Auth0

Learn how to set up Auth0 for identity management in a Gatsby static site.

April 24, 2019

TL;DR: In this article, you'll learn how to secure a basic Gatsby static site with Auth0. The finished code for this tutorial is at the gatsby-auth0 repository.

I have a confession. Despite my public love of Angular, I have recently also fallen in love with the static site generator GatsbyJS. I believe by the transitive property that this means that I've fallen in love with React, too, since Gatsby is built around React (but don't tell anyone). Gatsby just feeds two parts of my soul simultaneously: the programmer nerd side and the writer side.

It's not just me, either. Gatsby has been growing in popularity due to how beautifully it merges technologies like GraphQL and MDX with concepts like progressive web apps and server-side rendering. There's even an easy-to-use command line interface (the Gatsby CLI) to make developing, building, and deploying your static site virtually painless. To me, it is the most intuitive JAM stack (JavaScript + APIs + Markup) solution out there.

This combination of power and simplicity has inspired people like Dan Abramov, Joel Hooks, Marcy Sutton, Emma Wedekind, and many more to build their personal sites with Gatsby.

".@GatsbyJS is a powerful static site generator combining React, GraphQL, and many other modern web technologies."

Tweet

Tweet This

As wonderful as this is, in many static sites there is still the need for authentication. Stores, member areas, or admin dashboards can all be built as static sites and all require either a protected route or a persisted user profile. Luckily, Auth0 is here to help.

In this article, I'm going to take a slightly different path than our typical authentication tutorial. Ordinarily, I would have you build a sample application that includes styling and a source of data. Because Gatsby orchestrates things like GraphQL, CSS-in-JS, API data, and much more, it's incredibly easy to get lost in the weeds in a tutorial and lose track of what is specific to Gatsby.

For that reason, I'm going to have you build the absolute simplest (and, well, ugliest) sample application possible so you can focus solely on learning how to set up authentication in that app. I won't be covering any data sources, GraphQL, or styling strategies. Keeping this tutorial super simple means that this strategy will work for you whether you're building a blog, a store, or anything else your heart desires.

One more thing. If you'd like to watch a video of this approach, you can watch Auth0's Ado Kukic pair with Gatsby's Jason Lengstorf in this recorded stream about adding Auth0 to Gatsby. I'm using the same approach in this tutorial with a few details cleaned up.

Prerequisites

To go through this tutorial, you will need Node.js and NPM installed. You should download and install them before continuing.

You'll also need some basic knowledge of React. You only need to know the basic scaffolding of components and JSX to follow along, but it will be difficult if you're a total beginner. If that's you, you can read our article on building and securing your first React app before continuing.

Gatsby Basics

To get started with Gatsby, you'll first need to install the Gatsby CLI globally on your machine. You can do that by running the command:

npm install -g gatsby-cli

The Gatsby CLI has some built in commands like develop to run a development server, build to generate a production build, and serve to serve the production build. There are lots of other options and commands that you can check out in the Gatsby CLI docs.

One cool feature of the CLI is the ability to use a starter as the template for a new project. You can use either an official Gatsby starter or any other Gatsby repository. For this tutorial, you'll use gatsby-starter-hello-world by running the following command:

gatsby new gatsby-auth0 gatsbyjs/gatsby-starter-hello-world

Note that the first argument (gatsby-auth0) is just the name of the new project. You can call it whatever you'd like.

Gatsby will automatically run npm install for you, so once that's done, open the project in your preferred editor. You'll see the simplest possible Gatsby project, which includes one file inside of the src/pages/ folder called index.js. Open that file and replace it with the following:

// ./src/pages/index.js
import React from "react"
import { Link } from "gatsby"

export default () => (
  <div>
    <p>Hello Gatsby!</p>
    <Link to="/account">Go to your account</Link>
  </div>
)

You can see that this is a super simple React component written in JSX. It imports Gatsby's Link function to navigate to an account route. You'll create that route in the next section. For now, run the command gatsby develop in your terminal and navigate to localhost:8000. You should see "Hello Gatsby!" with a link to go to the account page.

How to Create a Protected Account Route

You've now created your first static site with Gatsby — congratulations! You're ready to create an account route that you'll protect with Auth0 in just a bit.

To start, create a new file called account.js in the src/pages/ folder and paste in the following code:

// src/pages/account.js
import React from "react"

const Account = () => (
  <div>
    <p>This is going to be a protected route.</p>
  </div>
)

export default Account

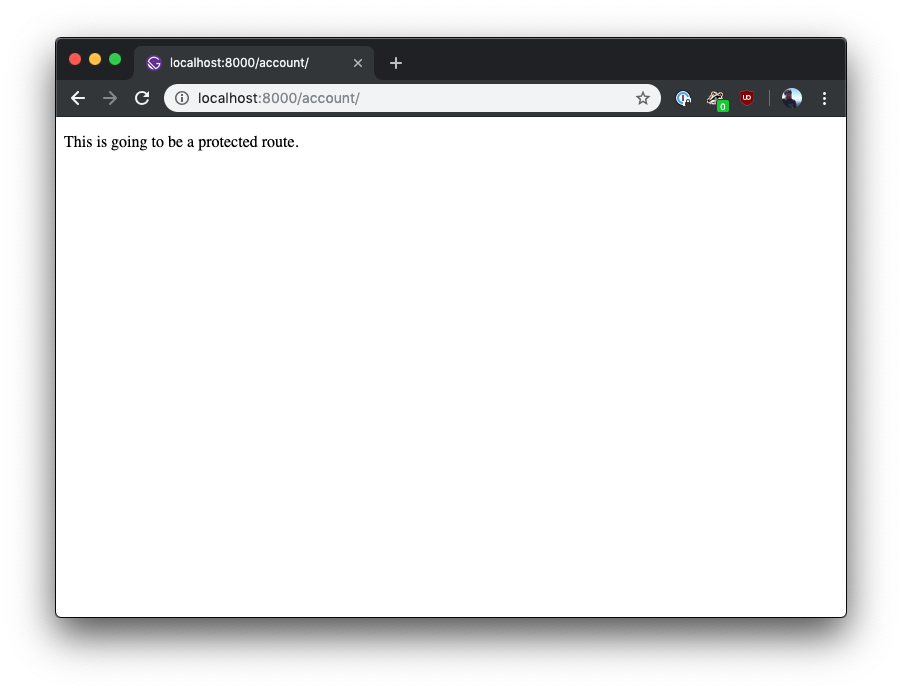
This is another super simple React component. Gatsby will automatically turn this file (and any file in this folder that exports a React component) into a route. Start the development server again with gatsby develop if it's not already running. You should see the following if you navigate to localhost:8000/account:

Gatsby basic account route.

How to Create a Gatsby client-only route

A bit later, you're going to protect the entire account route with Auth0. This means that it will function like a "membership area" of a web site. Any route nested underneath account, such /account/billing or /account/settings, should also be protected.

To set this up, you'll need to manually take over the routing of this section of the site by setting up a client-only route. This is the approach taken in Gatsby's simple auth example, which you can use as a reference.

To set up a client-only route, first create a file at the root of the application called gatsby-node.js. This file is where you can tap into Gatsby's server-side build pipeline and customize how it works. You're going to override Gatsby's createPage function. Paste in the following code:

// ./gatsby-node.js
// Implement the Gatsby API “onCreatePage”. This is
// called after every page is created.
exports.onCreatePage = async ({ page, actions }) => {
  const { createPage } = actions

  // page.matchPath is a special key that's used for matching pages
  // only on the client.
  if (page.path.match(/^\/account/)) {
    page.matchPath = "/account/*"

    // Update the page.
    createPage(page)
  }
}

If you stop and restart the server (gatsby develop), you should be able to navigate to localhost:8000/account/billing or any other path and still see the account component.

You can now set up the client-side routing. To do that, you'll use Reach Router. You could use the regular React Router instead, but Gatsby uses Reach under the hood. I also like Reach because it's accessible by default. Reach makes links accessible and handles focus management so you don't have to.

".@GatsbyJS uses Reach Router under the hood. It's accessible by default!"

Tweet

Tweet This

First, install Reach with the following command:

npm install @reach/router

Note: Gatsby will use Yarn if it's available on your machine. In that case, you'll want to swap any reference I make to npm with the equivalent yarn command (e.g. yarn add @reach/router).

You can add a couple of simple components to route to as a basic illustration of how this approach will work. Replace src/pages/account.js with the following code:

// src/pages/account.js
import React from "react"
import { Router } from "@reach/router"
import { Link } from "gatsby"

const Home = () => <p>Home</p>
const Settings = () => <p>Settings</p>
const Billing = () => <p>Billing</p>

const Account = () => (
  <>
    <nav>
      <Link to="/account">Home</Link>{" "}
      <Link to="/account/settings">Settings</Link>{" "}
      <Link to="/account/billing">Billing</Link>{" "}
    </nav>
    <Router>
      <Home path="/account" />
      <Settings path="/account/settings" />
      <Billing path="/account/billing" />
    </Router>
  </>
)

export default Account

You now have routes and simple matching components for Home, Billing, and Settings. Of course, these routes could refer to more complex components you've built. Gatsby can make use of any React architecture you prefer.

When you run gatsby develop and navigate to localhost:8000, you'll see a simple page with clickable links for each of these routes.

GatsbyJS account route with clickable links.

How to Add Auth0 to Your Gatsby Site

You're now ready to protect the entire account route with Auth0. Auth0 handles identity features like user registration, email confirmation, and password reset so you don't have to build them yourself.

Sign up for Auth0

If you don't have one yet, you will have to create a free Auth0 account now. After creating your account, go to the Applications section of your Auth0 dashboard and click on the Create Application button. Then, fill the form as follows:

  • Application Name: "Gatsby App"
  • Application Type: "Single Page Web App"

When you click on the Create button, Auth0 will redirect you to the Quick Start tab of your new application. From there, head to the Settings tab and make two changes:

  1. Add http://localhost:8000/callback to the Allowed Callback URLs field.
  2. Add http://localhost:8000 to Allowed Web Origins and Allowed Logout URLs.

For security reasons, after the login and logout processes, Auth0 will only redirect users to the URLs you register in these fields.

After updating the configuration, scroll to the bottom of the page, and click Save Changes. For now, leave this page open.

How to Set up Gatsby with Auth0

To get started with adding Auth0 to your Gatsby app, you'll need to install Auth0's headless browser SDK in your app. Back in the terminal, stop the development server (Ctrl + C), and issue the following command:

npm i auth0-js

Once that's done, you'll need to make a small change to Gatsby's server-side configuration. Add the following code to the end of gatsby-node.js:

// ./gatsby-node.js
// above code unchanged
exports.onCreateWebpackConfig = ({ stage, loaders, actions }) => {
  if (stage === "build-html") {
    /*
     * During the build step, `auth0-js` will break because it relies on
     * browser-specific APIs. Fortunately, we don’t need it during the build.
     * Using Webpack’s null loader, we’re able to effectively ignore `auth0-js`
     * during the build. (See `src/utils/auth.js` to see how we prevent this
     * from breaking the app.)
     */
    actions.setWebpackConfig({
      module: {
        rules: [
          {
            test: /auth0-js/,
            use: loaders.null(),
          },
        ],
      },
    })
  }
}

This code ignores auth0-js during the server-side build since it relies on browser APIs like window.

Create an authentication utility

Once that's done, create a new folder inside src called utils and a file called auth.js. Add the following code to it:

// src/utils/auth.js
import auth0 from "auth0-js"

const isBrowser = typeof window !== "undefined"

const auth = isBrowser
  ? new auth0.WebAuth({
      domain: process.env.AUTH0_DOMAIN,
      clientID: process.env.AUTH0_CLIENTID,
      redirectUri: process.env.AUTH0_CALLBACK,
      responseType: "token id_token",
      scope: "openid profile email",
    })
  : {}

After importing auth0-js, you'll notice there's a check for whether this code is running in the browser. You'll use this later to ignore certain functions if window and other browser APIs are not available (when running gatsby build for example).

The next section is the initial configuration code for Auth0 with variables for your app's domain, client ID, and redirect URI. You'll be getting back an access token and an ID token, which includes a user profile in the form of an idTokenPayload.

Note: This tutorial uses the traditional implicit grant flow. The OAuth2 working group published a new general security best current practices document which recommends the authorization code grant with Proof Key for Code Exchange (PKCE) to request access tokens from SPAs. The Auth0 JS SDK will soon support this flow for SPAs and we'll update the article at that time. You can read more about these changes in this article by Auth0 Principal Architect Vittorio Bertocci.

Add Gatsby Auth env config

While you could manually update the variables AUTH0_DOMAIN, AUTH0_CLIENTID, and AUTH0_CALLBACK, it's much better practice to create a separate environment file that's not checked in to source control.

Luckily, Gatsby ships with the library dotenv, so you can provide the values to the authentication service by creating a file at the root of the project called .env.development. Paste in the following:

# ./.env.development
# Get these values at https://manage.auth0.com
AUTH0_DOMAIN=<value>
AUTH0_CLIENTID=<value>
AUTH0_CALLBACK=http://localhost:8000/callback

Replace the placeholders with your Auth0 domain (e.g. yourtenant.auth0.com) and client ID. You can find both in your application's settings page.
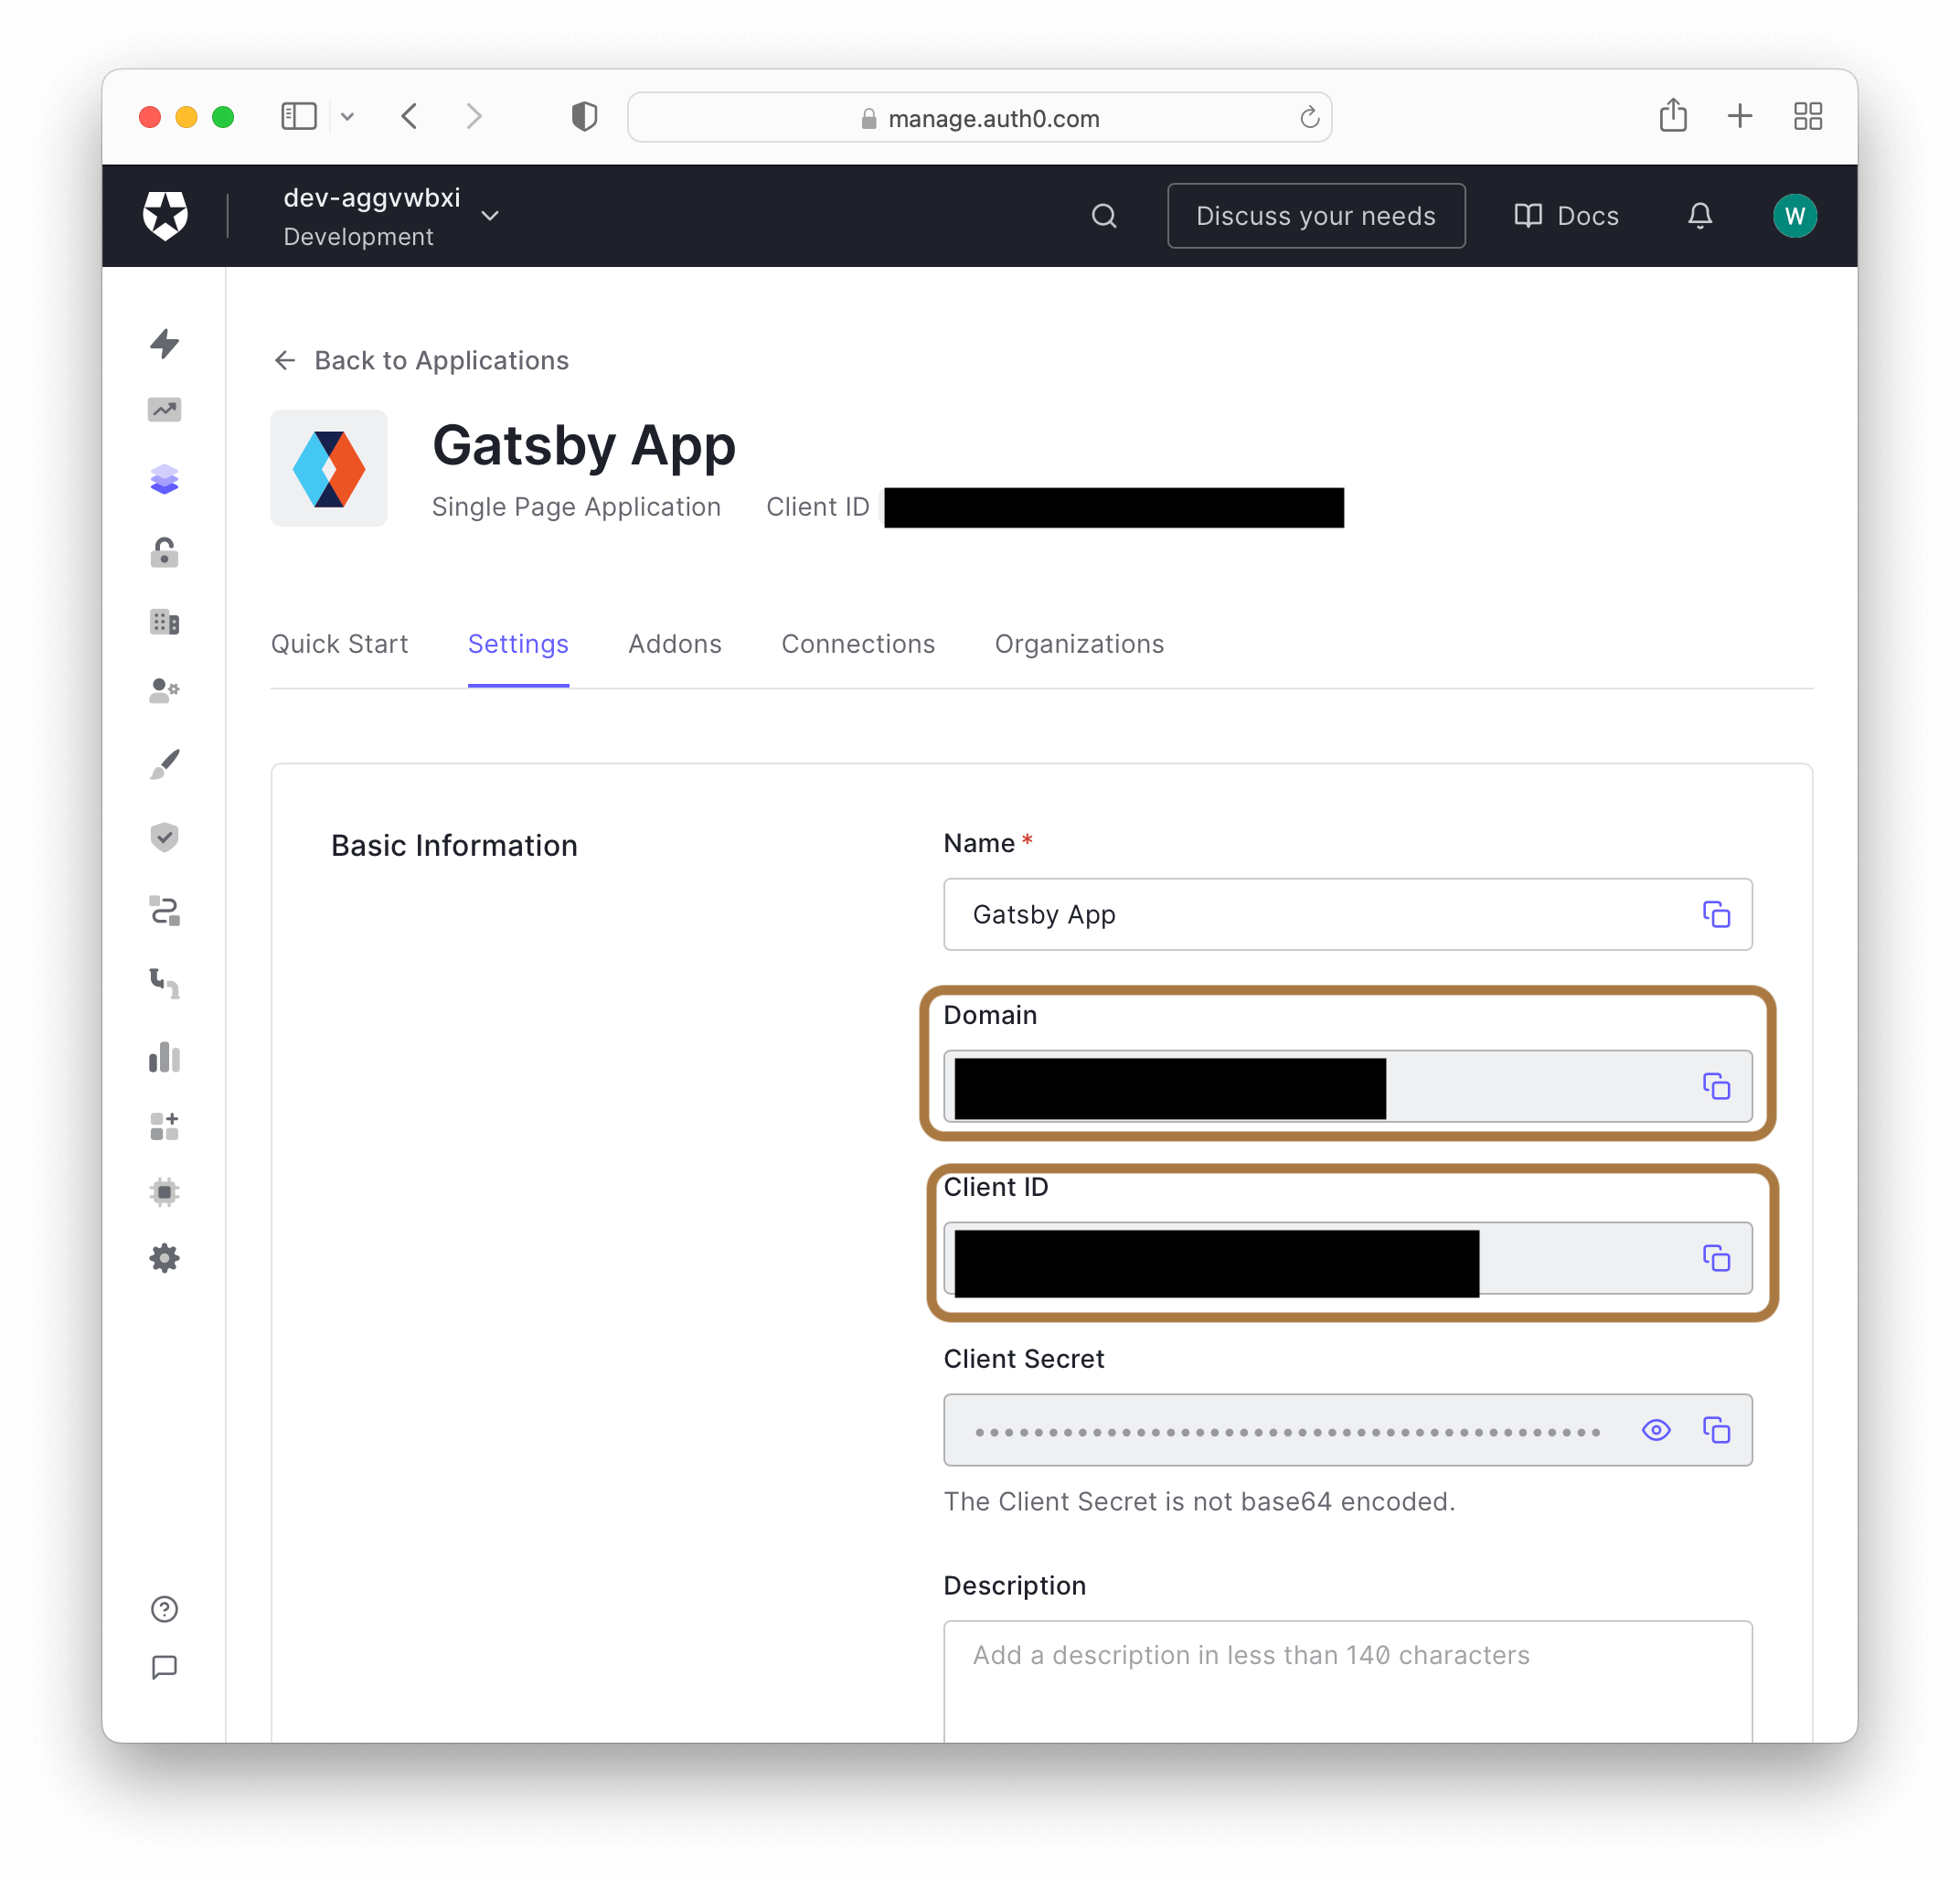
You can do the same thing with production values by creating .env.production. Don't forget to change AUTH0_CALLBACK to whatever your production server is and add it to your application settings in Auth0.

How to Implement Log In

Auth0 is now ready to use. You'll first need a way for your users to log in. To do that, update the auth.js utility you created with the following code:

// src/utils/auth.js
// above unchanged
import { navigate } from "gatsby"

// ...

// insert after auth const
const tokens = {
  accessToken: false,
  idToken: false,
  expiresAt: false,
}

let user = {}

export const isAuthenticated = () => {
  if (!isBrowser) {
    return;
  }

  return localStorage.getItem("isLoggedIn") === "true"
}

export const login = () => {
  if (!isBrowser) {
    return
  }

  auth.authorize()
}

const setSession = (cb = () => {}) => (err, authResult) => {
  if (err) {
    navigate("/")
    cb()
    return
  }

  if (authResult && authResult.accessToken && authResult.idToken) {
    let expiresAt = authResult.expiresIn * 1000 + new Date().getTime()
    tokens.accessToken = authResult.accessToken
    tokens.idToken = authResult.idToken
    tokens.expiresAt = expiresAt
    user = authResult.idTokenPayload
    localStorage.setItem("isLoggedIn", true)
    navigate("/account")
    cb()
  }
}

export const handleAuthentication = () => {
  if (!isBrowser) {
    return;
  }

  auth.parseHash(setSession())
}

export const getProfile = () => {
  return user
}

Here's what's happening in this code:

  • You'll call the login function from a component in a bit, which calls Auth0's authorize function. This directs users to a login page (where they can also sign up if it's their first time visiting).
  • Once the login is complete, Auth0 will send the user back to a callback route (which you'll create next). This route will call the handleAuthentication function in this utility.
  • The handleAuthentication function calls Auth0's parseHash function, which will parse the tokens from the location hash.
  • After that, setSession will be called as a callback. There is a bit of closure happening here which allows for an empty callback. This will be important when you implement silentAuth later on. The setSession function checks for errors and adds the tokens and expiration to the tokens object. It also assigns the idTokenPayload to the user object. You'll retrieve that using getProfile from a component.
  • setSession also sets a flag in local storage called isLoggedIn, which can be checked across browser sessions.
  • Finally, the setSession function will also navigate to the account route once everything is over. Note that this isn't a very sophisticated method of redirecting since there is no implementation of remembering the browser history. For example, if this function is run from a different route, it will always redirect back to /account. In a real application, you'll want to implement something more robust.

In this sample application, you won't be using the access token to access an API. If your Gatsby application gets data using a secure API, you will use the access token stored here to access those protected resources (for example, by adding it as an Authorization header). Check out the Gatsby documentation on Sourcing from Private APIs to learn more about how to use private API data in your Gatsby site.

With the login process done in the utility, you're now ready to implement it in the component code.

Add Gatsby Callback component

The first thing to do is to create a callback component for Auth0 to redirect to after a successful login. Create a file called callback.js under src/pages/ and paste in the code below:

// src/pages/callback.js
import React from "react"
import { handleAuthentication } from "../utils/auth"

const Callback = () => {
  handleAuthentication()

  return <p>Loading...</p>
}

export default Callback

You can see that the component calls handleAuthentication as mentioned.

Add login check to account component

So far, nothing is calling the login function to redirect the user to Auth0 to log in. You could either implement this as a link for the user to click or redirect them automatically when a route is triggered. Since you're doing a client-only protected route in this application, you'll do the latter.

Replace the account component code with the following:

// src/pages/account.js
import React from "react"
import { Router } from "@reach/router"
import { login, isAuthenticated, getProfile } from "../utils/auth"
import { Link } from "gatsby"

const Home = ({ user }) => {
  return <p>Hi, {user.name ? user.name : "friend"}!</p>
}
const Settings = () => <p>Settings</p>
const Billing = () => <p>Billing</p>

const Account = () => {
  if (!isAuthenticated()) {
    login()
    return <p>Redirecting to login...</p>
  }

  const user = getProfile()

  return (
    <>
      <nav>
        <Link to="/account/">Home</Link>{" "}
        <Link to="/account/settings/">Settings</Link>{" "}
        <Link to="/account/billing/">Billing</Link>{" "}
      </nav>
      <Router>
        <Home path="/account/" user={user} />
        <Settings path="/account/settings" />
        <Billing path="/account/billing" />
      </Router>
    </>
  )
}

export default Account

You can see that this component immediately checks for whether the user is logged in and, if not, calls the login function from the auth utility.

Restart the Gatsby development server and navigate to localhost:8000/account. You should now be directed to Auth0 to log in to your application (you will need to authorize the application the first time you log in). You'll also see your name (if available, otherwise it will be your email address) on the account home page.

This is great! However, if you refresh the browser, something strange happens. The app still thinks you're logged in because it does not direct you to Auth0. This is because of the isLoggedIn local storage flag set by setSession. However, your user information is no longer present, so the account home page says, "Hello, friend!" Behind the scenes, there are also no longer any tokens or user profile stored in the auth utility.

You'll fix this in the next section.

Implement Silent Authentication

It would be nice if, when the user refreshed the page, the app remembered if the user was logged in. The isLoggedIn flag in local storage is part of the solution, but there are no tokens or user profile information on refresh. It's bad practice to store these in local storage. To solve this, Auth0 provides a checkSession function that checks whether a user is logged in and, if so, returns valid tokens and user profile information for use in the application without requiring user interaction.

Add to the auth utility

To implement this, you'll first need to add one function to the auth utility:

// src/utils/auth.js
export const silentAuth = callback => {
  if (!isAuthenticated()) return callback()
  auth.checkSession({}, setSession(callback))
}

This function checks if the isLoggedIn flag is false and, if not, calls Auth0's checkSession function. This check is there because checkSession needs to be called every time the app loads. If the check wasn't there, checkSession would be called every time the app loaded, regardless of the user's session status.

Wrap the root element

You might intuitively think that silentAuth should be called in the Account component before the login function is called. This is actually not the case. In order to implement silentAuth correctly, it needs to be called in the root component. The root component only mounts once, while the other page elements (like the Account component) un-mount and re-mount when you navigate. If you implemented silentAuth in the Account component, you would run silentAuth every time you clicked a link. Wrapping the root element will only run silentAuth when the page loads.

Gatsby abstracts away the application's root element. You can, however, export a function called wrapRootElement and perform whatever logic or injection you need there. You'll do this in the config file for the client side of Gatsby called gatsby-browser.js. Create this file at the root of the project.

In gatsby-browser.js, you'll create a class component called SessionCheck, which will contain all of the logic necessary for calling silentAuth. This will happen on the componentDidMount lifecycle method and then set the state of the component to loading: false.

Paste the following code into gatsby-browser.js:

// ./gatsby-browser.js
import React from "react"
import { silentAuth } from "./src/utils/auth"

class SessionCheck extends React.Component {
  constructor(props) {
    super(props)
    this.state = {
      loading: true,
    }
  }

  handleCheckSession = () => {
    this.setState({ loading: false })
  }

  componentDidMount() {
    silentAuth(this.handleCheckSession)
  }

  render() {
    return (
      this.state.loading === false && (
        <React.Fragment>{this.props.children}</React.Fragment>
      )
    )
  }
}

export const wrapRootElement = ({ element }) => {
  return <SessionCheck>{element}</SessionCheck>
}

You can see here that the render method only returns the children when loading is false. After the component definition, wrapRootElement wraps the SessionCheck component around the root element of the application.

If you restart gatsby develop and navigate to localhost:8000, you should be able to log in, refresh the app, and still see your profile information on the /account route. Awesome!

Important note: If you used Google to sign in to your application, silent authentication will throw an error and not work correctly. This is because silent auth does not work with the Google test keys provided by Auth0 for development. To fix this, you can generate your own Google keys and add them to your Auth0 configuration by following these instructions.

Implement Log Out

Finally, you'll need a way for users to log out of your application.

Add log out to the auth utility

Add the following function to the end of src/utils/auth.js:

export const logout = () => {
  localStorage.setItem("isLoggedIn", false)
  auth.logout()
}

This function sets the isLoggedIn flag to false and calls Auth0's logout function.

For reference, the completed auth service should look like this:

// src/utils/auth.js
import auth0 from "auth0-js"
import { navigate } from "gatsby"

const isBrowser = typeof window !== "undefined"

const auth = isBrowser
  ? new auth0.WebAuth({
      domain: process.env.AUTH0_DOMAIN,
      clientID: process.env.AUTH0_CLIENTID,
      redirectUri: process.env.AUTH0_CALLBACK,
      responseType: "token id_token",
      scope: "openid profile email",
    })
  : {}

const tokens = {
  accessToken: false,
  idToken: false,
  expiresAt: false,
}

let user = {}

export const isAuthenticated = () => {
  if (!isBrowser) {
    return;
  }

  return localStorage.getItem("isLoggedIn") === "true"
}

export const login = () => {
  if (!isBrowser) {
    return
  }

  auth.authorize()
}

const setSession = (cb = () => {}) => (err, authResult) => {
  if (err) {
    navigate("/")
    cb()
    return
  }

  if (authResult && authResult.accessToken && authResult.idToken) {
    let expiresAt = authResult.expiresIn * 1000 + new Date().getTime()
    tokens.accessToken = authResult.accessToken
    tokens.idToken = authResult.idToken
    tokens.expiresAt = expiresAt
    user = authResult.idTokenPayload
    localStorage.setItem("isLoggedIn", true)
    navigate("/account")
    cb()
  }
}

export const silentAuth = callback => {
  if (!isAuthenticated()) return callback()
  auth.checkSession({}, setSession(callback))
}

export const handleAuthentication = () => {
  if (!isBrowser) {
    return;
  }
  
  auth.parseHash(setSession())
}

export const getProfile = () => {
  return user
}

export const logout = () => {
  localStorage.setItem("isLoggedIn", false)
  auth.logout()
}

Update the account component

Now you can add a log out link to the navigation section of the Account component. The finished Account component code will look like this:

// src/pages/account.js
import React from "react"
import { Router } from "@reach/router"
import { login, logout, isAuthenticated, getProfile } from "../utils/auth"
import { Link } from "gatsby"

const Home = ({ user }) => {
  return <p>Hi, {user.name ? user.name : "friend"}!</p>
}
const Settings = () => <p>Settings</p>
const Billing = () => <p>Billing</p>

const Account = () => {
  if (!isAuthenticated()) {
    login()
    return <p>Redirecting to login...</p>
  }

  const user = getProfile()

  return (
    <>
      <nav>
        <Link to="/account/">Home</Link>{" "}
        <Link to="/account/settings/">Settings</Link>{" "}
        <Link to="/account/billing/">Billing</Link>{" "}
        <a
          href="#logout"
          onClick={e => {
            logout()
            e.preventDefault()
          }}
        >
          Log Out
        </a>
      </nav>
      <Router>
        <Home path="/account/" user={user} />
        <Settings path="/account/settings" />
        <Billing path="/account/billing" />
      </Router>
    </>
  )
}

export default Account

Running gatsby develop again, you should now be able to log in, refresh your application, and log out successfully. Congratulations!

Remember, the finished code for this tutorial is at the gatsby-auth0 repository.

Conclusion

You now know how to implement authentication using Auth0 in virtually any Gatsby application. Feel free to explore the excellent Gatsby docs and learn more about sourcing and querying data with GraphQL, styling your application using CSS modules or CSS-in-JS, and much, much more. Most importantly, I hope you have as much fun as I do developing with Gatsby!

  • Twitter icon
  • LinkedIn icon
  • Faceboook icon