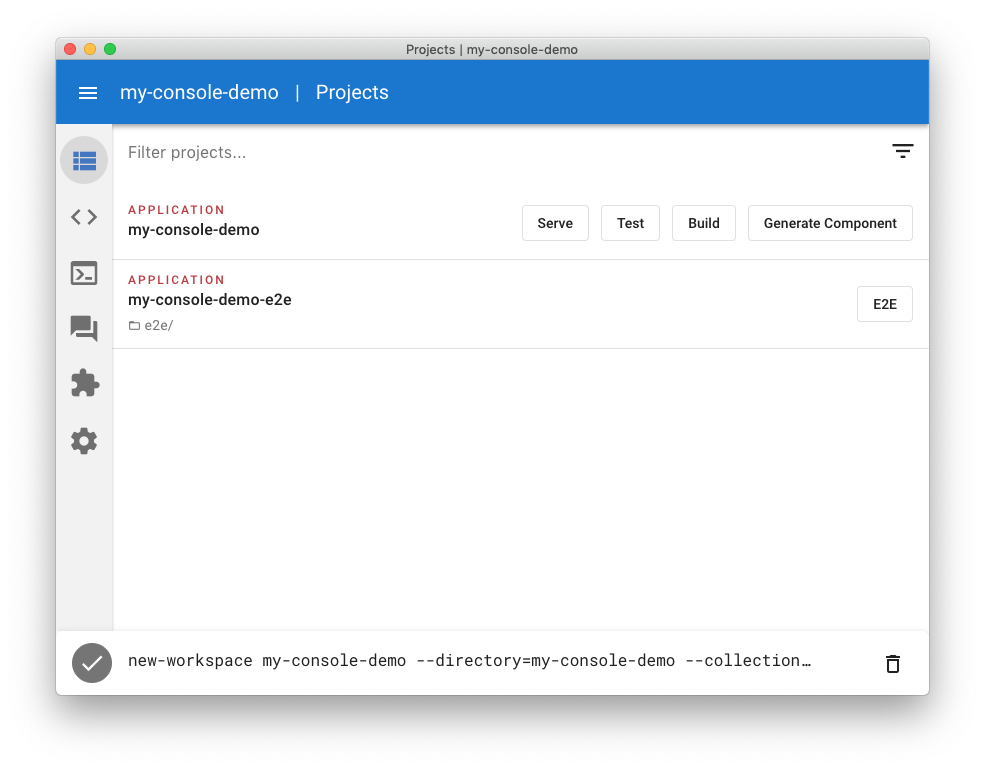
TL;DR: In this article, we’ll explore Angular Console. Angular Console is a desktop application that provides a graphical UI for the Angular CLI. It is packed with features like code generation, task running, and a simple interface for installing CLI extensions like schematics. Angular Console is a great tool for Angular developers of all skill levels!
There’s often a bizarre prejudice in programming against graphical UIs in favor of the command line. Maybe it’s because of 80’s hacker movies, but it’s never made sense to me. A GUI is just a layer of abstraction. The computer gets the same commands whether you’re clicking on some buttons or furiously typing green text into a black screen.
Angular Console is a great reason to reconsider that bias. It’s a desktop application developed by Nrwl that provides a graphical UI for the Angular CLI. Nrwl is a software development consultancy that specializes in creating high-quality enterprise software. They’re also great at giving back to the Angular Community. Angular Console is packed with features like code generation, task running, and a simple interface for installing CLI extensions like schematics.
Do you enjoy a visual UI when building/serving @Angular apps? I tried the brand new Angular Console from @nrwl_io and it's looking good!
See it below 📽️https://t.co/GetJg4ELswpic.twitter.com/DnahCmUJsJ— John Papa (@JohnPapa) <a href="https://twitter.com/JohnPapa/status/1028319375835758593?ref_src=twsrc%5Etfw">August 11, 2018</a>
Who is Angular Console for?
When the team at Nrwl announced Angular Console, a lot of people shared a similar reaction. Sure, a GUI is fine for beginners (probably said with a sneer), but not the Advanced Super Users. I’m here to tell you that Angular Console is incredibly helpful for Angular developers across the experience spectrum.
“Angular Console by @nrwl_io is helpful for @angular devs of all experience levels.”
Tweet This
It’s fantastic for new Angular friends
Okay, yes, let’s get this out there: Angular Console is great for folks new to Angular. Learning Angular can be tough, even with prior programming experience. Suddenly, you’re thrown into a world of TypeScript and RxJS observables on top of all of the normal front end development concerns. The Angular CLI is a lifesaver, but even that has a learning curve. The CLI has a specific syntax to learn, as well as all of the different commands needed to build applications. I don’t know about you, but the faster I can get up and running with a new framework, the more likely I am to stick with it.
Angular Console helps reduce the tooling friction of learning Angular to practically nothing. In just a few clicks, you can have a shiny new Angular application and open it in your favorite editor. You can then run CLI commands to generate things like components and services straight from Angular Console. You can even run and serve your app with a few clicks!
It’s a lifesaver for experienced Angular developers
Do you remember (without looking!) the command to use the NgRx schematics to generate a new action, but to use a flat directory structure and group all actions within one folder? How about the command to add a directive to a specific module while giving it a custom prefix?
Neither do I, at least not from memory. It’s the same reason I have to look up
git rebaseIn psychology, this is called being a cognitive miser. We humans prefer simplicity over complexity when it comes to processes and problem-solving. We can improve our ability to solve problems and finish tasks by reducing unnecessary complexity.
Angular Console helps reduce your cognitive overhead by providing a simple interface for generating code that includes live updating of CLI command output.
Here’s a screenshot of that command I mentioned to add a directive with a custom prefix to a specific module:
Note that I didn’t have to remember the name of the project, the path to the module, or the command to use a custom prefix. Angular Console handled all of that for me while showing me what it was doing under the hood. This becomes even more useful as your applications get larger, especially when trying to keep track of multiple projects and modules.
Angular Console also lets you quickly and easily add CLI extensions and schematics to your applications. There’s no more looking up exactly which package you need to install. If you want to add Angular Material, Ionic, NativeScript, or many others to your application, you can simply choose from a list and click “Add.” You’ll learn more about that in just a minute.
Naturally, the Nx schematics from Nrwl are tightly integrated into Angular Console. Nx schematics unlock all kinds of essential tools for enterprise developers, like the monorepo pattern, built-in support for testing with Jest and Cypress, and an incredible suite of scripts (like the ability to generate a dependency graph). Nx is definitely a power tool for the advanced user and Angular Console lets you wield it with ease and grace.
A Tour through Angular Console
Now that you know why Angular Console is so helpful, why don’t you take it for a test drive?
How to Install Angular Console
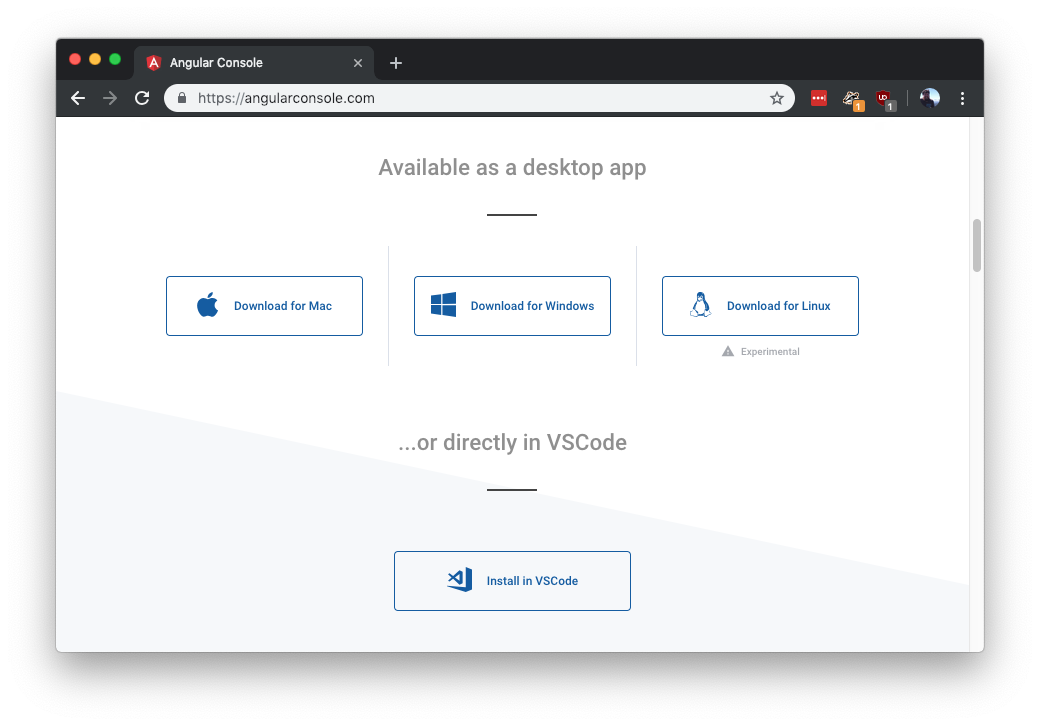
You’ll first need to head over to the Angular Console site to download and install it. It’s available as a desktop app for Mac, Windows, and Linux (the Linux app is still experimental), as well as an extension for Visual Studio Code. The requirements for running Angular Console are the same as running the Angular CLI, so you’ll need to download and install Node first.
Note: For this tour through Angular Console, I'll be using the dekstop version. The UI for the Visual Studio Code extension is a bit different, but all of the functionality is still there.
How to Create a Project with Angular Console
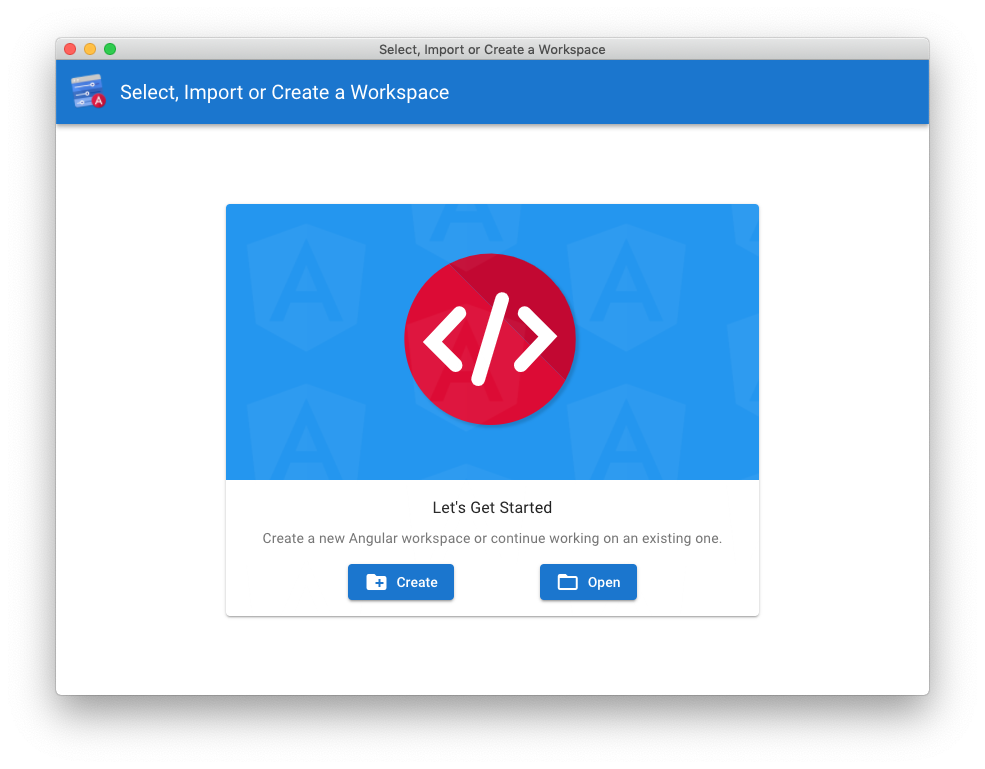
Once you’ve got Angular Console installed, open it up. You’ll see a welcome screen that lets you choose between creating a new Angular workspace or opening an existing one.
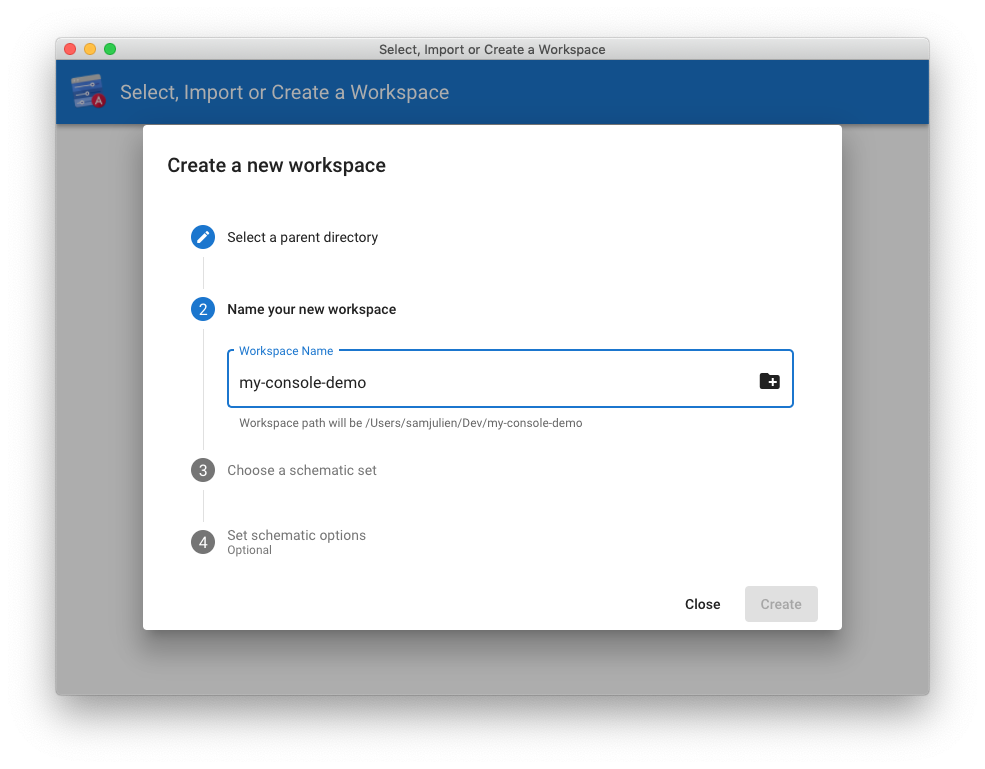
Click the create button. Select the parent directory you want to use and give a name to your new workspace (you can name it whatever you’d like). Angular Console will show you the path where your new workspace will live once it’s created.
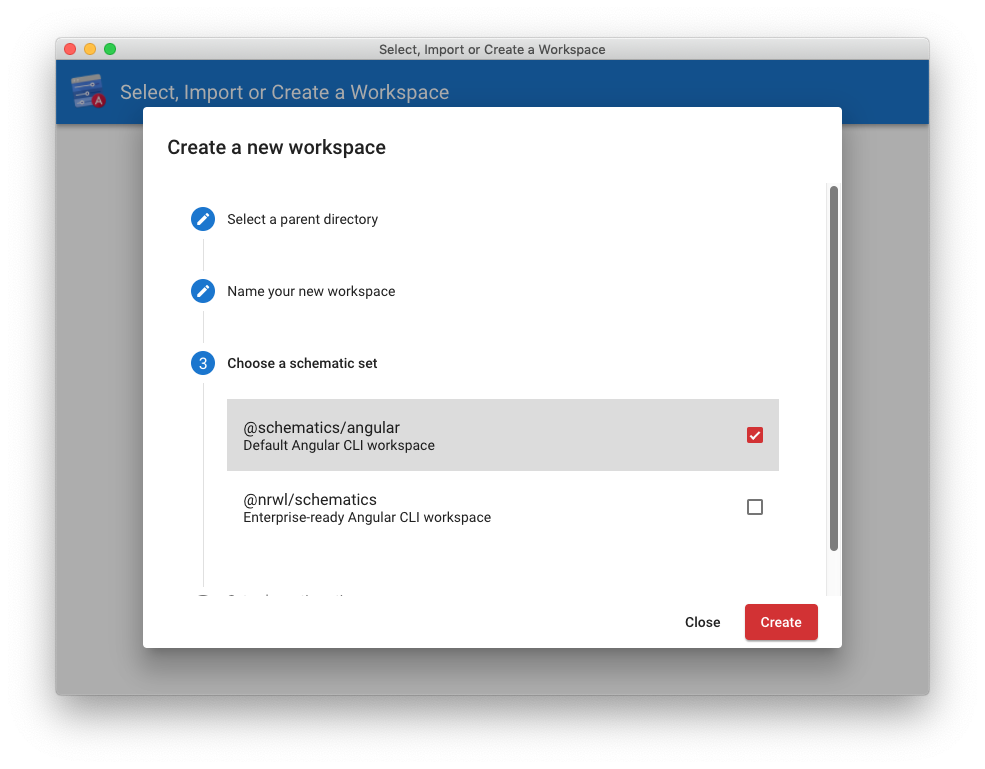
Click on step 3, “Choose a schematic set.” Here, Angular Console gives you the option to use either the default Angular schematics or Nrwl’s Nx schematics. As mentioned earlier, the Nx schematics create a monorepo and allow for some great other options for enterprise developers. For now, let’s keep things simple. Choose the default schematics.
There's also an optional step 4, "Set schematic options." This includes options to skip the initial dependency installation, initialization of a git repostory, and many others.
You can keep it simple right now, though. Skip all of those and just click "Create."
You’ll see a bunch of output from the command line as the Angular CLI generates the application and runs
npm installIf you click on the bar at the bottom (called the "action bar"), it will slide out as a bottom sheet and show you all of the command line output for running
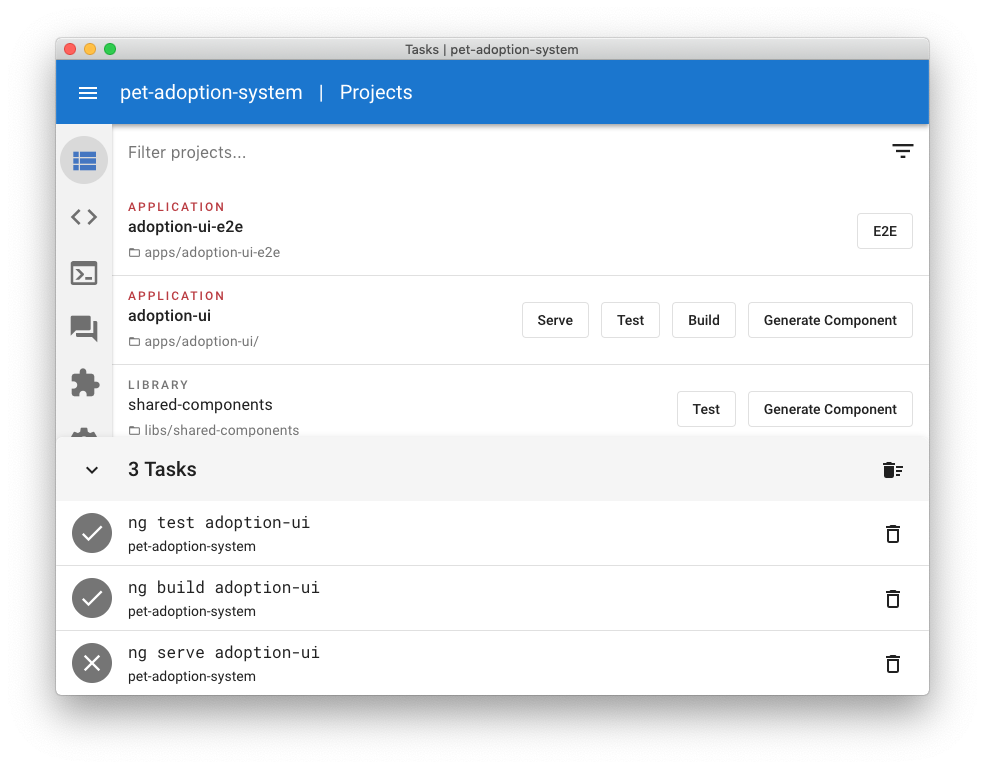
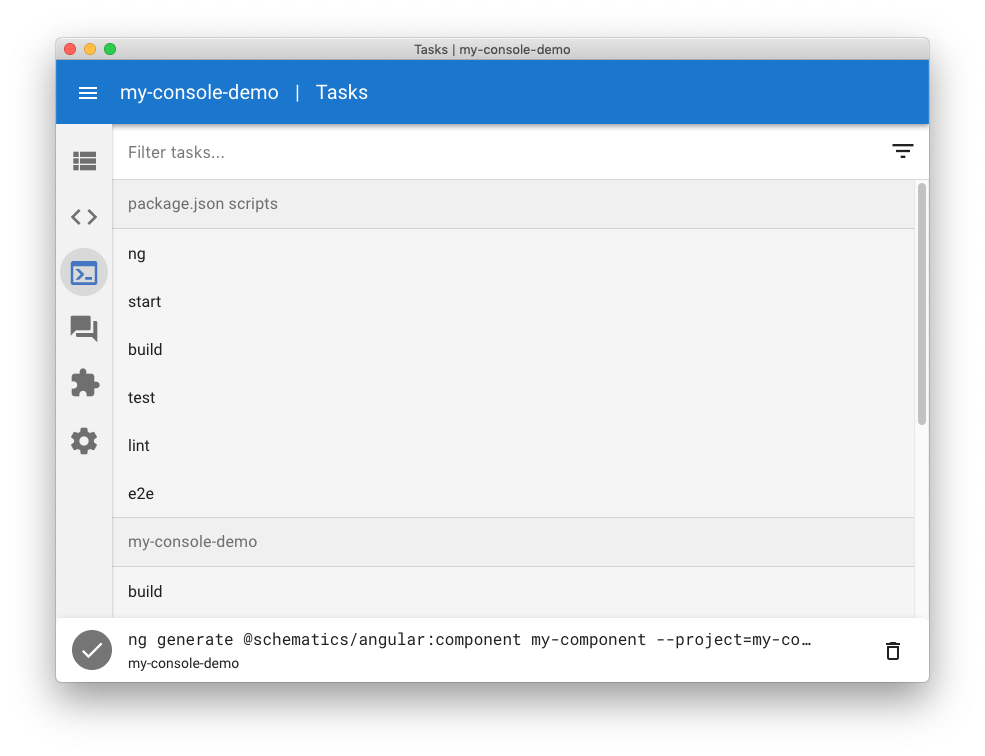
ng newIn doing research for this article, I learned a couple of neat things about the action bar. I interviewed Nrwl engineer Dan Muller about Angular Console and it turns out this is his favorite feature in the app. Dan and his best friend Cindy were traveling together while they brainstormed on how to make this feature amazing. The action bar actually caches the last five tasks you ran. In addition to dismissing the output, there’s also a button that lets you re-run these tasks. Here’s an example from another project I have open:
Dan also put a lot of love into the UI design of this feature, like how the icons change if the task failed or was successful. The Angular Material library has no built-in bottom sheet, so he created it from scratch. You can really tell that Nrwl put a lot of care and attention into Angular Console, which developers like me really appreciate.
Okay, your new workspace is ready to go! Let’s look at how to use Angular Console.
Angular Console basics
Looking at the open project, you’ll notice a hamburger menu button in the upper left corner. That button takes you back to a list of workspaces, where you can also create or open a new workspace.
Below the main title bar, you’ll see a filter bar and a sorting button to organize projects. Of course, this brand new application only contains the main project and its
e2eBelow the filter and sorting bar, you’ll notice that there are a few buttons. To the right of the name of the main application, you’ll see buttons for “Serve,” “Test,” “Build,” and “Generate Component.” To the right of the end-to-end project name, you’ll see an “E2E” button. These buttons correspond to Angular CLI commands or
npm“Angular Console can generate code, run tasks, and install extensions.”
Tweet This
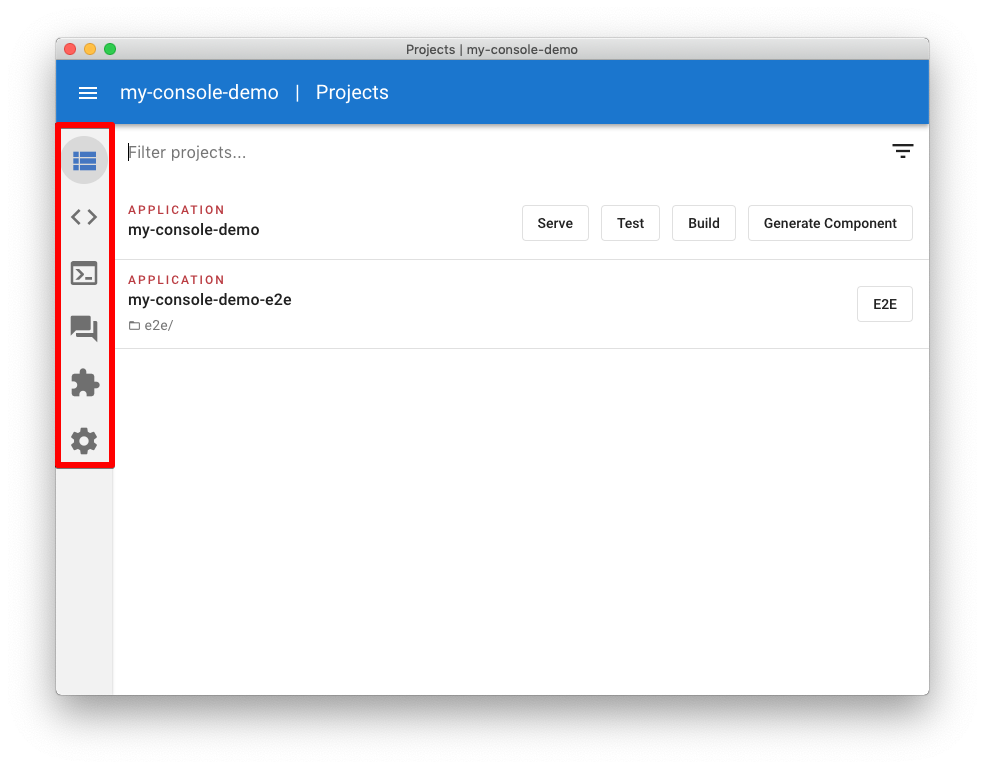
The left toolbar is home to all of the core functionality of Angular Console.
The top list button you takes back to the list of projects in the open workspace (where you are now). The bottom gear button takes you to the settings screen. The chat bubble icon is where you can access Nrwl Connect, which is Nrwl’s premium support service. Nrwl Connect also unlocks some additional features in Angular Console.
The other three buttons are for generating code, running tasks, and installing extensions. Let’s step through each of these.
Generate code
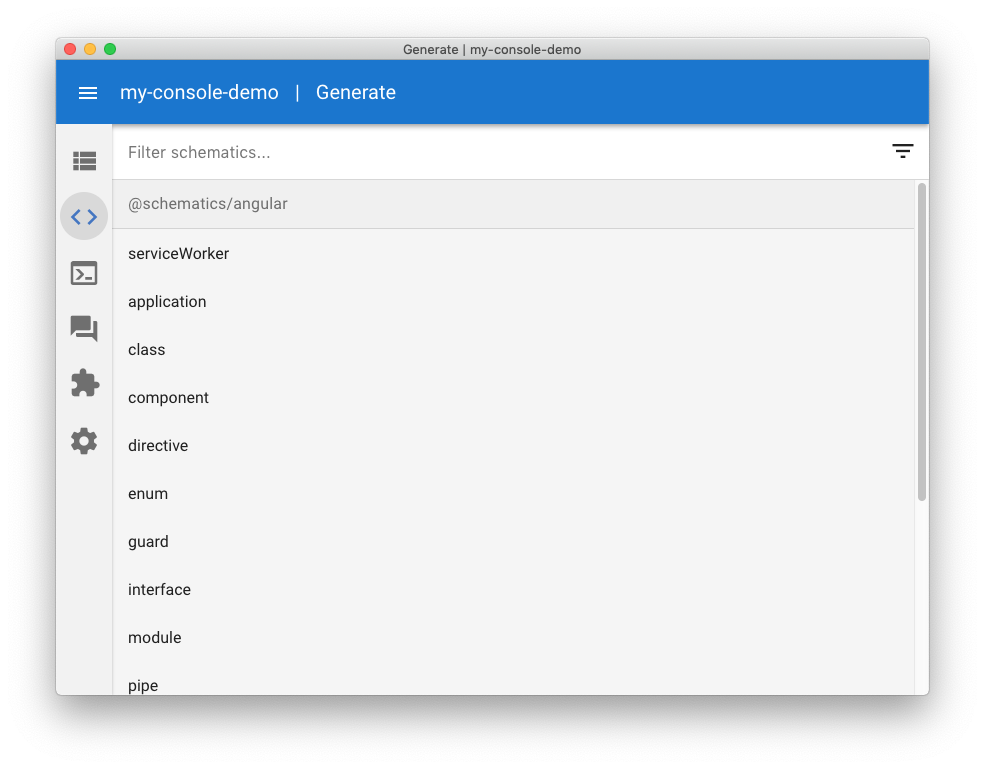
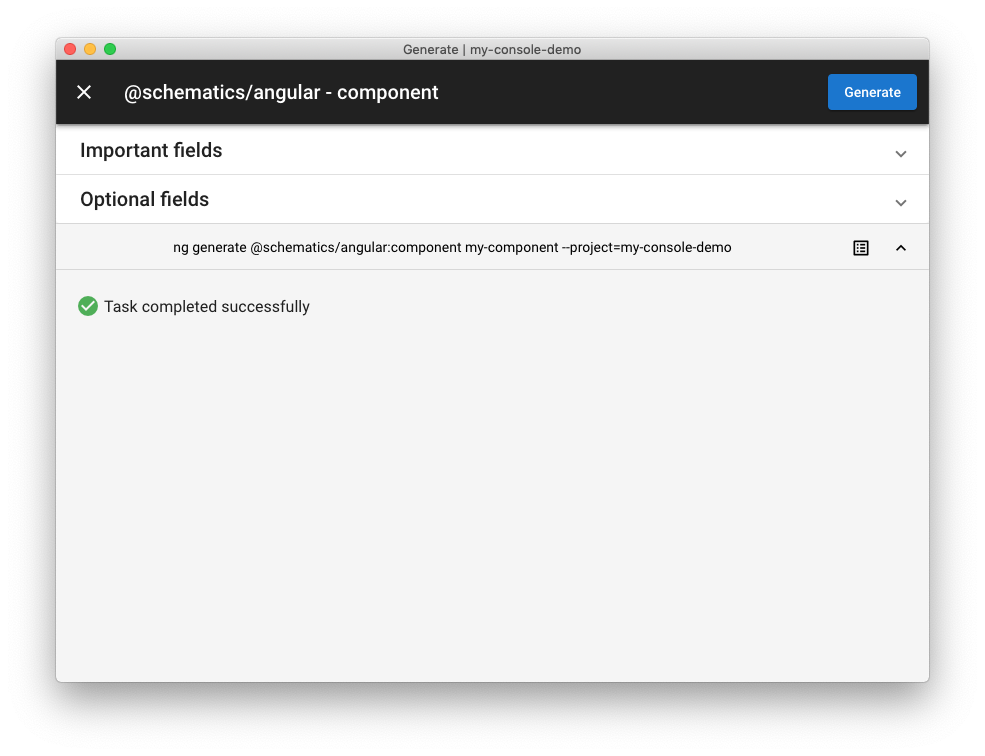
You can use Angular Console to generate code in projects by clicking on the brackets icon in the left toolbar. This screen lists all available schematics, which you can also filter by name.
To try this, click on
component@schematics/angulargenerate--dry-runYou’ll probably stick with the “Important fields” most of the time, but the “Optional fields” are where power users of the CLI will benefit. It can be tough to remember all of those extra flags and options. Angular Console’s live updating of the dry run output is extremely useful, too. Sometimes I just use Angular Console as a staging area for the commands I want to run and then copy and paste them into my terminal.
To generate a component from this screen, fill out a name and select the main project (not the
e2eClick the “X” in the upper left corner to return to the code generation screen. The task output is still available to you from the action bar you saw earlier.
Run tasks
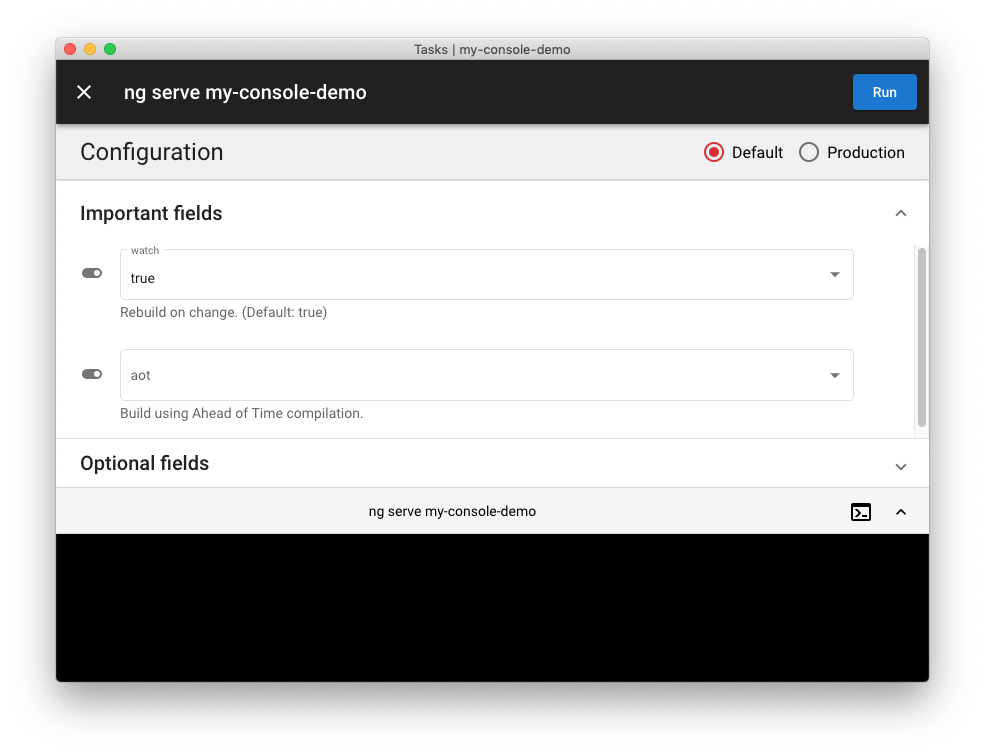
Code generation is really awesome, but it’s only one of the features of Angular Console. You can also use Angular Console to run tasks. Click on the terminal icon in the left toolbar to get started. You’ll see a list of
package.jsone2eSearch for “serve” and click on the task under the main project you created. You’ll see a screen similar to the one you saw when generating code. The familiar “Important fields” and “Optional fields” will be present, as well as the output pane. You’ll also see radio buttons for the
serveJust as with the code generation screen, you’ll most likely stick with the standard fields as you get started. That being said, there are a wealth of options just for the
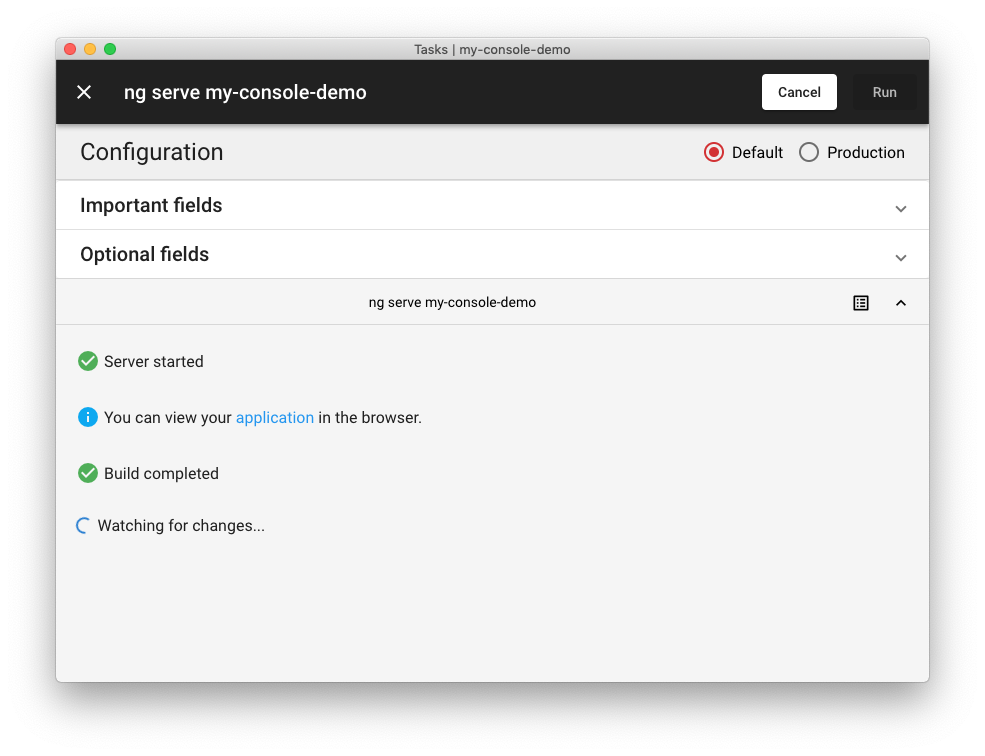
serveng serveng buildOnce you’ve got the settings how you want them, click the “Run” button in the upper right corner. You’ll see the successful Console Output, as well as some new information from the Structured Output. You can click on the provided link to view your application in the browser at
localhost:4200Click the “X” in the upper left corner to return to the task runner screen. The task is again available to you from the action bar. This time, since the server is in watch mode, you’ll see the spinning progress circle inside of a button on the left side. You can stop the
serveInstall extensions
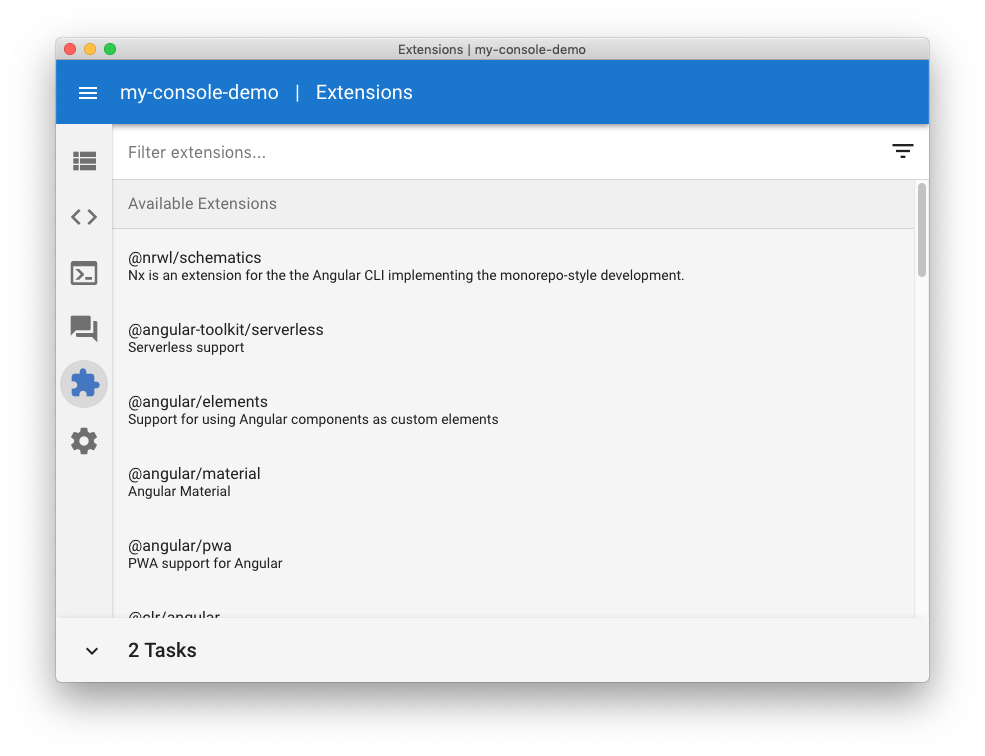
Last but not least, Angular Console features an easy way to install other extensions and schematics packages in your workspace. Click on the puzzle piece in the left toolbar to go to the extensions screen. You’ll see a long list of available extensions from the Angular team, outside companies, and members of the community. Whether you need to add state management, a UI library, or mobile support, you can search through the list and install the package you need with ease. You can also install Nrwl’s Nx schematics to convert your default CLI workspace into an Nx workspace.
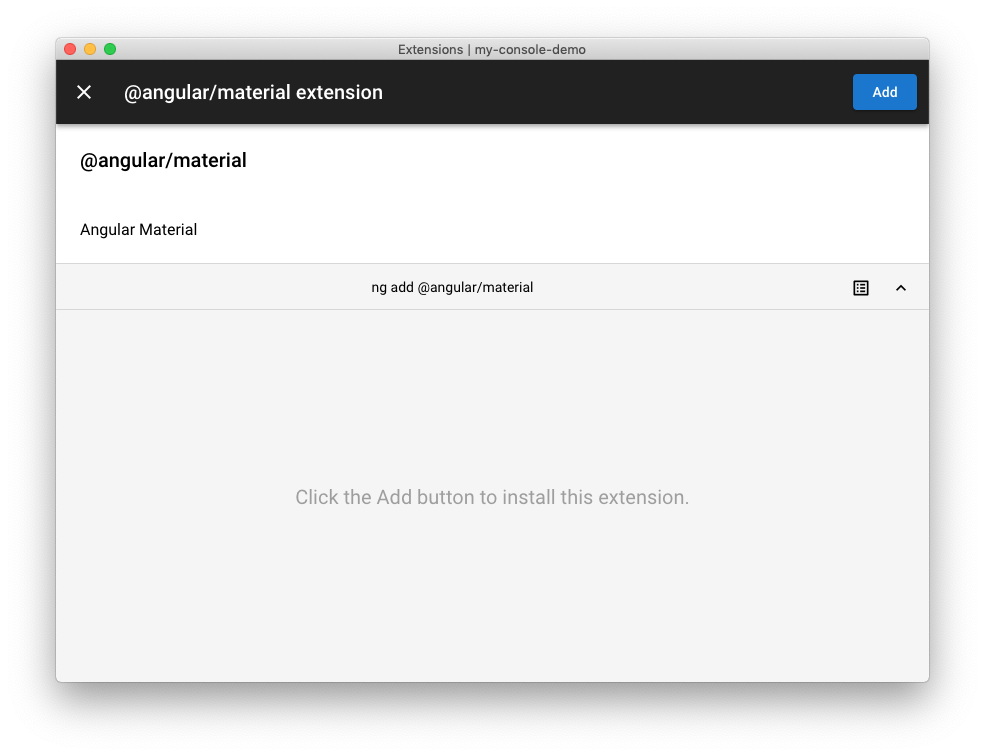
To try this out, search for “material” and click on the
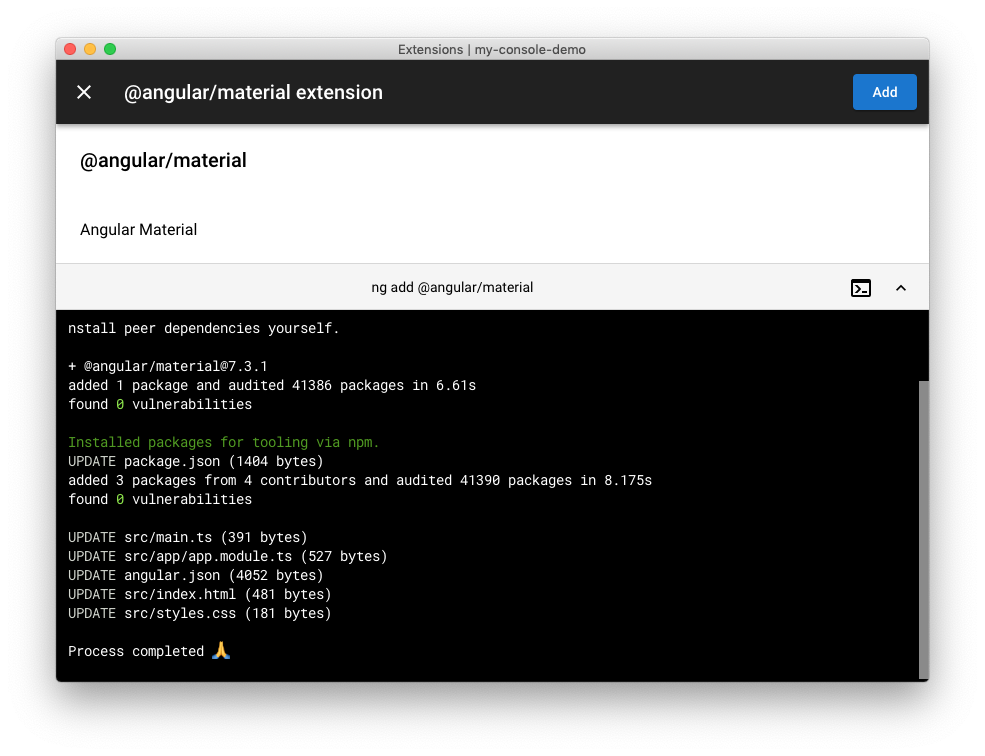
@angular/materialClick the “Add” button in the upper right corner. You’ll see the installation output in the console, as well as “Task completed successfully” in the Structured Output.
Clicking on the “X” in the upper left corner will take you back to the extension installation screen. You’ll also see your completed task added to the bottom task list. You can clear that list any time by clicking on the bar to pop out the bottom sheet and clicking the trash can button. Note that clearing out the list will also stop any running tasks like
ng serveIf you install extensions that include CLI schematics, such as Nx or NgRx, you'll also see new tasks available from the Task Runner screen.
Conclusion
I hope this tour of Angular Console has given you some ideas of how it can be useful to you. If you’re new to Angular, I hope Angular Console will become a great learning tool that helps you get up and running quickly with Angular. If you’re experienced with Angular, I hope you’ll see it as a timesaver and a cheatsheet for CLI commands. If you can’t stand GUIs and want to stick to the command line, that’s okay too. Whatever you choose, happy coding everyone!
Special thanks to Dan Muller from Nrwl for talking through some of the features and engineering decisions of Angular Console with me. Dan can be reached at dan@nrwl.io.
Aside: Authenticate an Angular App with Auth0
By integrating Auth0 in your Angular application, you will be able to manage user identities, including password resets, creating, provisioning, blocking, and deleting users. It requires just a few steps.
Set up an Auth0 application
First, sign up for a free account here. Then, set up an Auth0 application with the following steps:
- Go to your Applications section of the Auth0 Dashboard and click the "Create Application" button.
- Name your new app and select "Single Page Web Applications" as the application type.
- In the Settings for your new Auth0 app, add
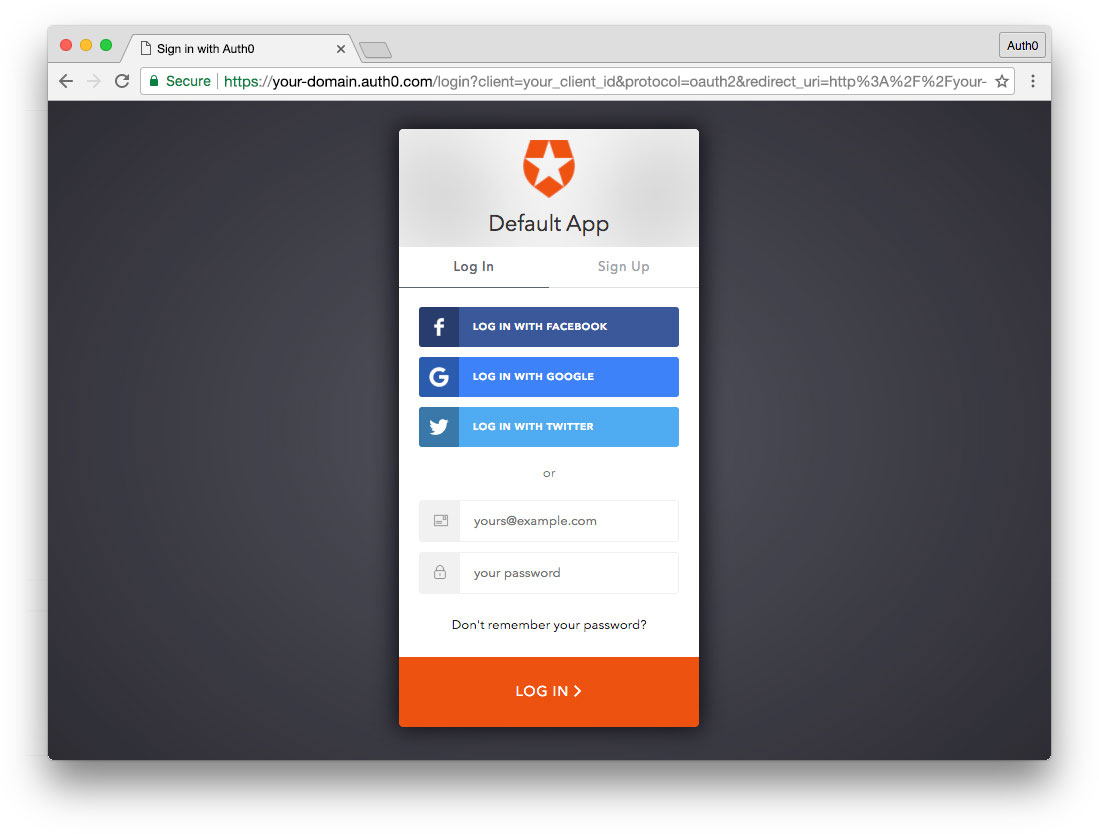
to the Allowed Callback URLs, Allowed Web Origins, and Allowed Logout URLs. Click the "Save Changes" button.http://localhost:4200 - If you'd like, you can set up some social connections. You can then enable them for your app in the Application options under the Connections tab. The example shown in the screenshot above uses username/password database, Facebook, Google, and Twitter.
Note: Set up your own social keys and do not leave social connections set to use Auth0 dev keys, or you will encounter issues with token renewal.
Add dependencies and configure
In the root folder of your Angular project, install the
library by typing the following command in a terminal window:auth0-spa-js
npm install @auth0/auth0-spa-js
Then, edit the
environment.tssrc/environmentsCLIENT_DOMAINCLIENT_ID// src/environments/environment.ts export const environment = { production: false, auth: { CLIENT_DOMAIN: 'YOUR_DOMAIN', CLIENT_ID: 'YOUR_CLIENT_ID', }, }; export const config = {};
Replace the
andYOUR_DOMAINplaceholders with the actual values for the domain and client id you found in your Auth0 Dashboard.YOUR_CLIENT_ID
Add the authentication service
Authentication logic in your Angular application is handled with an
AuthServiceng generate service auth
Now, open the
src/app/auth.service.ts//src/app/auth.service.ts import { Injectable } from '@angular/core'; import createAuth0Client from '@auth0/auth0-spa-js'; import Auth0Client from '@auth0/auth0-spa-js/dist/typings/Auth0Client'; import { from, of, Observable, BehaviorSubject, combineLatest, throwError, } from 'rxjs'; import { tap, catchError, concatMap, shareReplay } from 'rxjs/operators'; import { Router } from '@angular/router'; import { environment } from './../environments/environment'; @Injectable({ providedIn: 'root', }) export class AuthService { // Create an observable of Auth0 instance of client auth0Client$ = (from( createAuth0Client({ domain: environment.auth.CLIENT_DOMAIN, client_id: environment.auth.CLIENT_ID, redirect_uri: `${window.location.origin}`, }), ) as Observable<Auth0Client>).pipe( shareReplay(1), // Every subscription receives the same shared value catchError((err) => throwError(err)), ); // Define observables for SDK methods that return promises by default // For each Auth0 SDK method, first ensure the client instance is ready // concatMap: Using the client instance, call SDK method; SDK returns a promise // from: Convert that resulting promise into an observable isAuthenticated$ = this.auth0Client$.pipe( concatMap((client: Auth0Client) => from(client.isAuthenticated())), tap((res) => (this.loggedIn = res)), ); handleRedirectCallback$ = this.auth0Client$.pipe( concatMap((client: Auth0Client) => from(client.handleRedirectCallback())), ); // Create subject and public observable of user profile data private userProfileSubject$ = new BehaviorSubject<any>(null); userProfile$ = this.userProfileSubject$.asObservable(); // Create a local property for login status loggedIn: boolean = null; constructor(private router: Router) { // On initial load, check authentication state with authorization server // Set up local auth streams if user is already authenticated this.localAuthSetup(); // Handle redirect from Auth0 login this.handleAuthCallback(); } // When calling, options can be passed if desired // https://auth0.github.io/auth0-spa-js/classes/auth0client.html#getuser getUser$(options?): Observable<any> { return this.auth0Client$.pipe( concatMap((client: Auth0Client) => from(client.getUser(options))), tap((user) => this.userProfileSubject$.next(user)), ); } private localAuthSetup() { // This should only be called on app initialization // Set up local authentication streams const checkAuth$ = this.isAuthenticated$.pipe( concatMap((loggedIn: boolean) => { if (loggedIn) { // If authenticated, get user and set in app // NOTE: you could pass options here if needed return this.getUser$(); } // If not authenticated, return stream that emits 'false' return of(loggedIn); }), ); checkAuth$.subscribe(); } login(redirectPath: string = '/') { // A desired redirect path can be passed to login method // (e.g., from a route guard) // Ensure Auth0 client instance exists this.auth0Client$.subscribe((client: Auth0Client) => { // Call method to log in client.loginWithRedirect({ redirect_uri: `${window.location.origin}`, appState: { target: redirectPath }, }); }); } private handleAuthCallback() { // Call when app reloads after user logs in with Auth0 const params = window.location.search; if (params.includes('code=') && params.includes('state=')) { let targetRoute: string; // Path to redirect to after login processed const authComplete$ = this.handleRedirectCallback$.pipe( // Have client, now call method to handle auth callback redirect tap((cbRes) => { // Get and set target redirect route from callback results targetRoute = cbRes.appState && cbRes.appState.target ? cbRes.appState.target : '/'; }), concatMap(() => { // Redirect callback complete; get user and login status return combineLatest([this.getUser$(), this.isAuthenticated$]); }), ); // Subscribe to authentication completion observable // Response will be an array of user and login status authComplete$.subscribe(([user, loggedIn]) => { // Redirect to target route after callback processing this.router.navigate([targetRoute]); }); } } logout() { // Ensure Auth0 client instance exists this.auth0Client$.subscribe((client: Auth0Client) => { // Call method to log out client.logout({ client_id: environment.auth.CLIENT_ID, returnTo: `${window.location.origin}`, }); }); } }
This service provides the properties and methods necessary to manage authentication across your Angular application.
Add the login and logout buttons
To add a new component that allows you to authenticate with Auth0, run the following command in a terminal window:
ng generate component login-button
Open the
src/app/login-button/login-button.component.ts//src/app/login-button/login-button.component.ts import { Component, OnInit } from '@angular/core'; import { AuthService } from '../auth.service'; @Component({ selector: 'app-login-button', templateUrl: './login-button.component.html', styleUrls: ['./login-button.component.css'], }) export class LoginButtonComponent implements OnInit { constructor(public auth: AuthService) {} ngOnInit() {} }
Next, define the component's UI by replacing the content of the
src/app/login-button/login-button.component.html<!-- src/app/login-button/login-button.component.html --> <div> <button (click)="auth.login()" *ngIf="!auth.loggedIn">Log In</button> <button (click)="auth.logout()" *ngIf="auth.loggedIn">Log Out</button> </div>
Finally, put the
<app-login-button></app-login-button>src/app/app.component.htmlYour Angular application is ready to authenticate with Auth0!
Check out the Angular Quickstart to learn more about integrating Auth0 with Angular applications.
About the author

Sam Julien
Director of Developer Relations


