.NET 5, the successor of .NET Core 3.1 and .NET Framework 4.8, aims to provide .NET developers with a new cross-platform development experience. It puts order to the .NET universe fragmentation that has been arising over the years and brings new amazing features. Of course, you cannot learn all about .NET 5 right now, but you can focus on just five things to have a clear understanding of what is going on.
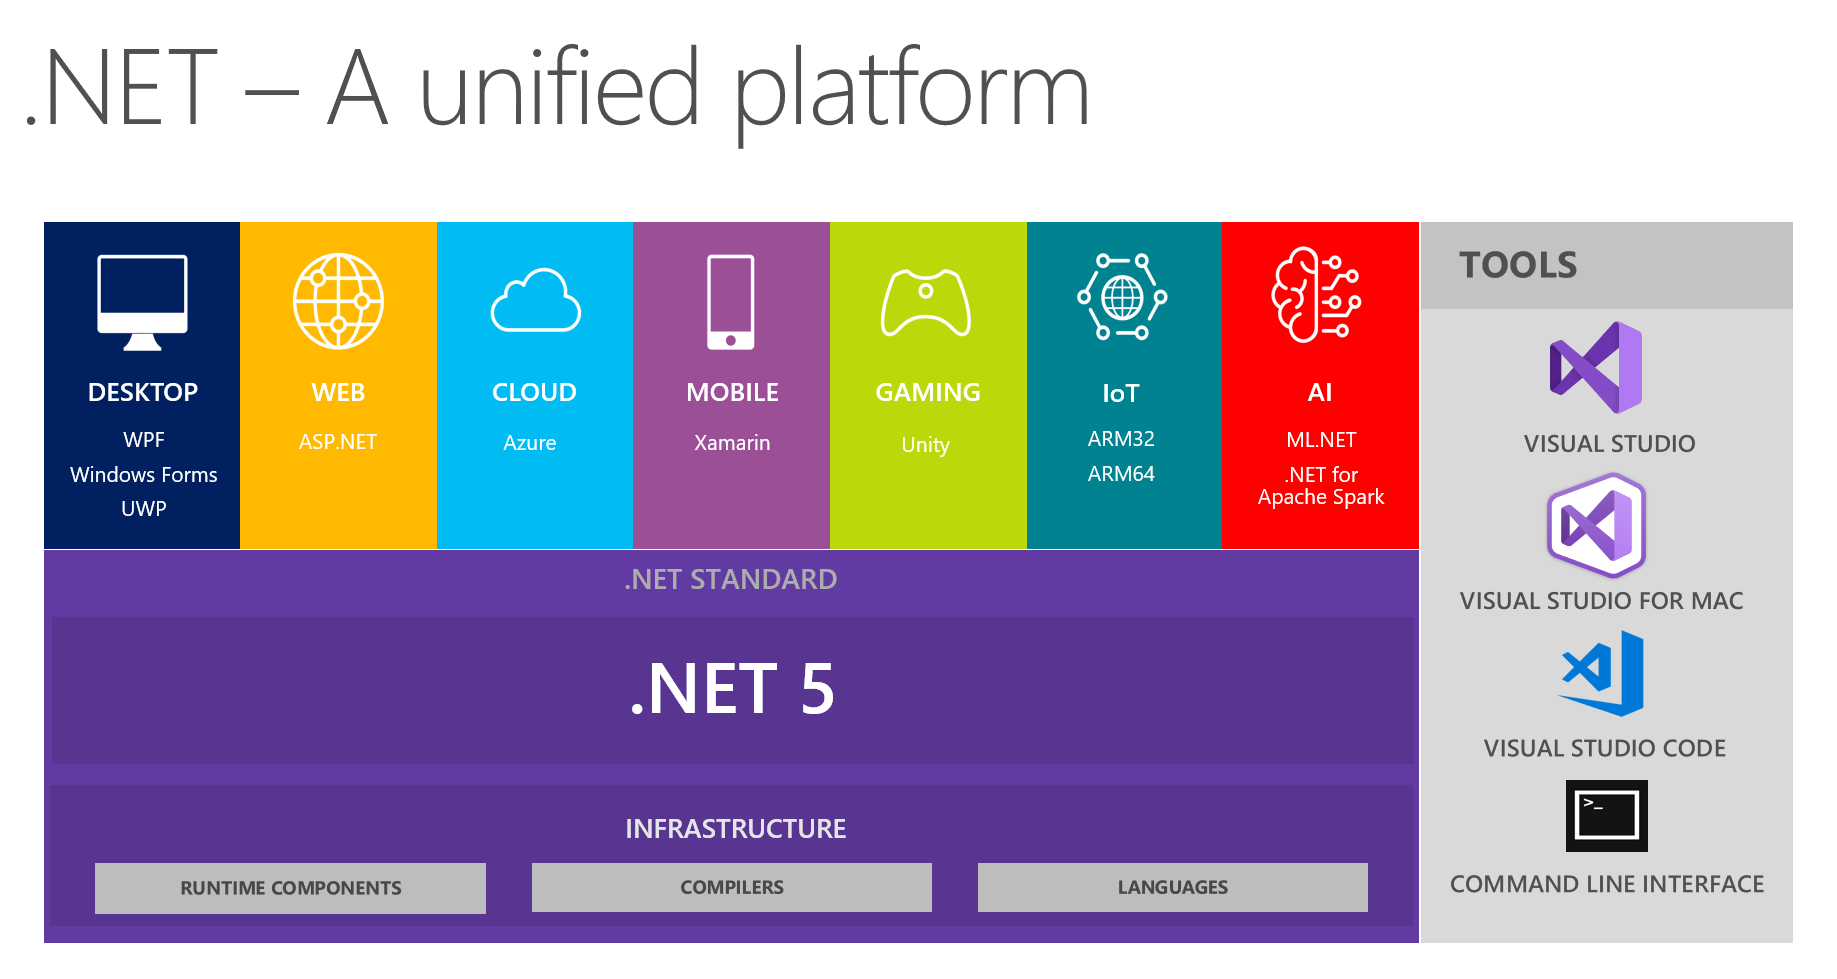
The Unified Platform
The first thing you have to know is that .NET 5 brings you a new unified vision of the .NET world.
If you have been working with .NET, you may be aware of its platform fragmentation since its first release in 2002. The .NET Framework was initially designed for Windows, but its runtime specification, also known as Common Language Infrastructure (CLI), was standardized as ECMA 335.
The standardization allowed anyone to create their own implementation of the .NET runtime. And in fact, a few of them appeared on the horizon: Mono for Linux-based systems, Silverlight for browser-based applications, .NET Compact and Micro frameworks for mobile and resource-constrained devices, and so on. Then, Microsoft decided to write .NET Core from scratch with cross-platform compatibility in mind.
These different implementations raised the need to understand where a .NET package could run on. Should you build different versions of your library to distribute it? The answer to this question was .NET Standard, i.e., a formal specification of the common APIs you should expect across CLI implementations. In other words, if you build your library for one specific .NET Standard, you'll be guaranteed it will run on all the runtimes that implement that specification.
You understand that, in this messy situation, the desired cross-implementation compatibility is not so easy to achieve. This is why .NET 5 appears on the scene.
The new .NET platform is the unified successor of the various .NET flavors: .NET Framework, .NET Standard, .NET Core, Mono, etc. It is officially the next version of .NET Core 3.1, but basically determines the end of .NET Framework, .NET Standard, and the other variants that caused big headaches to .NET developers.
.NET 5 provides a common set of APIs that aligns the different runtime implementations. This set of APIs is identified by the
net5.0net5.0-windowsOf course, achieving this unified platform required a significant effort and an internal architecture rearrangement. A few features have been removed from the core API set, as you will see later on, but the platform gained a general improvement in performance.
While the new .NET 5 comes with the platform unification goal, the initial plan changed because of COVID-19. In fact, .NET 5 sets the foundations of the unification, but it will be completed with .NET 6 in November 2021. With that release, you will get the stable release of the new Universal UI and support for the specific TFMs for Android (
net6.0-androidnet6.0-ios“.NET 5 was born with cross-platform compatibility in mind.”
Tweet This
New Features in C#
The second thing you should know is about C#. .NET 5 comes with C# 9, the new version of the .NET platform's main programming language. There are several new features, but here you will find a taste of the most relevant ones.
Top-level statements
Among the new features, one of the most notable is the introduction of top-level statements. To learn what they are, take a look at the following classic minimal program:
using System;

namespace HelloWorld
{
    class Program
    {
        static void Main(string[] args)
        {
            Console.WriteLine("Hello World!");
        }
    }
}
Just to write one string to the console, you need to define a namespace, a class, and the static method
Main()System.Console.WriteLine("Hello World!");
Top-level statements allow you to focus on what really matters in small console programs and utilities and use C# with a more scripting-oriented approach.
Record types
Another interesting new feature is record types. With records, you can declare an immutable reference type, i.e., a class-based type that cannot be changed after its creation. An example of a built-in immutable reference type is the
System.StringSystem.StringConsider the following record type declaration:
public record Person
{
    public string FirstName { get; }
    public string LastName { get; }

    public Person(string first, string last) => (FirstName, LastName) = (first, last);
}
You can create an instance of the
PersonFirstNamevar person = new Person("John", "Doe"); person.FirstName = "Jack"; //throws an error
However, you can compare two instances of the
Personvar person = new Person("John", "Doe"); var anotherPerson = new Person("John", "Smith"); Console.WriteLine(person == anotherPerson); //false
Init setters
C# 9 also adds the
initpublic class Person { public string FirstName { get; init; } public string LastName { get; init; } public string Address { get; set; } }
This class defines a person with
LastNameFirstNameAddressvar person = new Person { FirstName = "John", LastName = "Doe", Address = "124 Conch Street, Bikini Bottom, Pacific Ocean" } person.Address = "17 Cherry Tree Lane"; person.FirstName = "Jack"; //throws error
If you want to learn more about the features brought by C# 9, please check out the official documentation.
.NET MAUI, the Universal UI
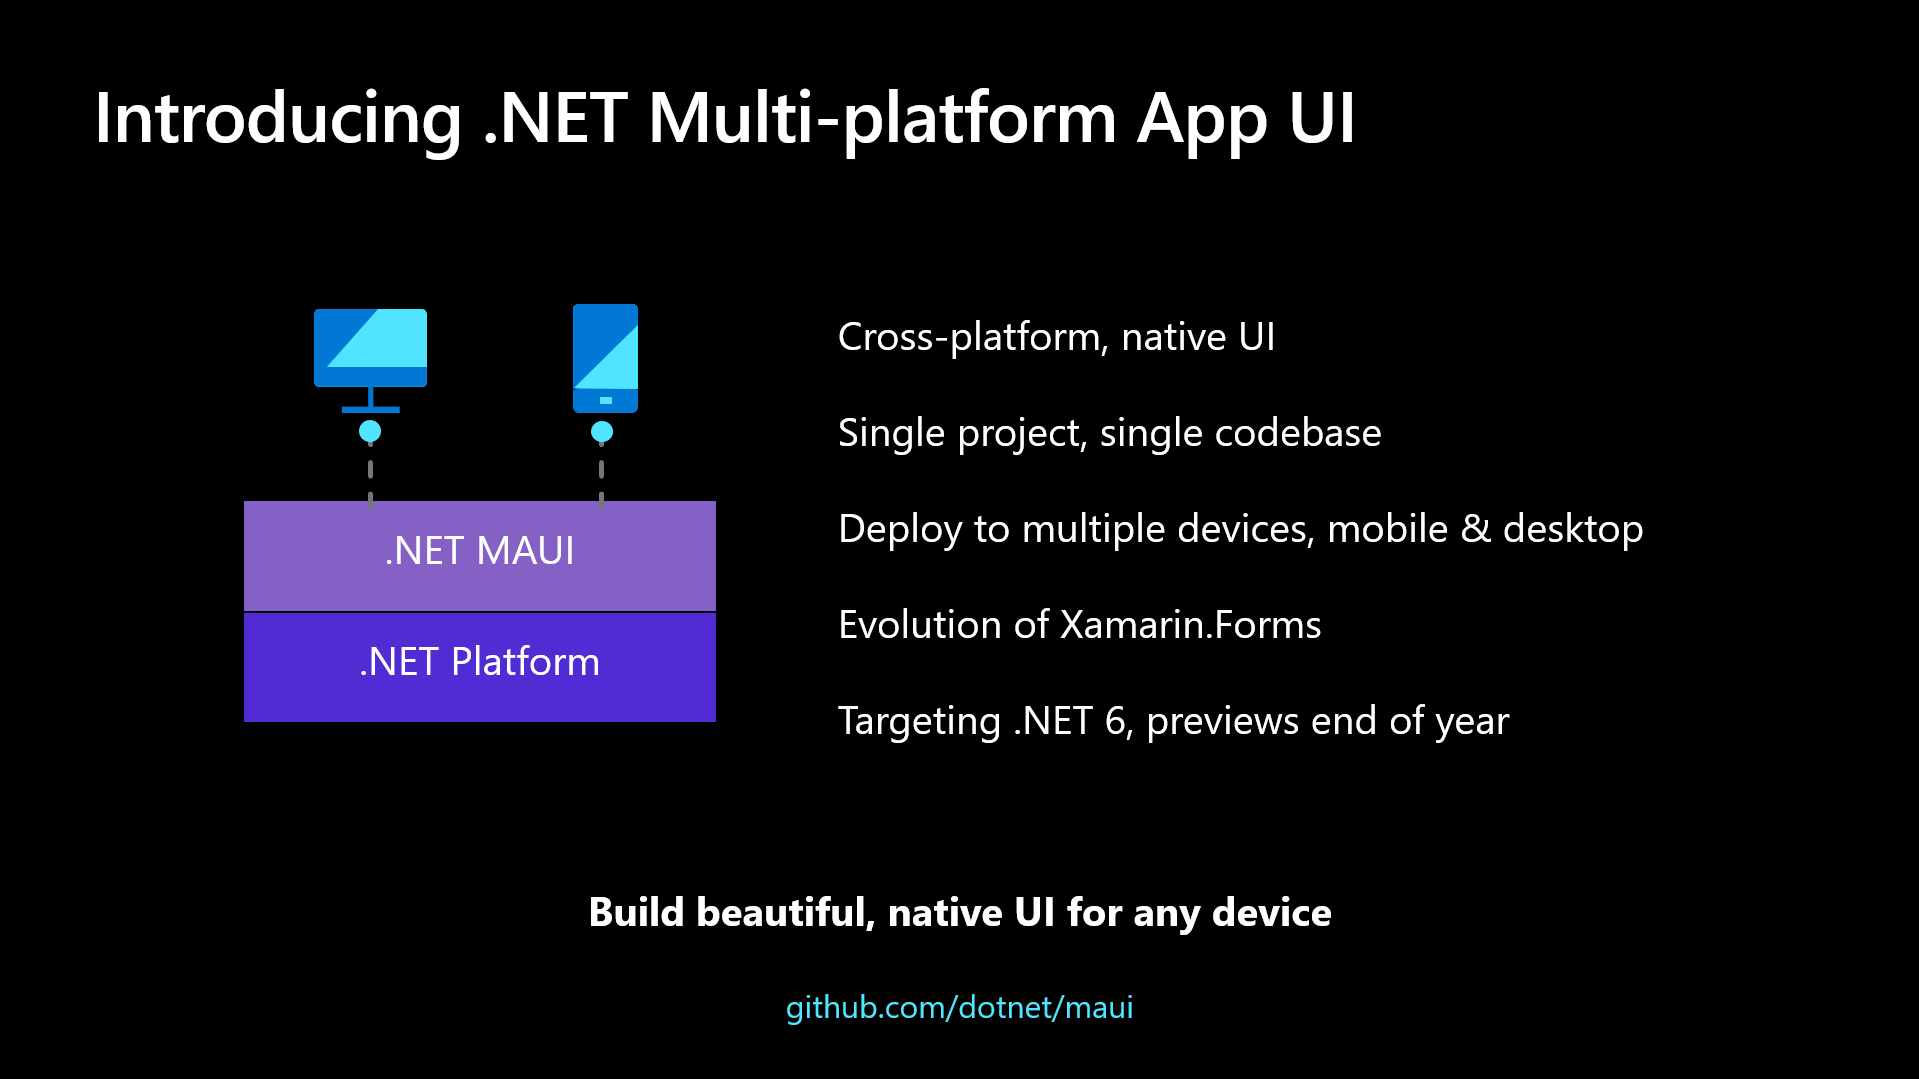
As the third thing, you have to know that .NET 5 is bringing to you a new way to build cross-platform user interfaces. Thanks to the .NET Multi-platform App UI framework, also known as .NET MAUI), you will be able to build user interfaces for Android, iOS, macOS, and Windows with a single project.
Actually, this feature is still in progress and will be released with .NET 6, but you can start taking a look at .NET MAUI to be ready when it is officially released. Take a look at the roadmap to follow its progress.
.NET MAUI can be considered an evolution of Xamarin.Forms, the open-source framework for building iOS and Android apps with a single .NET codebase. But this new framework proposes a universal model for building UIs on mobile and desktop platforms.
In addition to the well-known Model-View-ViewModel (MVVM) pattern, .NET MAUI supports the new Model-View-Update (MVU) pattern. This is a one-way data flow pattern inspired by the Elm programming language architecture that provides an effective way to manage UI updates and application state.
Supporting Single-File Applications
The fourth thing you will get in .NET 5 is the support of single-file applications, that is, applications published and deployed as a single file. That means that your application and all its dependencies are bundled into one file. For example, say you run the following command within the folder of your .NET 5 project:
dotnet publish -r linux-x64 --self-contained true /p:PublishSingleFile=true
You will get a single file containing your application built for Linux, all the dependencies you used in your project, and the .NET runtime (
--self-contained trueOf course, you can also specify these parameters in your project configuration:
<Project Sdk="Microsoft.NET.Sdk">

  <PropertyGroup>
    <OutputType>Exe</OutputType>
    <TargetFramework>net5.0</TargetFramework>
    <!-- Enable single file -->
    <PublishSingleFile>true</PublishSingleFile>
    <!-- Determine self-contained or framework-dependent -->
    <SelfContained>true</SelfContained>
    <!-- The OS and CPU type you are targeting -->
    <RuntimeIdentifier>linux-x64</RuntimeIdentifier>
  </PropertyGroup>

</Project>
Be aware that this feature doesn't use the same approach as the single-file applications you can build in .NET Core 3.1. In .NET Core 3.1, the single-file application is just a way to package binaries. At run time, they are unpackaged to a temporary folder, loaded, and executed. In .NET 5, the single-file application has a new internal structure, and it is directly executed with no performance penalty.
Take a look at the documentation to learn more about this deployment type.
No Longer Supported Technologies
The last of the five things you are learning about .NET 5 concerns what is no longer supported. As said above, the architectural review and the attempt to make .NET 5 an actual cross-platform programming framework led to removing a few features supported in .NET Framework. Let's take a quick look at the removed features and the possible alternatives.
Web Forms
For a long time, ASP.NET Web Forms has been the main technology to build dynamic web UIs. However, it is not a secret that its lifetime was closely bound to .NET Framework's destiny. .NET Core doesn't support Web Forms, so the fact it is no longer supported in .NET 5 shouldn't actually be news.
However, you have a few alternatives to build web UIs. If you are building traditional web applications, Razor Pages are one of these alternatives. If you want to build single-page applications, you can use Blazor.
Windows Communication Foundation (WCF)
Even WCF, the traditional communication framework for Windows, is going to be deprecated. This may appear a bit shocking for the developers that have used it to build their service-oriented applications. However, it is pretty understandable if you realize that the primary goal of .NET 5 is becoming a cross-platform framework.
The alternative to WCF recommended by Microsoft is to migrate to gRPC. But if you are nostalgic about WCF or want to prepare a smooth transition, you can give the CoreWCF open-source project a try.
Windows Workflow Foundation
Finally, .NET 5 will not even include Windows Workflow Foundation, the workflow engine technology available in .NET Framework. There is no official replacement for this technology. However, you can use an open-source porting project, CoreWF, to attempt moving your existing workflows on .NET 5 or creating new ones.
Summary
At the end of this article, you have a high-level idea of how .NET 5 will impact your existing .NET projects and which opportunities the new platform is going to offer you. Maybe these highlighted five things may seem like little stuff, but they should allow you to find your way around this turning point in the .NET evolution.
Of course, you can try .NET 5 right now by downloading its runtime and SDK.
While .NET 5 is out, many applications that need security rely on older versions of .NET. Here’s how you can secure an ASP.NET Core 3.x with Auth0. The same patterns should apply to .NET 5. Let us know in the comments if you bump into any difficulties.
Aside: Securing ASP.NET Core with Auth0
Securing ASP.NET Core applications with Auth0 is easy and brings a lot of great features to the table. With Auth0, you only have to write a few lines of code to get a solid identity management solution, single sign-on, support for social identity providers (like Facebook, GitHub, Twitter, etc.), and support for enterprise identity providers (like Active Directory, LDAP, SAML, custom, etc.).
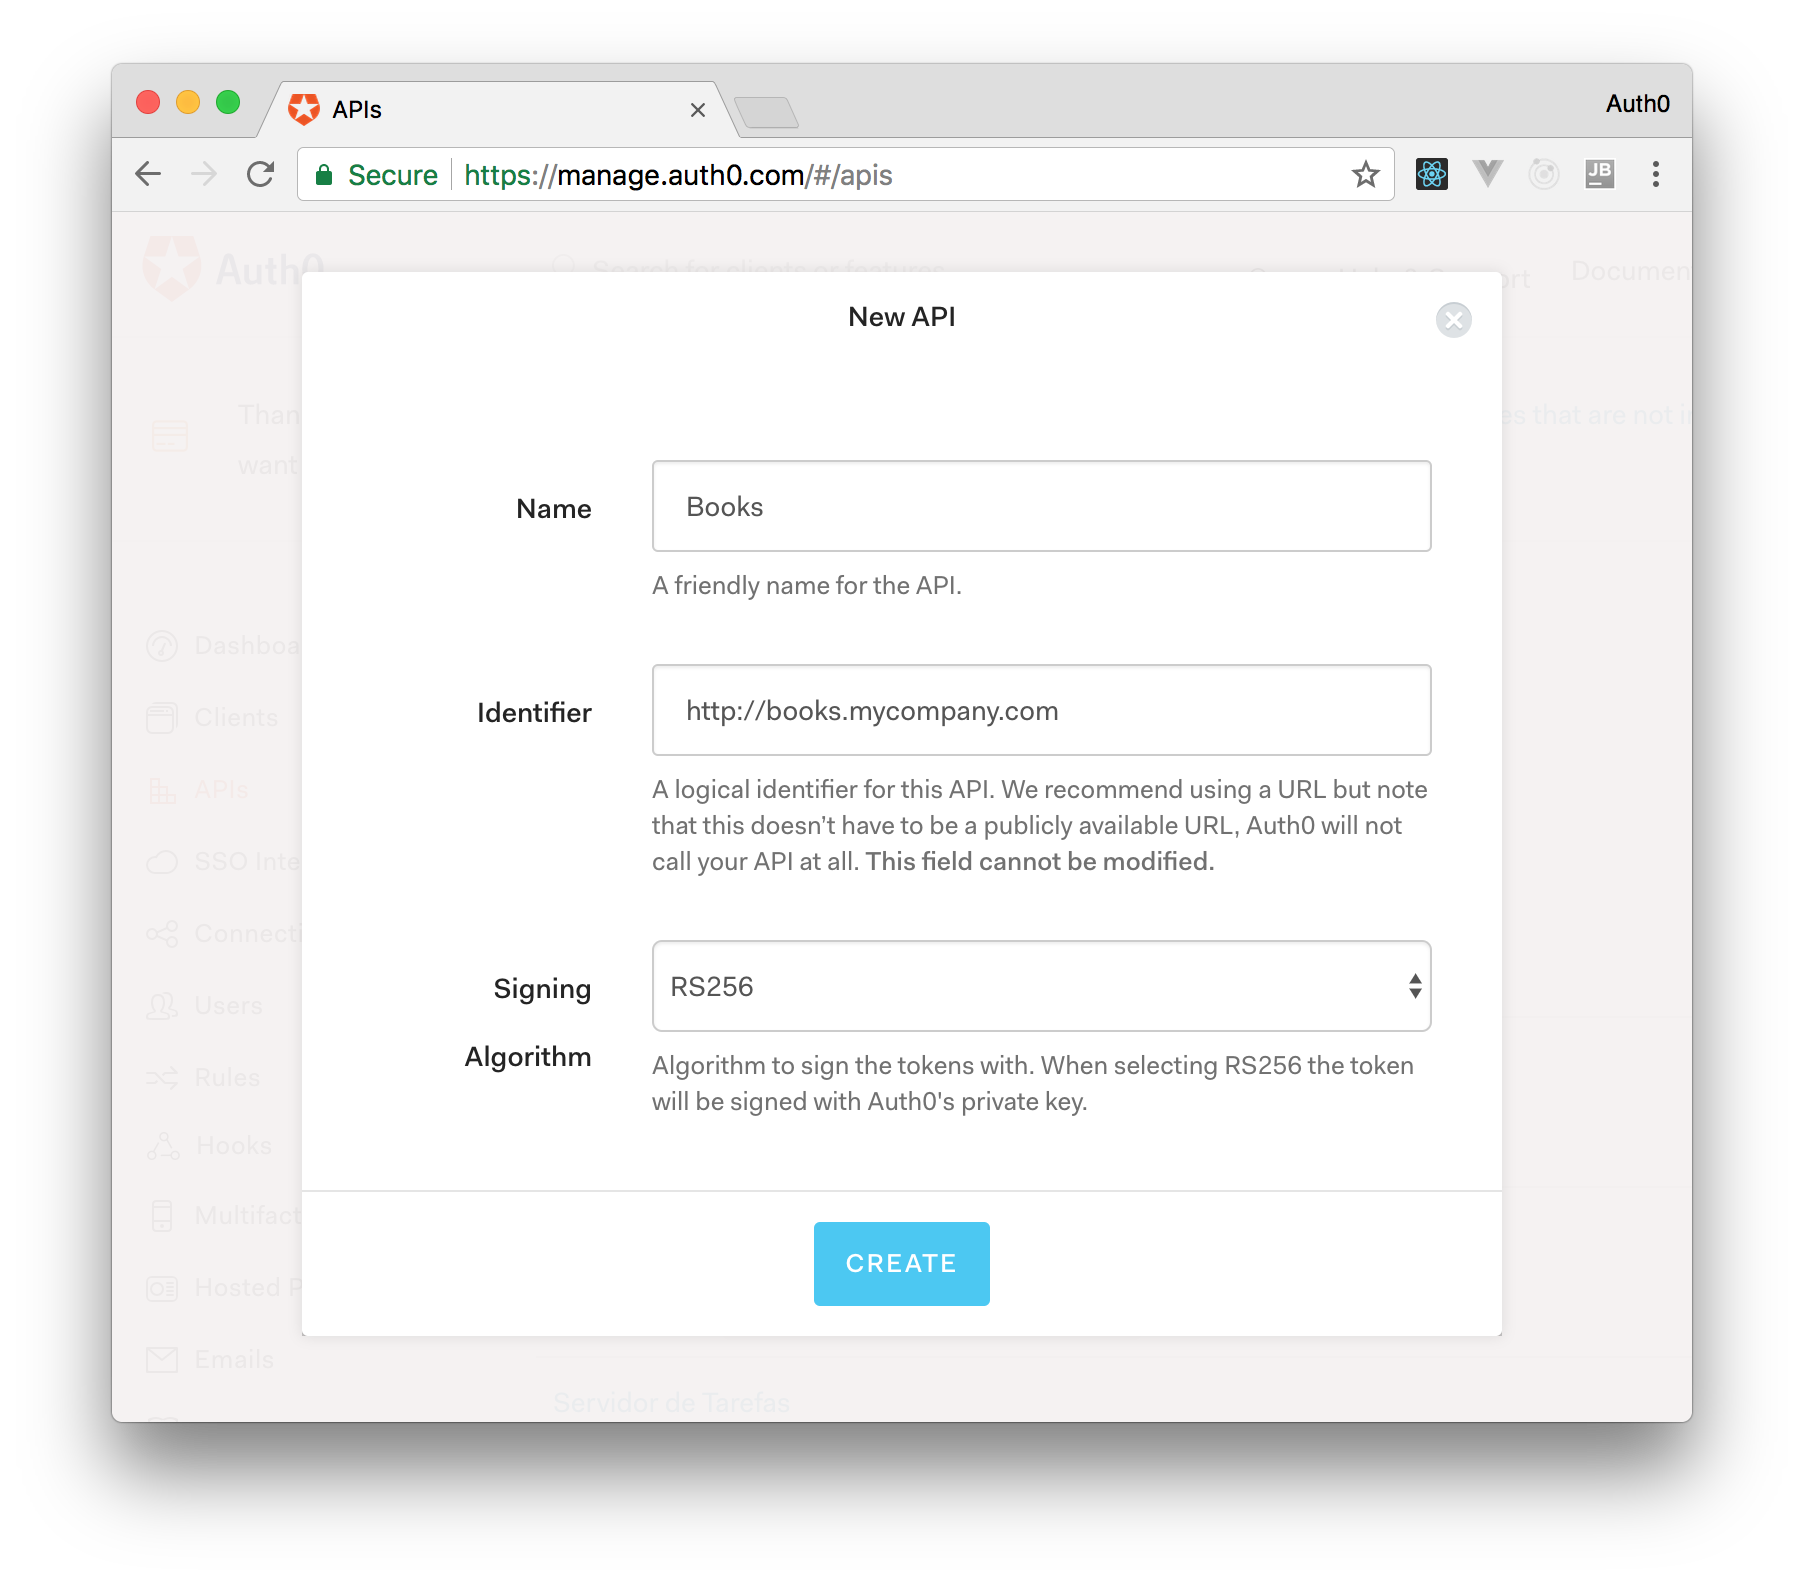
On ASP.NET Core, you need to create an API in your Auth0 Management Dashboard and change a few things on your code. To create an API, you need to sign up for a free Auth0 account. After that, you need to go to the API section of the dashboard and click on "Create API". On the dialog shown, you can set the Name of your API as "Books", the Identifier as "http://books.mycompany.com", and leave the Signing Algorithm as "RS256".

After that, you have to add the call to
services.AddAuthentication()ConfigureServices()Startupstring authority = $"https://{Configuration["Auth0:Domain"]}/"; string audience = Configuration["Auth0:Audience"]; services.AddAuthentication(options => { options.DefaultAuthenticateScheme = JwtBearerDefaults.AuthenticationScheme; options.DefaultChallengeScheme = JwtBearerDefaults.AuthenticationScheme; }).AddJwtBearer(options => { options.Authority = authority; options.Audience = audience; });
In the body of the
Configure()Startupapp.UseAuthentication()app.UseAuthorization()app.UseRouting(); app.UseAuthentication(); app.UseAuthorization(); app.UseEndpoints(endpoints => { endpoints.MapControllers(); });
Make sure you invoke these methods in the order shown above. It is essential so that everything works properly.
Finally, add the following element to the
appsettings.json{ "Logging": { // ... }, "Auth0": { "Domain": "YOUR_DOMAIN", "Audience": "YOUR_AUDIENCE" } }
Note: Replace the placeholders
andYOUR_DOMAINwith the actual values for the domain that you specified when creating your Auth0 account and the Identifier you assigned to your API.YOUR_AUDIENCE
About the author

Andrea Chiarelli
Principal Developer Advocate
I have over 20 years of experience as a software engineer and technical author. Throughout my career, I've used several programming languages and technologies for the projects I was involved in, ranging from C# to JavaScript, ASP.NET to Node.js, Angular to React, SOAP to REST APIs, etc.
In the last few years, I've been focusing on simplifying the developer experience with Identity and related topics, especially in the .NET ecosystem.


