TL;DR: In this series, you will learn how to make React and Redux control a bunch of SVG elements to create a game. The knowledge acquired throughout this series will also allow you to create other types of animations that are orchestrated by React and Redux, not only games. You can find the final code developed in this article in the following GitHub repository: Aliens Go Home - Part 2
The React Game: Aliens, Go Home!
The game that you will develop in this series is called Aliens, Go Home! The idea of this game is simple, you will have a cannon and will have to kill flying objects that are trying to invade the Earth. To kill these flying objects you will have to point and click on an SVG canvas to make your cannon shoot.
If you are curious, you can find the final game up and running here. But don't play too much, you have work to do!
“I'm creating a game with React, Redux, and SVG elements.”
Tweet This
Previously, on Part 1
In the first part of this series, you have used
to bootstrap your React application and you have installed and configured Redux to manage the game state. After that, you have learned how to use SVG with React components while creating game elements like create-react-app
SkyGroundCannonBaseCannonPipeCannonPipeThese actions paved the way to understand how you can create your game (and other animations) with React, Redux, and SVG.
Note: If, for whatever reason, you don't have the code created in the first part of the series, you can simply clone it from this GitHub repository. After cloning it, you will be able to follow the instructions in the sections that follow.
Creating More SVG React Components
The subsections that follow will show you how to create the rest of your game elements. Although they might look lengthy, they are quite simple and similar. You may even be able to follow the instructions in a matter of minutes.
After this section, you will find the most interesting topics of this part of the series. These topics are entitled Making Flying Objects Appear Randomly and Using CSS Animation to Move Flying Objects.
Creating the Cannonball React Component
The next element that you will create is the
CannonBallTo create this component, add a new file called
CannonBall.jsx./src/componentsimport React from 'react'; import PropTypes from 'prop-types'; const CannonBall = (props) => { const ballStyle = { fill: '#777', stroke: '#444', strokeWidth: '2px', }; return ( <ellipse style={ballStyle} cx={props.position.x} cy={props.position.y} rx="16" ry="16" /> ); }; CannonBall.propTypes = { position: PropTypes.shape({ x: PropTypes.number.isRequired, y: PropTypes.number.isRequired }).isRequired, }; export default CannonBall;
As you can see, to make a cannonball appear in your canvas, you will have to pass to it an object that contains the
xyprop-typesPropTypes.shapeAfter creating this component, you might want to see it on your canvas. To do that, simply add the following tag inside the
svgCanvasimport CannonBall from './CannonBall';<CannonBall position={{x: 0, y: -100}}/>
Just keep in mind that, if you add it before an element that occupies the same position, you will not see it. So, to play safe, just add it as the last element (right after
<CannonBase />If you don't remember how to do that, you just have to run
in the project root and then open http://localhost:3000 in your preferred browser. Also, don't forget to commit this code to your repository before moving on.npm start
Creating the Current Score React Component
Another React component that you will have to create is the
CurrentScoreBefore creating this component, you might want to add some neat font to use on it. Actually, you might want to configure and use a font on the whole game, so it won't look like a monotonous game. You can browse and choose a font from whatever place you want, but if you are not interested in investing time on this, you can simply add the following line at the top of the
./src/index.css@import url('https://fonts.googleapis.com/css?family=Joti+One'); /* other rules ... */
This will make your game load the Joti One font from Google.
After that, you can create the
CurrentScore.jsx./src/componentsimport React from 'react'; import PropTypes from 'prop-types'; const CurrentScore = (props) => { const scoreStyle = { fontFamily: '"Joti One", cursive', fontSize: 80, fill: '#d6d33e', }; return ( <g filter="url(#shadow)"> <text style={scoreStyle} x="300" y="80"> {props.score} </text> </g> ); }; CurrentScore.propTypes = { score: PropTypes.number.isRequired, }; export default CurrentScore;
Note: If you haven't configured Joti One (or if you configured some other font), you will have to change this code accordingly. Besides that, this font is used by other components that you will create, so keep in mind that you might have to update these components as well.
As you can see, the
CurrentScorescoreCanvas<CurrentScore score={15} />svgimportimport CurrentScore from './CurrentScore';If you try to see your new component now, you won't be able to. This is because your component is using a
filtershadowsvg<defs> <filter id="shadow"> <feDropShadow dx="1" dy="1" stdDeviation="2" /> </filter> </defs>
In the end, your
Canvasimport React from 'react'; import PropTypes from 'prop-types'; import Sky from './Sky'; import Ground from './Ground'; import CannonBase from './CannonBase'; import CannonPipe from './CannonPipe'; import CannonBall from './CannonBall'; import CurrentScore from './CurrentScore'; const Canvas = (props) => { const viewBox = [window.innerWidth / -2, 100 - window.innerHeight, window.innerWidth, window.innerHeight]; return ( <svg id="aliens-go-home-canvas" preserveAspectRatio="xMaxYMax none" onMouseMove={props.trackMouse} viewBox={viewBox} > <defs> <filter id="shadow"> <feDropShadow dx="1" dy="1" stdDeviation="2" /> </filter> </defs> <Sky /> <Ground /> <CannonPipe rotation={props.angle} /> <CannonBase /> <CannonBall position={{x: 0, y: -100}}/> <CurrentScore score={15} /> </svg> ); }; Canvas.propTypes = { angle: PropTypes.number.isRequired, trackMouse: PropTypes.func.isRequired, }; export default Canvas;
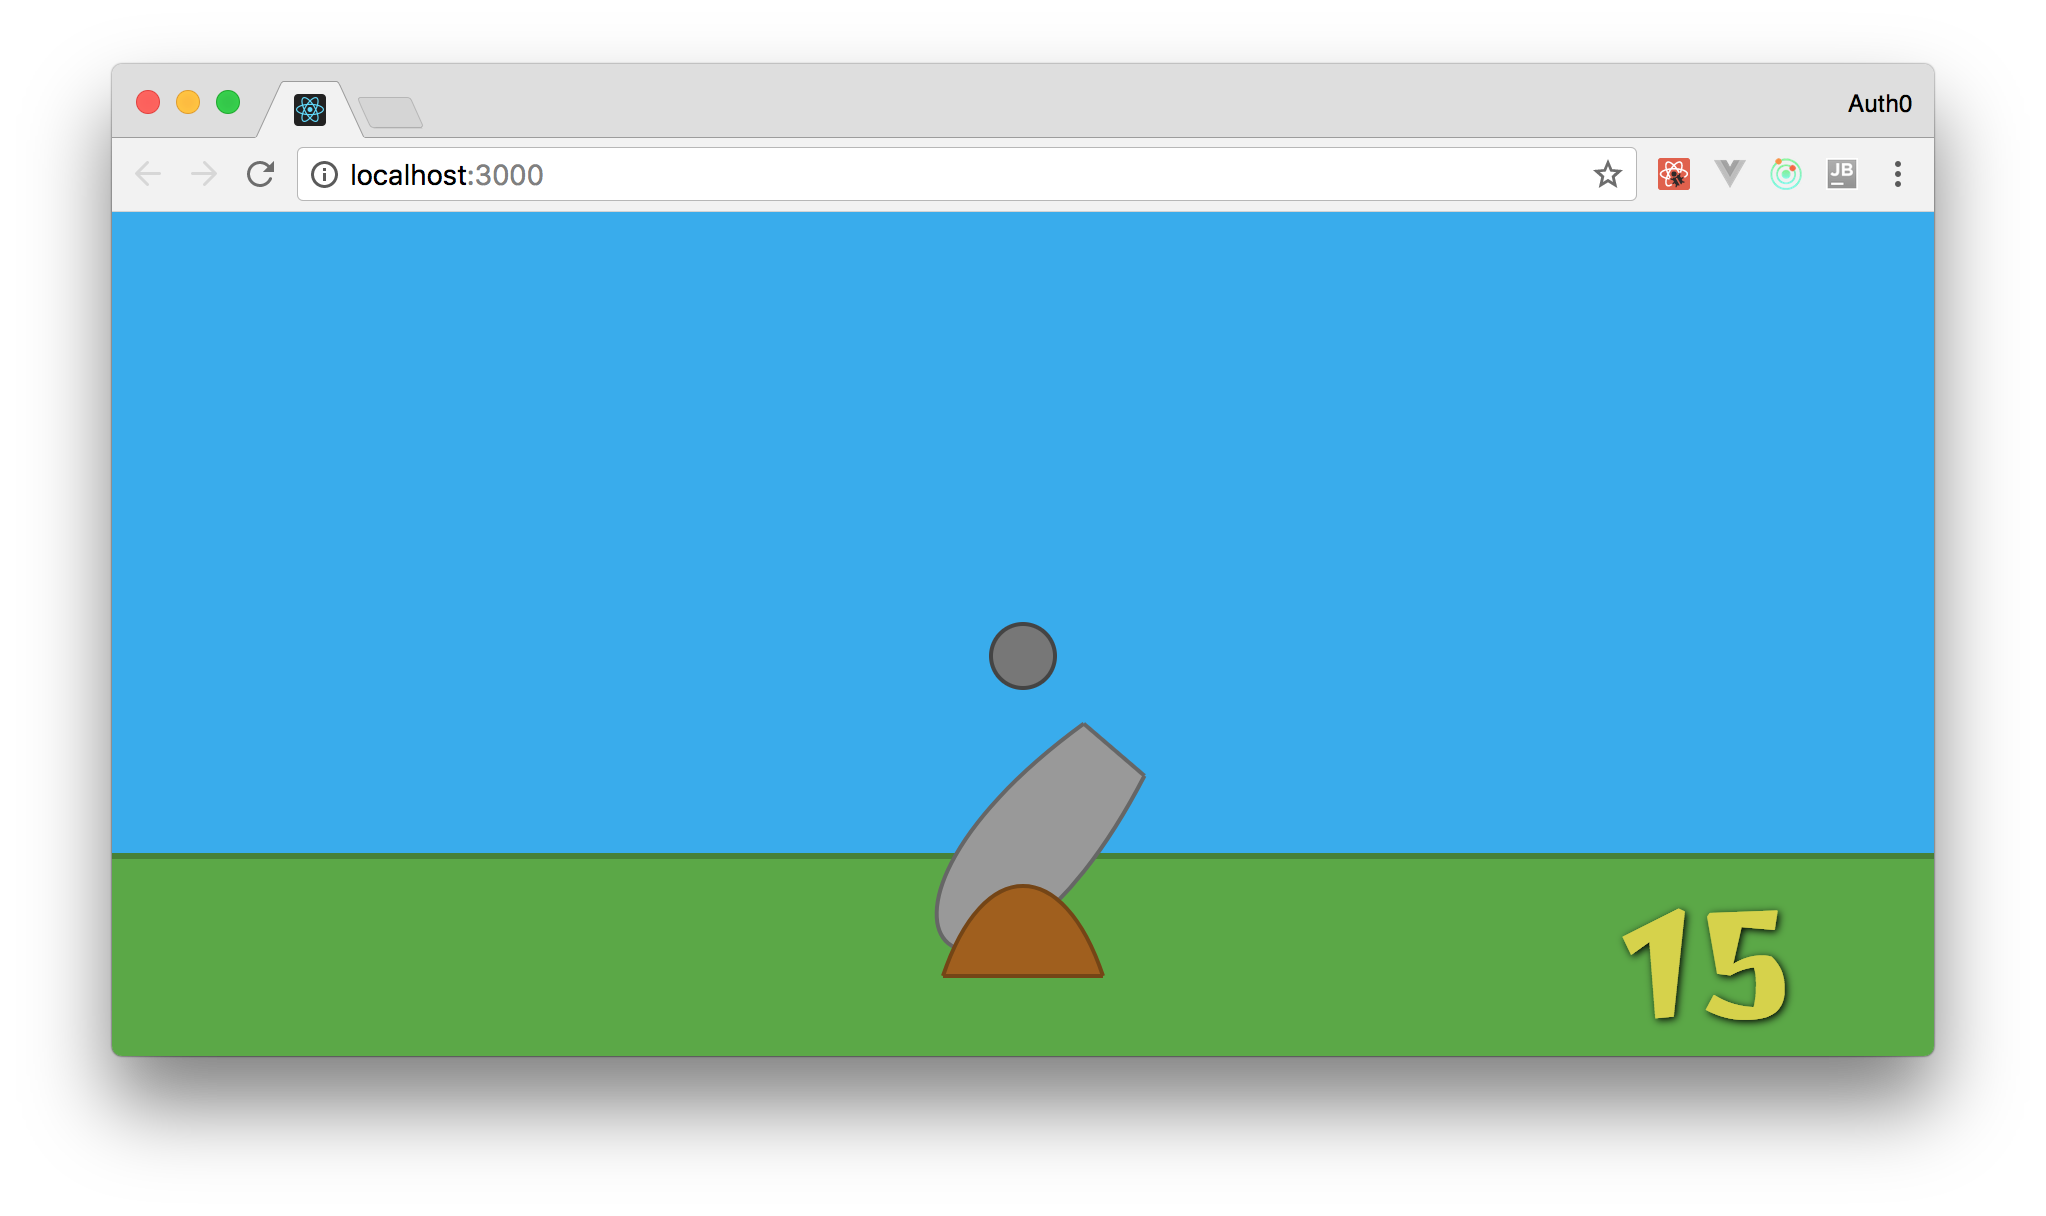
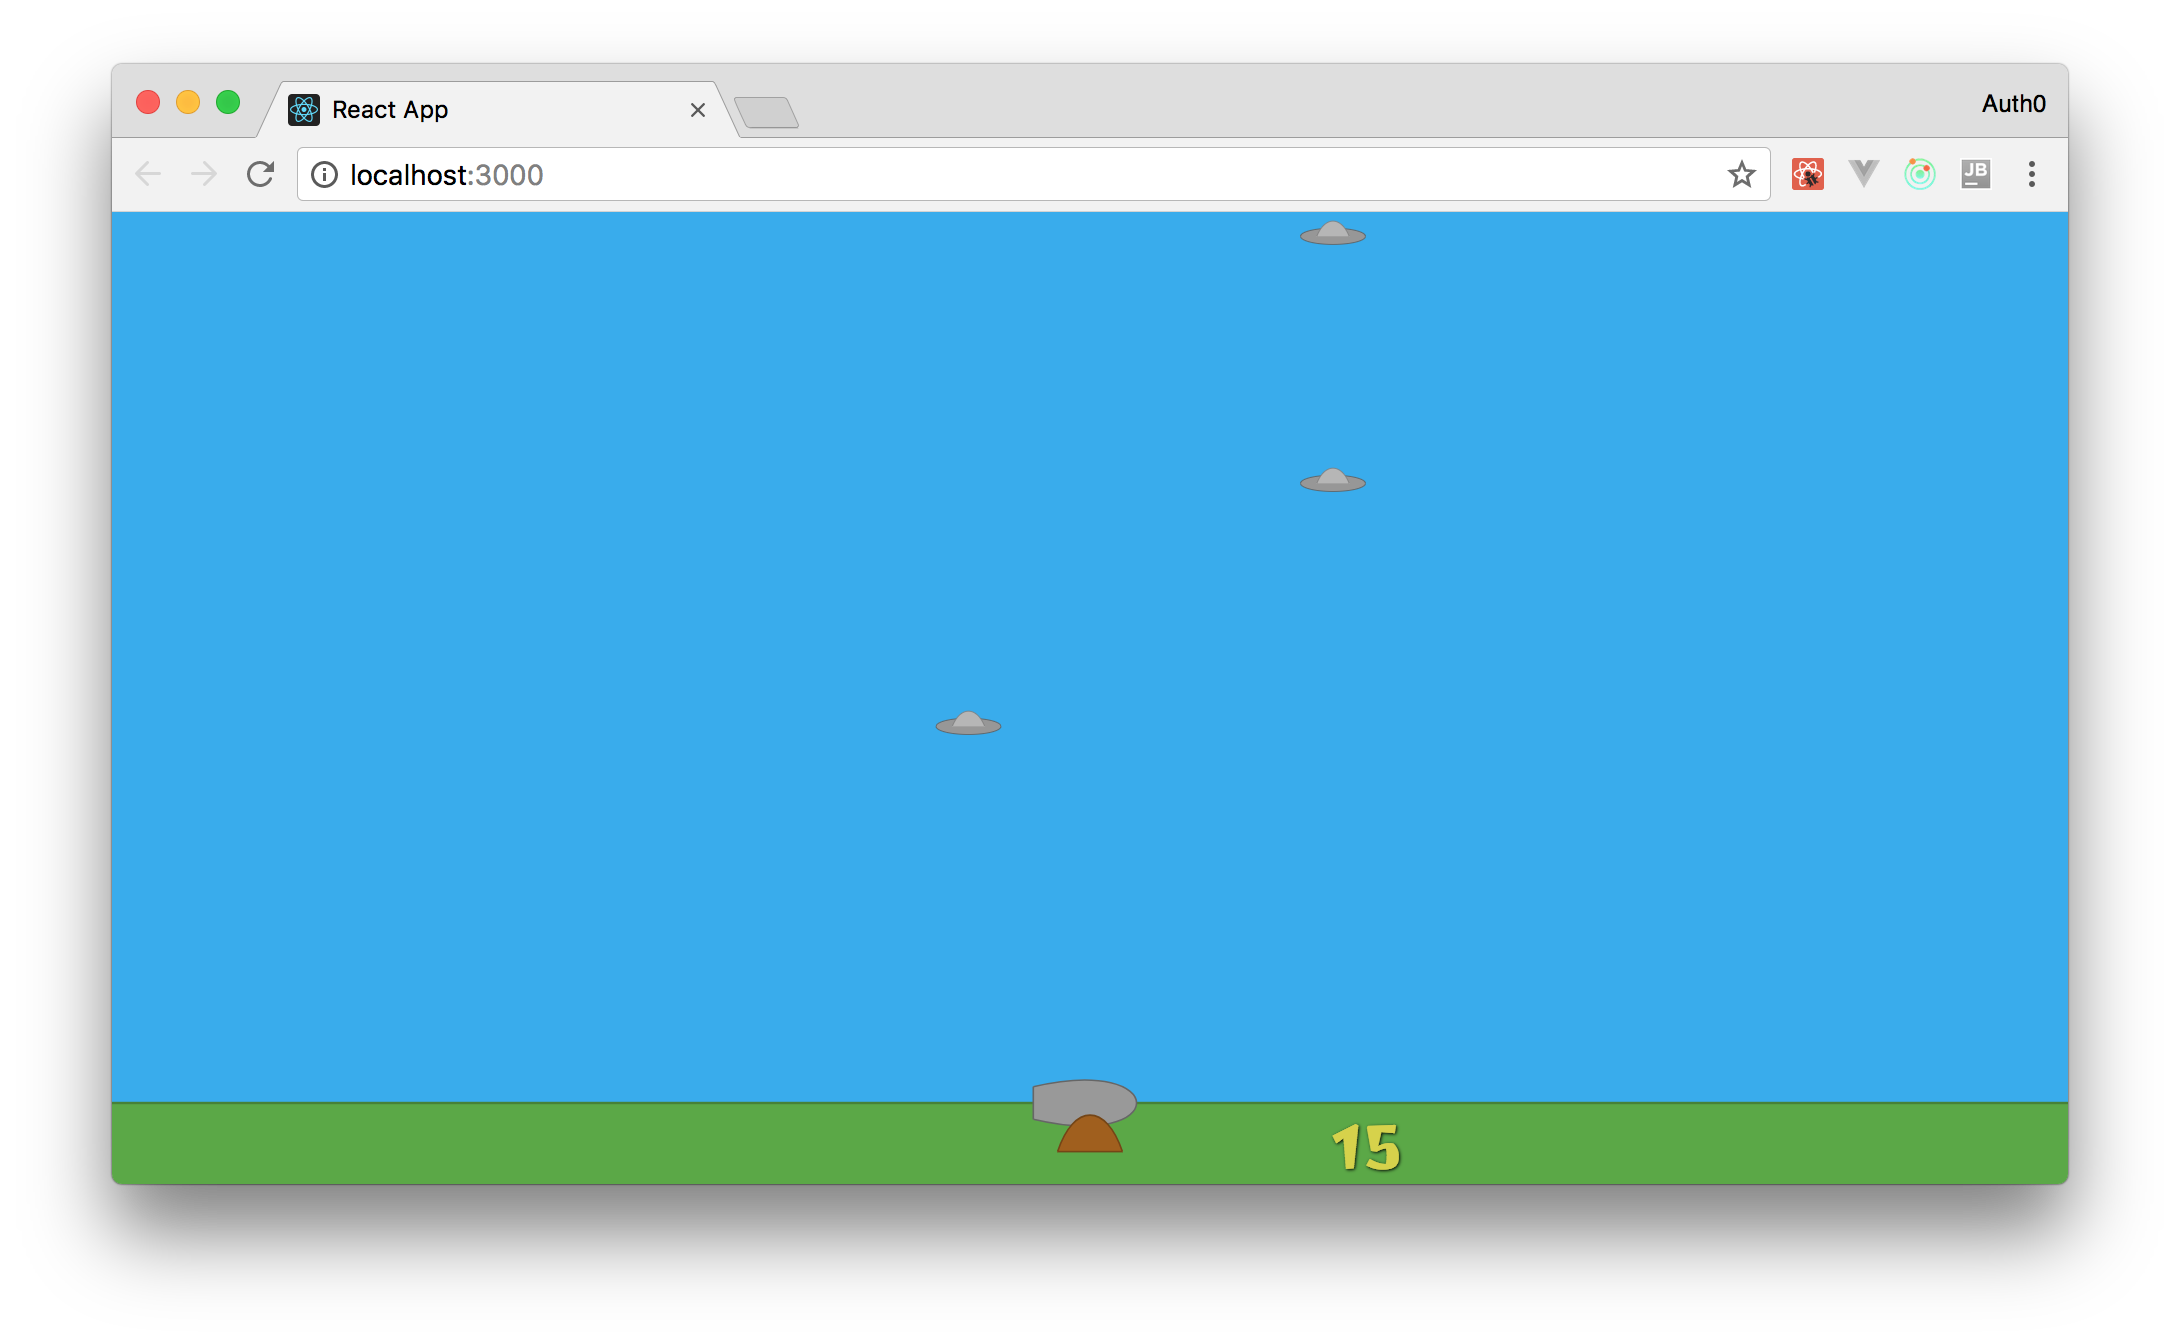
And your game will look like this:
Not bad, huh?!
Creating the Flying Object React Component
What about creating React components to represent your flying objects now? Flying objects are not circles, nor rectangles. They usually have two parts (the top and the base) and these parts are usually rounded. That's why you are going to use two React components to create your flying objects: the
FlyingObjectBaseFlyingObjectTopOne of these components is going to use a Bezier Cubic curve to define its shapes. The other one is going to be an ellipse.
You can start by creating the first one, the
FlyingObjectBaseFlyingObjectBase.jsx./src/componentsimport React from 'react'; import PropTypes from 'prop-types'; const FlyingObjectBase = (props) => { const style = { fill: '#979797', stroke: '#5c5c5c', }; return ( <ellipse cx={props.position.x} cy={props.position.y} rx="40" ry="10" style={style} /> ); }; FlyingObjectBase.propTypes = { position: PropTypes.shape({ x: PropTypes.number.isRequired, y: PropTypes.number.isRequired }).isRequired, }; export default FlyingObjectBase;
After that, you can define the top part of the flying object. To do that, create a file called
FlyingObjectTop.jsx./src/componentsimport React from 'react'; import PropTypes from 'prop-types'; import { pathFromBezierCurve } from '../utils/formulas'; const FlyingObjectTop = (props) => { const style = { fill: '#b6b6b6', stroke: '#7d7d7d', }; const baseWith = 40; const halfBase = 20; const height = 25; const cubicBezierCurve = { initialAxis: { x: props.position.x - halfBase, y: props.position.y, }, initialControlPoint: { x: 10, y: -height, }, endingControlPoint: { x: 30, y: -height, }, endingAxis: { x: baseWith, y: 0, }, }; return ( <path style={style} d={pathFromBezierCurve(cubicBezierCurve)} /> ); }; FlyingObjectTop.propTypes = { position: PropTypes.shape({ x: PropTypes.number.isRequired, y: PropTypes.number.isRequired }).isRequired, }; export default FlyingObjectTop;
If you don't know how the Bezier Cubic curve works, take a look at the previous article.
This is enough to show some flying objects but, as you are going to make them randomly appear in your game, it will be easier to treat these components as a single element. To do that, simply create a new file called
FlyingObject.jsximport React from 'react'; import PropTypes from 'prop-types'; import FlyingObjectBase from './FlyingObjectBase'; import FlyingObjectTop from './FlyingObjectTop'; const FlyingObject = props => ( <g> <FlyingObjectBase position={props.position} /> <FlyingObjectTop position={props.position} /> </g> ); FlyingObject.propTypes = { position: PropTypes.shape({ x: PropTypes.number.isRequired, y: PropTypes.number.isRequired }).isRequired, }; export default FlyingObject;
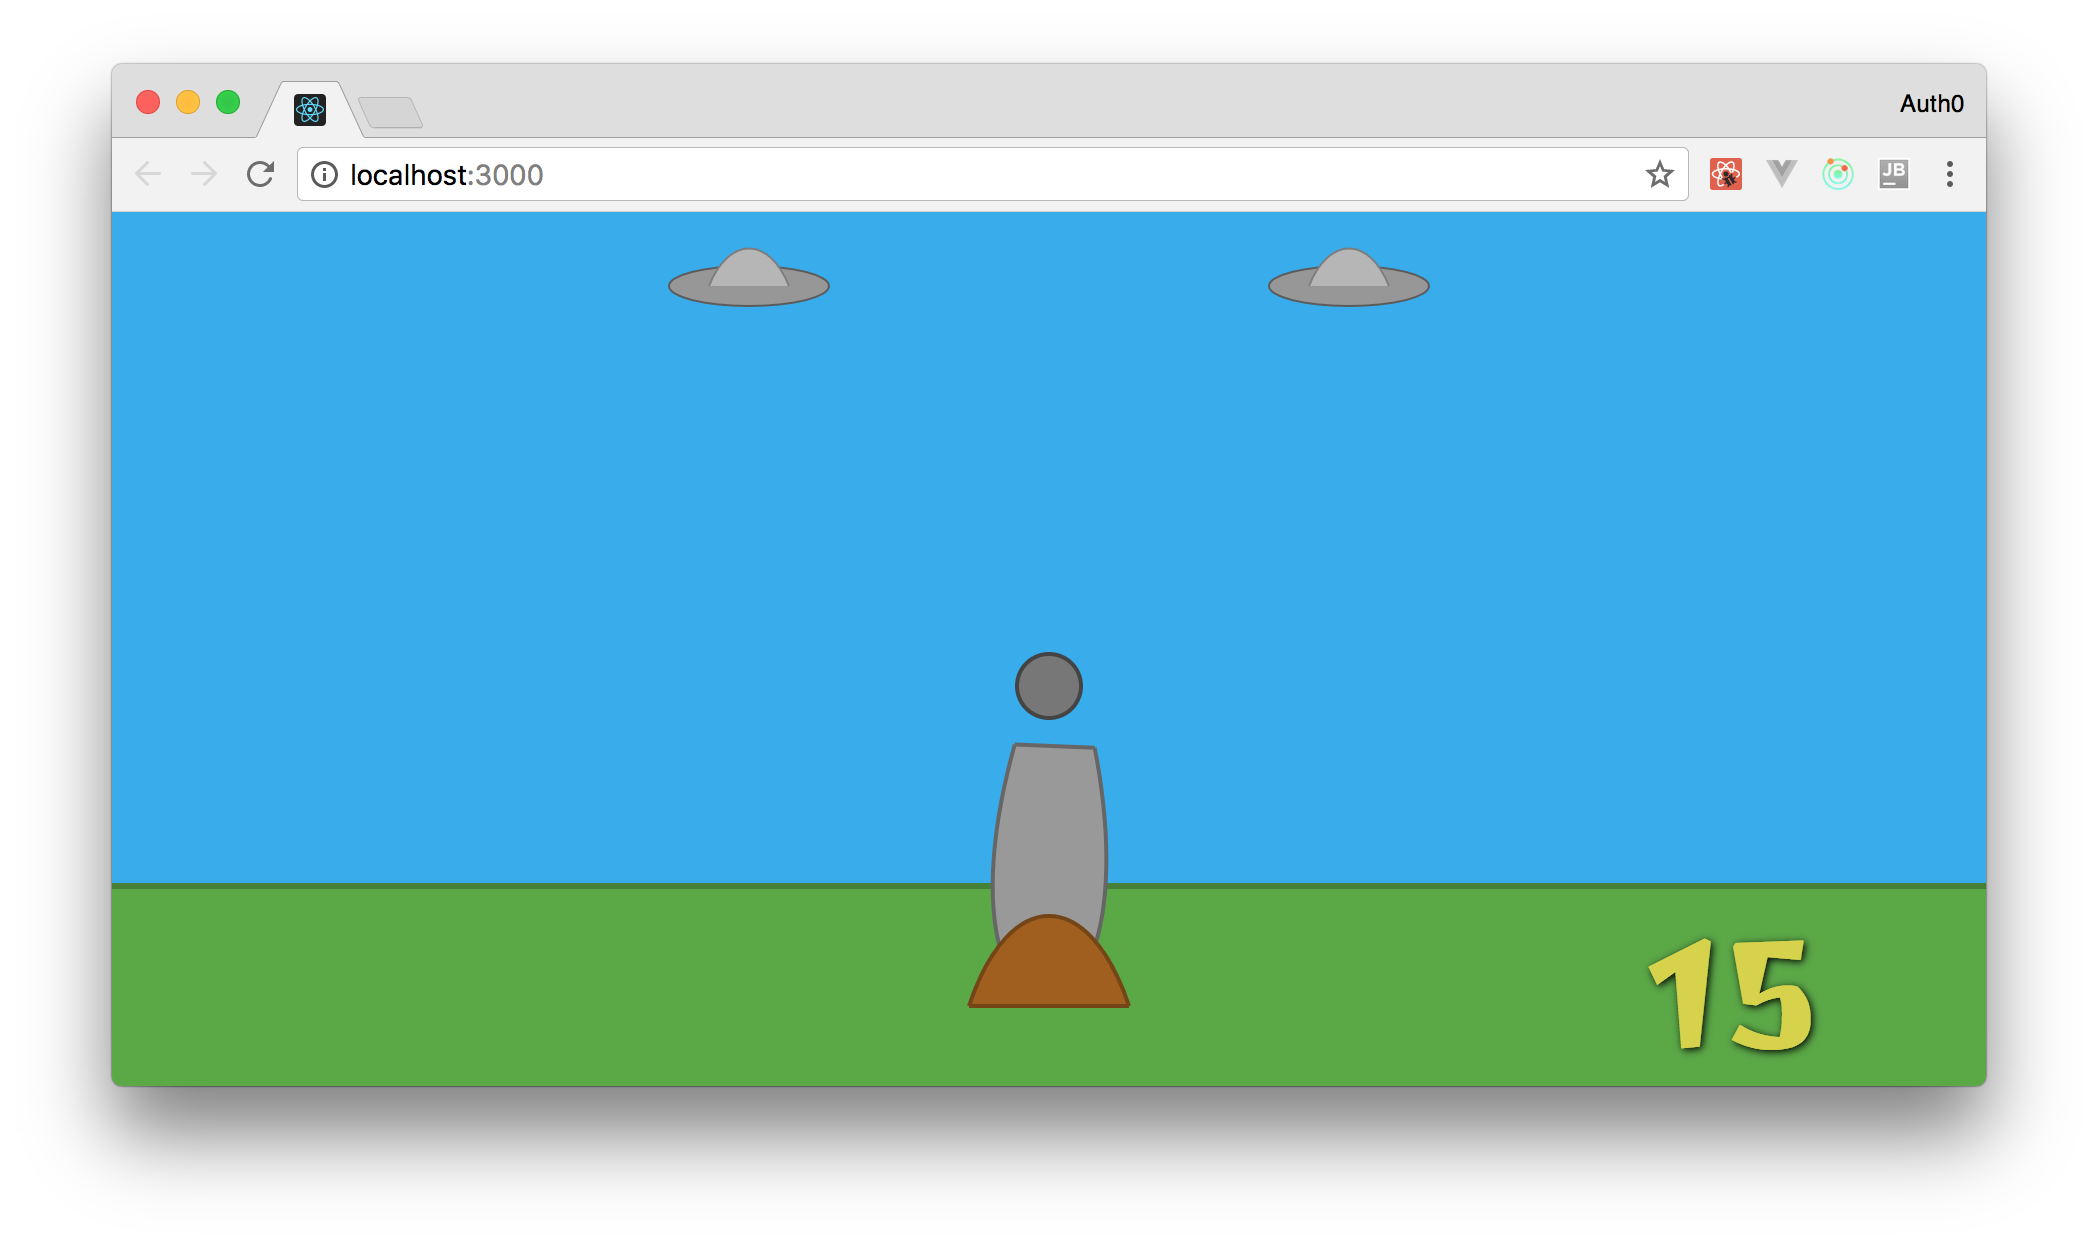
Now, to add flying objects in your game, you can simply use one React component. To see this in action, update your
Canvas// ... other imports import FlyingObject from './FlyingObject'; const Canvas = (props) => { // ... return ( <svg ...> // ... <FlyingObject position={{x: -150, y: -300}}/> <FlyingObject position={{x: 150, y: -300}}/> </svg> ); }; // ... propTypes and export
Creating the Heart React Component
The next component that you will need to create is the component that represents gamers' lives. There is nothing better to represent a life than a
HeartHeart.jsx./src/componentsimport React from 'react'; import PropTypes from 'prop-types'; import { pathFromBezierCurve } from '../utils/formulas'; const Heart = (props) => { const heartStyle = { fill: '#da0d15', stroke: '#a51708', strokeWidth: '2px', }; const leftSide = { initialAxis: { x: props.position.x, y: props.position.y, }, initialControlPoint: { x: -20, y: -20, }, endingControlPoint: { x: -40, y: 10, }, endingAxis: { x: 0, y: 40, }, }; const rightSide = { initialAxis: { x: props.position.x, y: props.position.y, }, initialControlPoint: { x: 20, y: -20, }, endingControlPoint: { x: 40, y: 10, }, endingAxis: { x: 0, y: 40, }, }; return ( <g filter="url(#shadow)"> <path style={heartStyle} d={pathFromBezierCurve(leftSide)} /> <path style={heartStyle} d={pathFromBezierCurve(rightSide)} /> </g> ); }; Heart.propTypes = { position: PropTypes.shape({ x: PropTypes.number.isRequired, y: PropTypes.number.isRequired }).isRequired, }; export default Heart;
As you can see, to create the shape of a heart with SVG, you need two Cubic Bezier curves: one for each side of the heart. You also had to add a
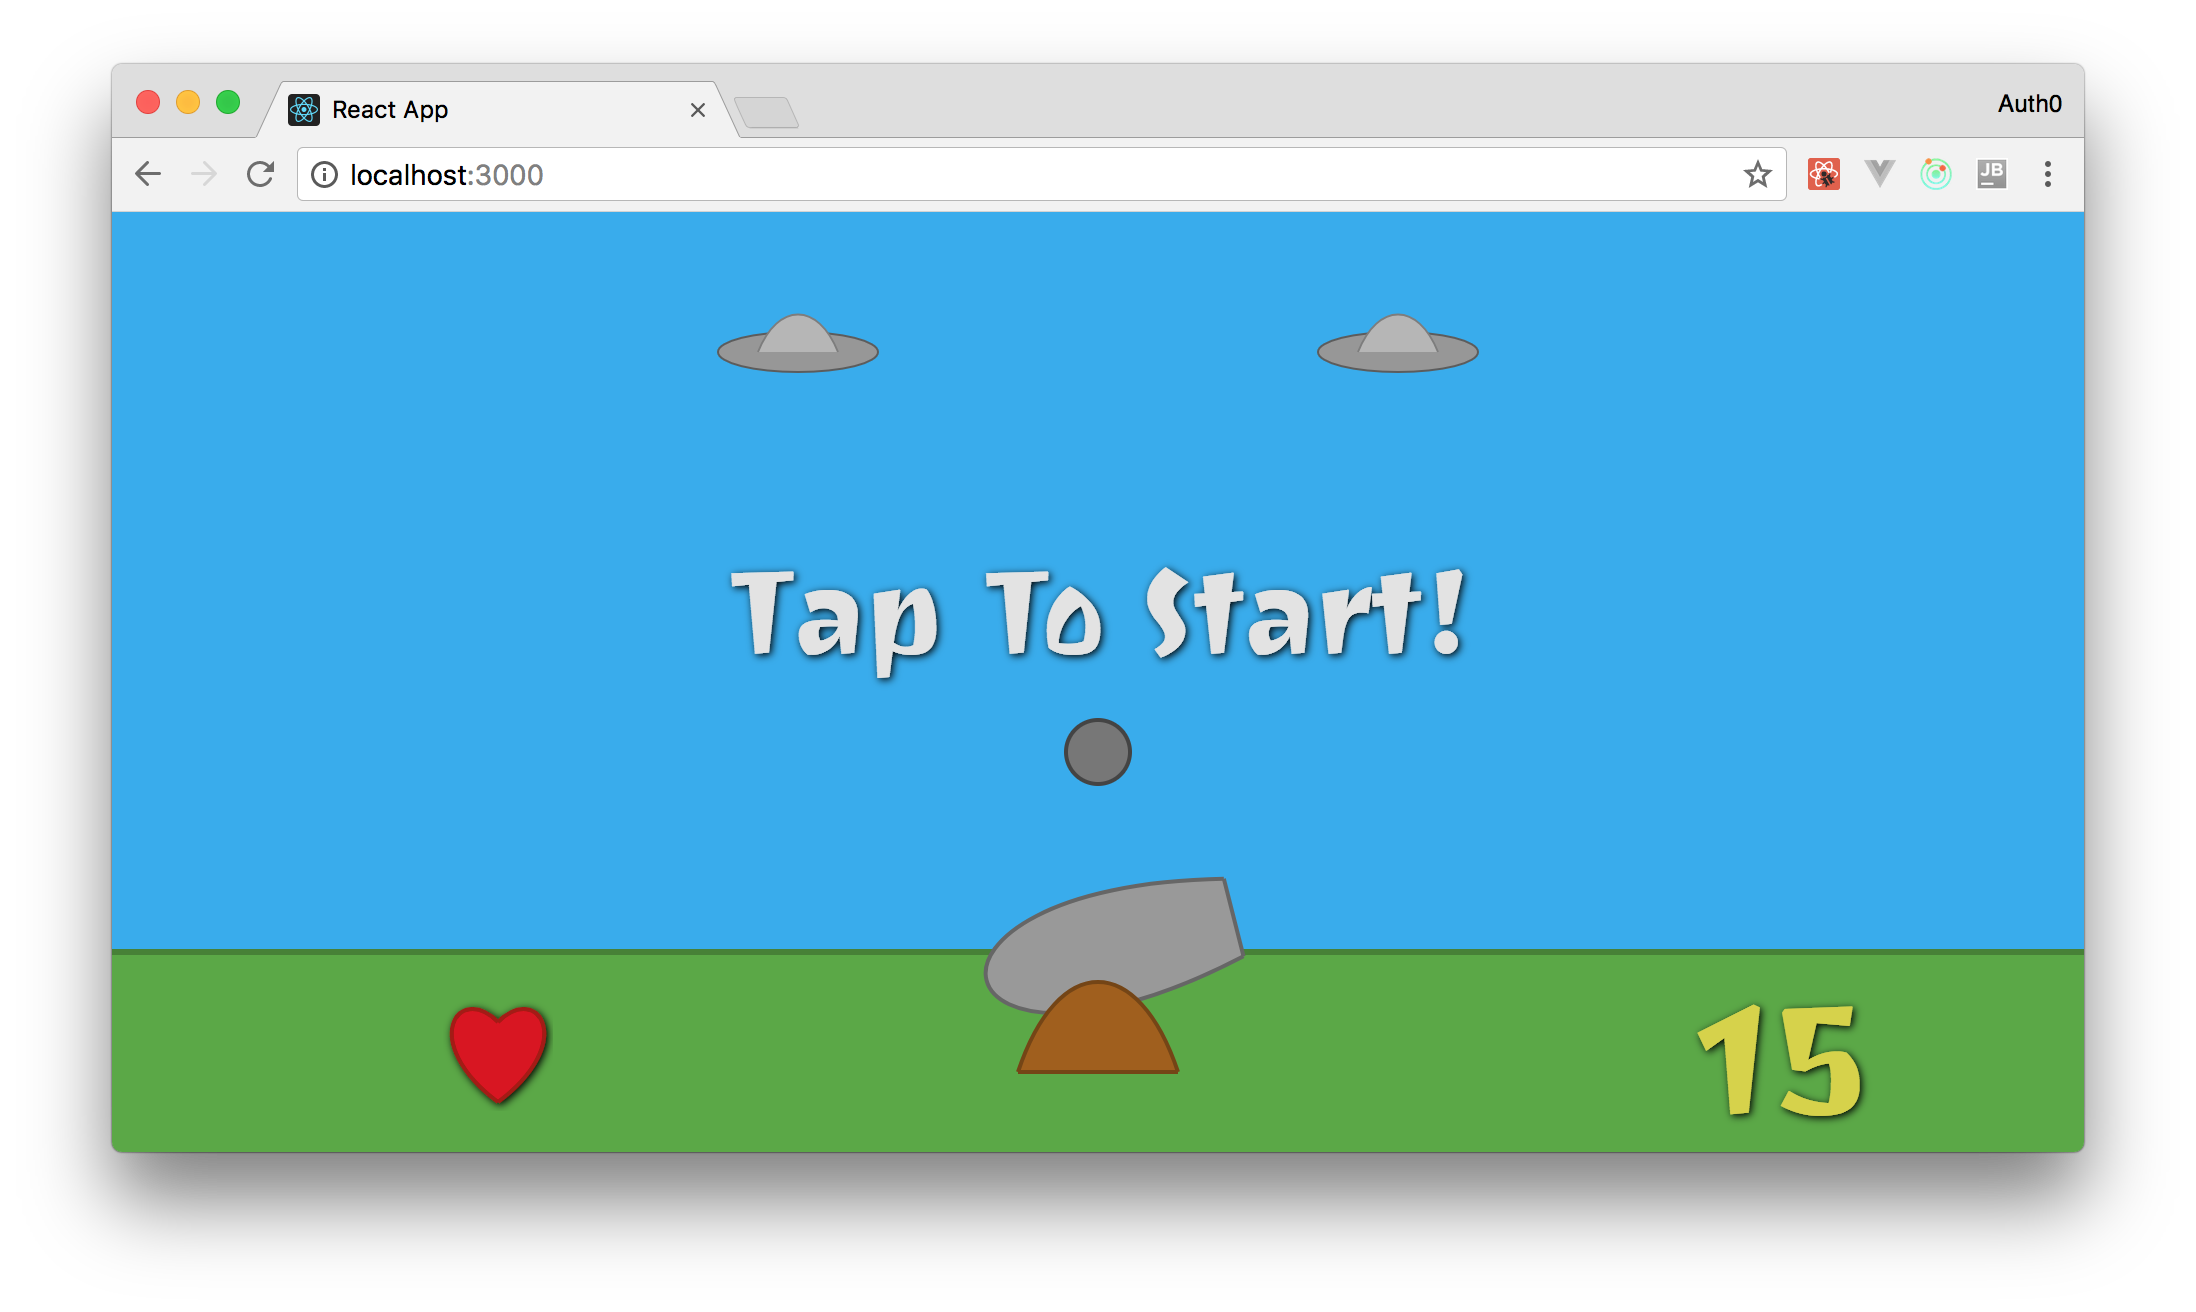
positionFor now, you can simply add one heart to your canvas so you can confirm that everything is working properly. To do this, open the
Canvas<Heart position={{x: -300, y: 35}} />
This must be the last element inside the
svgimport Heart from './Heart';Creating the Start Game Button React Component
Every game needs a start button. So, to create one for your game, add a file called
StartGame.jsximport React from 'react'; import PropTypes from 'prop-types'; import { gameWidth } from '../utils/constants'; const StartGame = (props) => { const button = { x: gameWidth / -2, // half width y: -280, // minus means up (above 0) width: gameWidth, height: 200, rx: 10, // border radius ry: 10, // border radius style: { fill: 'transparent', cursor: 'pointer', }, onClick: props.onClick, }; const text = { textAnchor: 'middle', // center x: 0, // center relative to X axis y: -150, // 150 up style: { fontFamily: '"Joti One", cursive', fontSize: 60, fill: '#e3e3e3', cursor: 'pointer', }, onClick: props.onClick, }; return ( <g filter="url(#shadow)"> <rect {...button} /> <text {...text}> Tap To Start! </text> </g> ); }; StartGame.propTypes = { onClick: PropTypes.func.isRequired, }; export default StartGame;
As you don't need to show more than one
StartGamex: 0y: -150- First, this component is expecting a function called
. This function is used to listen for clicks in this button and will trigger a Redux action to inform your app that it must start a new game.onClick - Second, this component is using a constant called
that you haven't defined yet. This constant will represent the area that is usable. Any area beyond that will have no purpose besides making your app fill the whole screen.gameWidth
To define the
gameWidth./src/utils/constants.jsexport const gameWidth = 800;
After that, you can add the
StartGameCanvas<StartGame onClick={() => console.log('Aliens, Go Home!')} />svgimport StartGame from './StartGame';Creating the Title React Component
The last component that you will create in this part of the series is the
TitleTitle.jsx./src/componentsimport React from 'react'; import { pathFromBezierCurve } from '../utils/formulas'; const Title = () => { const textStyle = { fontFamily: '"Joti One", cursive', fontSize: 120, fill: '#cbca62', }; const aliensLineCurve = { initialAxis: { x: -190, y: -950, }, initialControlPoint: { x: 95, y: -50, }, endingControlPoint: { x: 285, y: -50, }, endingAxis: { x: 380, y: 0, }, }; const goHomeLineCurve = { ...aliensLineCurve, initialAxis: { x: -250, y: -780, }, initialControlPoint: { x: 125, y: -90, }, endingControlPoint: { x: 375, y: -90, }, endingAxis: { x: 500, y: 0, }, }; return ( <g filter="url(#shadow)"> <defs> <path id="AliensPath" d={pathFromBezierCurve(aliensLineCurve)} /> <path id="GoHomePath" d={pathFromBezierCurve(goHomeLineCurve)} /> </defs> <text {...textStyle}> <textPath xlinkHref="#AliensPath"> Aliens, </textPath> </text> <text {...textStyle}> <textPath xlinkHref="#GoHomePath"> Go Home! </textPath> </text> </g> ); }; export default Title;
To make your title curved, you have used a combination of
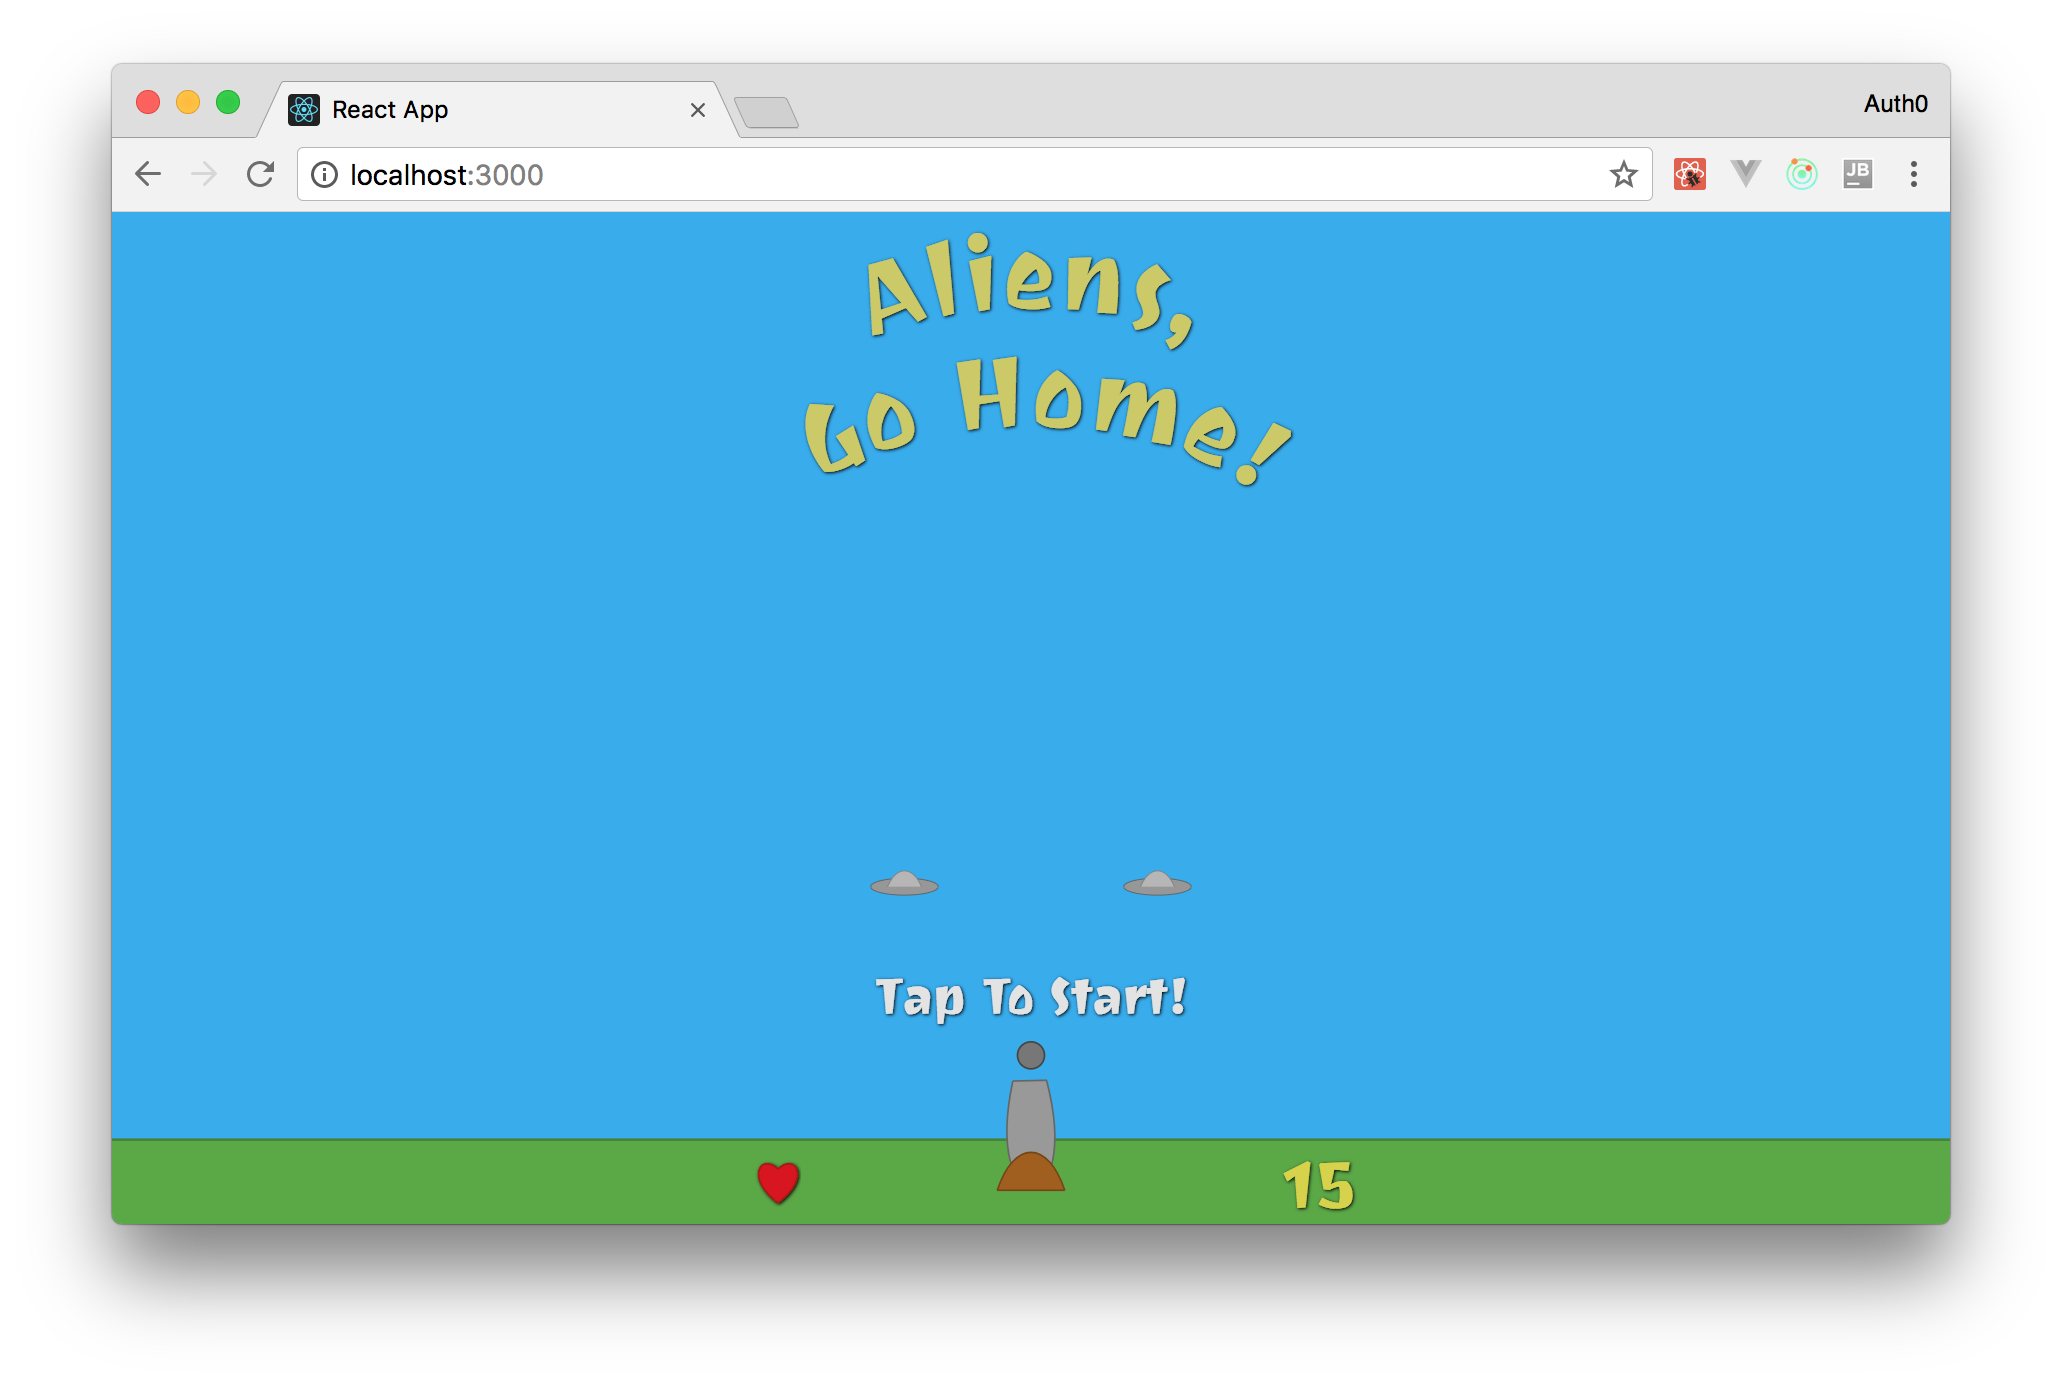
pathtextPathStartGameNow, to add this component to your canvas, you can simply add
<Title />svgimport Title from './Title';Canvas.jsxMaking Your React Game Responsive
To change your game dimensions and to make it responsive, you will need to do two things. First, you will need to attach an
onresizewindow./src/App.jscomponentDidMount()window.onresize = () => { const cnv = document.getElementById('aliens-go-home-canvas'); cnv.style.width = `${window.innerWidth}px`; cnv.style.height = `${window.innerHeight}px`; }; window.onresize();
This will make your app keep the dimension of your canvas equal to the dimension of the window that your users see. Even if they resize their browsers. It will also force the execution of the
window.onresizeSecond, you will need to change the
viewBox100 - window.innerHeightviewBoxinnerHeightwindowconst gameHeight = 1200; const viewBox = [window.innerWidth / -2, 100 - gameHeight, window.innerWidth, gameHeight];
In this new version, you are using the
1200Enabling Users to Start the Game
With all these new components in place and with these new dimensions, you can start thinking about enabling your users to start the game. That is, you can refactor your game to make its state switch to started whenever a user clicks on the Start Game button. This must trigger a lot of changes in your game's state. However, to make things easier to grasp, you can start by simply removing the
TitleStartGameTo do that, you will need to create a new Redux action that will be processed by a Redux reducer to change a flag in your game. To create this new action, open the
./src/actions/index.js// ... MOVE_OBJECTS export const START_GAME = 'START_GAME'; // ... moveObjects export const startGame = () => ({ type: START_GAME, });
Then, you can refactor the
./src/reducers/index.jsimport { MOVE_OBJECTS, START_GAME } from '../actions'; import moveObjects from './moveObjects'; import startGame from './startGame'; const initialGameState = { started: false, kills: 0, lives: 3, }; const initialState = { angle: 45, gameState: initialGameState, }; function reducer(state = initialState, action) { switch (action.type) { case MOVE_OBJECTS: return moveObjects(state, action); case START_GAME: return startGame(state, initialGameState); default: return state; } } export default reducer;
As you can see, now you have a child object inside
initialState
: a flag to indicate if the game is running or not;started
: a property that holds how many flying objects the user has killed;kills
: a property that holds how many lives the user has;lives
Besides that, you have added a new
caseswitchcasetypeSTART_GAMEstartGamestartedgameStatekillsTo implement the
startGamestartGame.js./src/reducersexport default (state, initialGameState) => { return { ...state, gameState: { ...initialGameState, started: true, } } };
As you can see, the code in this new file is quite simple. It just returns a new state object to the Redux store where the
startedtruegameStatekillsAfter implementing this function, you have to pass it to your game. You also have to pass the new
gameState./src/containers/Game.jsimport { connect } from 'react-redux'; import App from '../App'; import { moveObjects, startGame } from '../actions/index'; const mapStateToProps = state => ({ angle: state.angle, gameState: state.gameState, }); const mapDispatchToProps = dispatch => ({ moveObjects: (mousePosition) => { dispatch(moveObjects(mousePosition)); }, startGame: () => { dispatch(startGame()); }, }); const Game = connect( mapStateToProps, mapDispatchToProps, )(App); export default Game;
To summarize, the changes that you have made in this file are:
: Now, you have told Redux that themapStateToProps
component cares about theApp
property.gameState
: You have also told Redux to pass themapDispatchToProps
function to thestartGame
component, so it can trigger this new action.App
Both these new
AppgameStatestartGameAppCanvas./src/App.js// ... import statements ... class App extends Component { // ... constructor(props) ... // ... componentDidMount() ... // ... trackMouse(event) ... render() { return ( <Canvas angle={this.props.angle} gameState={this.props.gameState} startGame={this.props.startGame} trackMouse={event => (this.trackMouse(event))} /> ); } } App.propTypes = { angle: PropTypes.number.isRequired, gameState: PropTypes.shape({ started: PropTypes.bool.isRequired, kills: PropTypes.number.isRequired, lives: PropTypes.number.isRequired, }).isRequired, moveObjects: PropTypes.func.isRequired, startGame: PropTypes.func.isRequired, }; export default App;
Then, you can open the
./src/components/Canvas.jsximport React from 'react'; import PropTypes from 'prop-types'; import Sky from './Sky'; import Ground from './Ground'; import CannonBase from './CannonBase'; import CannonPipe from './CannonPipe'; import CurrentScore from './CurrentScore' import FlyingObject from './FlyingObject'; import StartGame from './StartGame'; import Title from './Title'; const Canvas = (props) => { const gameHeight = 1200; const viewBox = [window.innerWidth / -2, 100 - gameHeight, window.innerWidth, gameHeight]; return ( <svg id="aliens-go-home-canvas" preserveAspectRatio="xMaxYMax none" onMouseMove={props.trackMouse} viewBox={viewBox} > <defs> <filter id="shadow"> <feDropShadow dx="1" dy="1" stdDeviation="2" /> </filter> </defs> <Sky /> <Ground /> <CannonPipe rotation={props.angle} /> <CannonBase /> <CurrentScore score={15} /> { ! props.gameState.started && <g> <StartGame onClick={() => props.startGame()} /> <Title /> </g> } { props.gameState.started && <g> <FlyingObject position={{x: -150, y: -300}}/> <FlyingObject position={{x: 150, y: -300}}/> </g> } </svg> ); }; Canvas.propTypes = { angle: PropTypes.number.isRequired, gameState: PropTypes.shape({ started: PropTypes.bool.isRequired, kills: PropTypes.number.isRequired, lives: PropTypes.number.isRequired, }).isRequired, trackMouse: PropTypes.func.isRequired, startGame: PropTypes.func.isRequired, }; export default Canvas;
As you can see, in this new version, you have made the
StartGameTitlegameState.startedFlyingObjectIf you run your app now (issue
npm startMaking Flying Objects Appear Randomly
Now that you have implemented the Start Game feature, you can refactor your game to show some flying objects randomly positioned. These are the flying objects that your users will have to kill, so you will also need to make them fly (i.e. move down the screen). But first, you have to focus on making them appear somehow.
To do that, the first thing you will have to do is to define where these objects will appear. You will also have to set some interval and some max number of flying objects. To keep things organized, you can define constants to hold these rules. So, open the
./src/utils/constants.js// ... keep skyAndGroundWidth and gameWidth untouched export const createInterval = 1000; export const maxFlyingObjects = 4; export const flyingObjectsStarterYAxis = -1000; export const flyingObjectsStarterPositions = [ -300, -150, 150, 300, ];
The rules above state that your game will show new flying objects every one second (
1000maxFlyingObjects-1000flyingObjectsStarterYAxisflyingObjectsStarterPositionsTo implement the function that will use these constants, create a file called
createFlyingObjects.js./src/reducersimport { createInterval, flyingObjectsStarterYAxis, maxFlyingObjects, flyingObjectsStarterPositions } from '../utils/constants'; export default (state) => { if ( ! state.gameState.started) return state; // game not running const now = (new Date()).getTime(); const { lastObjectCreatedAt, flyingObjects } = state.gameState; const createNewObject = ( now - (lastObjectCreatedAt).getTime() > createInterval && flyingObjects.length < maxFlyingObjects ); if ( ! createNewObject) return state; // no need to create objects now const id = (new Date()).getTime(); const predefinedPosition = Math.floor(Math.random() * maxFlyingObjects); const flyingObjectPosition = flyingObjectsStarterPositions[predefinedPosition]; const newFlyingObject = { position: { x: flyingObjectPosition, y: flyingObjectsStarterYAxis, }, createdAt: (new Date()).getTime(), id, }; return { ...state, gameState: { ...state.gameState, flyingObjects: [ ...state.gameState.flyingObjects, newFlyingObject ], lastObjectCreatedAt: new Date(), } } }
At first, this code might look complex. However, it's quite the opposite. This list summarizes how it works:
- If the game is not running (i.e.
), this code simply returns the current state unaltered.! state.gameState.started - If the game is running, this function uses the
and thecreateInterval
constants to decide if it should create new flying objects or not. This logic populates themaxFlyingObjects
constant.createNewObject - If the
constant is set tocreateNewObject
, this function usestrue
to fetch a random number between 0 and 3 (Math.floor
) so it can decide where this new flying object will appear.Math.random() * maxFlyingObjects - With this information, this function creates a new object called
with itsnewFlyingObject
.position - In the end, this function returns a new state object with the new flying object and it updates the
value.lastObjectCreatedAt
As you may have noticed, the function that you have just created is a reducer. As such, you might expect that you will create an action to trigger this reducer but, actually, you won't need one. Since your game issues a
MOVE_OBJECTS10moveObjects./src/reducers/moveObjects.jsimport { calculateAngle } from '../utils/formulas'; import createFlyingObjects from './createFlyingObjects'; function moveObjects(state, action) { const mousePosition = action.mousePosition || { x: 0, y: 0, }; const newState = createFlyingObjects(state); const { x, y } = mousePosition; const angle = calculateAngle(0, 0, x, y); return { ...newState, angle, }; } export default moveObjects;
The new version of the
moveObjects- First, it forces the creation of the
constant if one is not passed in themousePosition
object. You will need that because the previous version would make the execution of the reducer halt if noaction
was passed to it.mousePosition - Second, it fetches a
object from thenewState
reducer, so new flying objects are created if needed.createFlyingObjects - Lastly, it returns a new object based on the
object retrieved in the last step.newState
Before refactoring the
AppCanvas./src/reducers/index.jsinitialState// ... import statements ... const initialGameState = { // ... other initial properties ... flyingObjects: [], lastObjectCreatedAt: new Date(), }; // ... everything else ...
With that in place, all you need to do is to add
flyingObjectspropTypesApp// ... import statements ... // ... App component class ... App.propTypes = { // ... other propTypes definitions ... gameState: PropTypes.shape({ // ... other propTypes definitions ... flyingObjects: PropTypes.arrayOf(PropTypes.shape({ position: PropTypes.shape({ x: PropTypes.number.isRequired, y: PropTypes.number.isRequired }).isRequired, id: PropTypes.number.isRequired, })).isRequired, // ... other propTypes definitions ... }).isRequired, // ... other propTypes definitions ... }; export default App;
And then make the
CanvasFlyingObject// ... import statements ... const Canvas = (props) => { // ... const definitions ... return ( <svg ... > // ... other SVG elements and React Components ... {props.gameState.flyingObjects.map(flyingObject => ( <FlyingObject key={flyingObject.id} position={flyingObject.position} /> ))} </svg> ); }; Canvas.propTypes = { // ... other propTypes definitions ... gameState: PropTypes.shape({ // ... other propTypes definitions ... flyingObjects: PropTypes.arrayOf(PropTypes.shape({ position: PropTypes.shape({ x: PropTypes.number.isRequired, y: PropTypes.number.isRequired }).isRequired, id: PropTypes.number.isRequired, })).isRequired, }).isRequired, // ... other propTypes definitions ... }; export default Canvas;
That's it! Now, your app will create and show randomly positioned flying objects when users start the game.
Note: If you run your app now and hit the Start Game button, you might end up seeing just one flying object. This might happen because there is nothing preventing flying objects from appearing in the same magnitude on the X-axis. In the next section, you will make your flying objects move along the Y-axis. This will ensure that you and your users are able to see all flying objects.
Using CSS Animation to Move Flying Objects
There are two paths you can follow to make your flying objects move. The first and most obvious one is to use JavaScript code to change their position. Although this approach might seem easy to implement, it will degrade the performance of your game to a level that makes it unfeasible.
The second and preferred approach is to use CSS animations. The advantage of this approach is that it uses the GPU to animate elements, which increases the performance of your app.
You might think that this approach is harder to implement but, as you will see, it is not. The trickiest part of it is that you will need the help of another NPM package to integrate CSS animations and React properly. That is, you will need to install the
package.styled-components
"By utilizing tagged template literals (a recent addition to JavaScript) and the power of CSS, styled-components allows you to write actual CSS code to style your components. It also removes the mapping between components and styles – using components as a low-level styling construct could not be easier!" —
styled-components
To install this package, you will have to stop your React app (i.e. if it is up and running) and issue the following command:
npm i styled-components
After installing it, you can replace the code of the
FlyingObject./src/components/FlyingObject.jsximport React from 'react'; import PropTypes from 'prop-types'; import styled, { keyframes } from 'styled-components'; import FlyingObjectBase from './FlyingObjectBase'; import FlyingObjectTop from './FlyingObjectTop'; import { gameHeight } from '../utils/constants'; const moveVertically = keyframes` 0% { transform: translateY(0); } 100% { transform: translateY(${gameHeight}px); } `; const Move = styled.g` animation: ${moveVertically} 4s linear; `; const FlyingObject = props => ( <Move> <FlyingObjectBase position={props.position} /> <FlyingObjectTop position={props.position} /> </Move> ); FlyingObject.propTypes = { position: PropTypes.shape({ x: PropTypes.number.isRequired, y: PropTypes.number.isRequired }).isRequired, }; export default FlyingObject;
In this new version, you have wrapped both the
FlyingObjectBaseFlyingObjectTopMovegstyledmoveVerticallystyled-componentsIn the end, what this means is that instead of adding pure/static flying objects, you are adding elements that carry a transformation (a CSS rule) to move them from their starter position (
transform: translateY(0);transform: translateY(${gameHeight}px);Of course, you will have to add the
gameHeight./src/utils/constants.jsflyingObjectsStarterYAxisTo make these changes, open the
constants.js// keep other constants untouched ... export const flyingObjectsStarterYAxis = -1100; // keep flyingObjectsStarterPositions untouched ... export const gameHeight = 1200;
Lastly, you will need to destroy flying objects after 4 seconds, so new ones can appear and move through the canvas. You can achieve that by replacing the code inside the
./src/reducers/moveObjects.jsimport { calculateAngle } from '../utils/formulas'; import createFlyingObjects from './createFlyingObjects'; function moveObjects(state, action) { const mousePosition = action.mousePosition || { x: 0, y: 0, }; const newState = createFlyingObjects(state); const now = (new Date()).getTime(); const flyingObjects = newState.gameState.flyingObjects.filter(object => ( (now - object.createdAt) < 4000 )); const { x, y } = mousePosition; const angle = calculateAngle(0, 0, x, y); return { ...newState, gameState: { ...newState.gameState, flyingObjects, }, angle, }; } export default moveObjects;
As you can see, this new code filters the
flyingObjectsgameState4000If you restart your app now (
npm start“Using CSS animations with React is easy and increases your app's performance.”
Tweet This
Conclusion and Next Steps
In the second part of this series, you have created most of the elements that you need to make a complete game with React, Redux, and SVG. In the end, you also have made flying objects appear at random positions and took advantage of CSS animations to make them fly around smoothly.
In the next and last article of this series, you will implement the missing features of your game. That is, you will: make your cannon shoot to kill flying objects; make your game control lives of your users; and you will control how many kills your users have. You will also use Auth0 and Socket.IO to implement a real-time leaderboard. Stay tuned!
About the author

Bruno Krebs
R&D Content Architect (Auth0 Alumni)

