Configuring MongoDB as an Auth0 custom database can simplify your user migration process, or even just add an OAuth and OpenID Connect layer on top of your existing database of users. Whatever your reason, let's step through the process of connecting Auth0 to MongoDB.
Enabling Custom Databases
Don't already have an Auth0 account yet? Sign up for free today!
Try out the most powerful authentication platform for free.
Get started →Once you're logged in, head to the Database Connections page, and click on the Create DB Connection button.
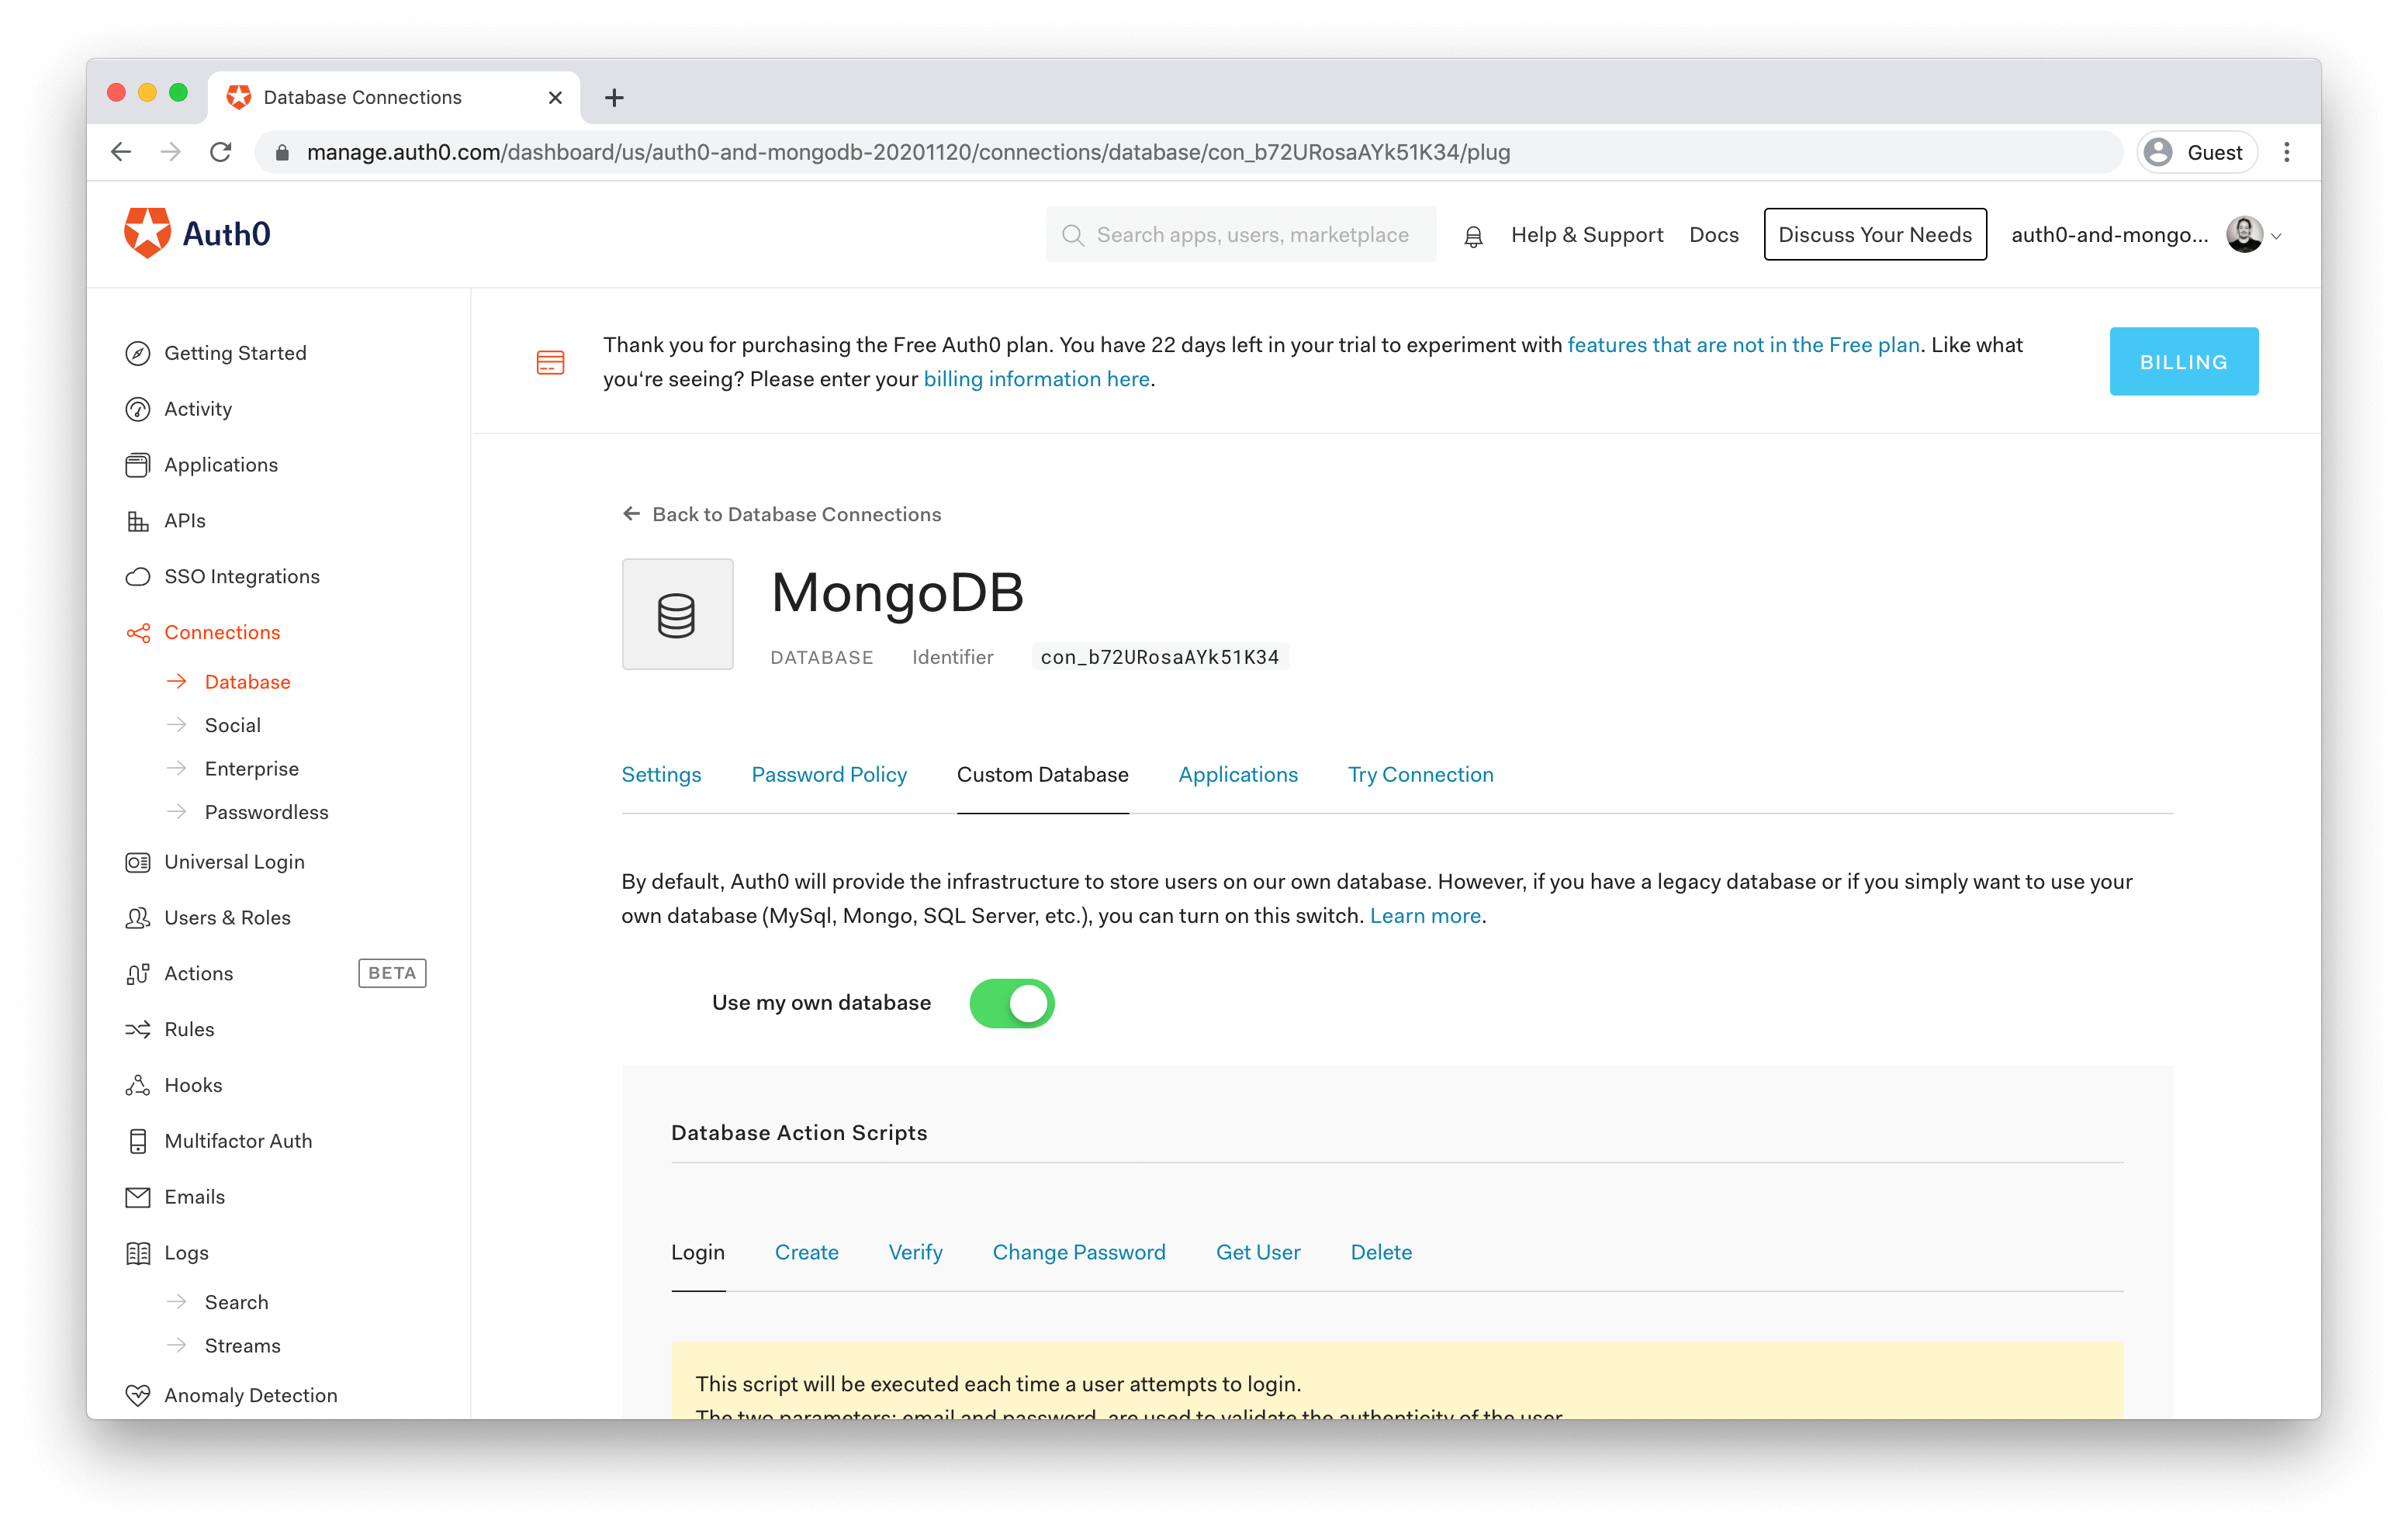
Give this database configuration a meaningful name, click the Create button, and then switch to the Custom Database tab.
On this screen, you can enable the Use my own database option and define the JavaScript that will run when the following events are triggered:
- Login
- executed each time a user attempts to login, to validate the authenticity of the user against a MongoDB record;
- Create
- executed when the user signs up, to create a record in MongoDB;
- Verify
- executed after a user signs up and follows the email "verification" link, to set a corresponding flag in MongoDB;
- Change Password
- executed when the user changes their password, or the reset email was sent and the user follows the "change password" link, to update a record in MongoDB;
- Get User
- executed to determine the current state of existence of a user, which returns a matching MongoDB record if any, without requiring the user's credentials; and
- Delete
- executed when a user is deleted, to deactivate or delete the respective MongoDB record.
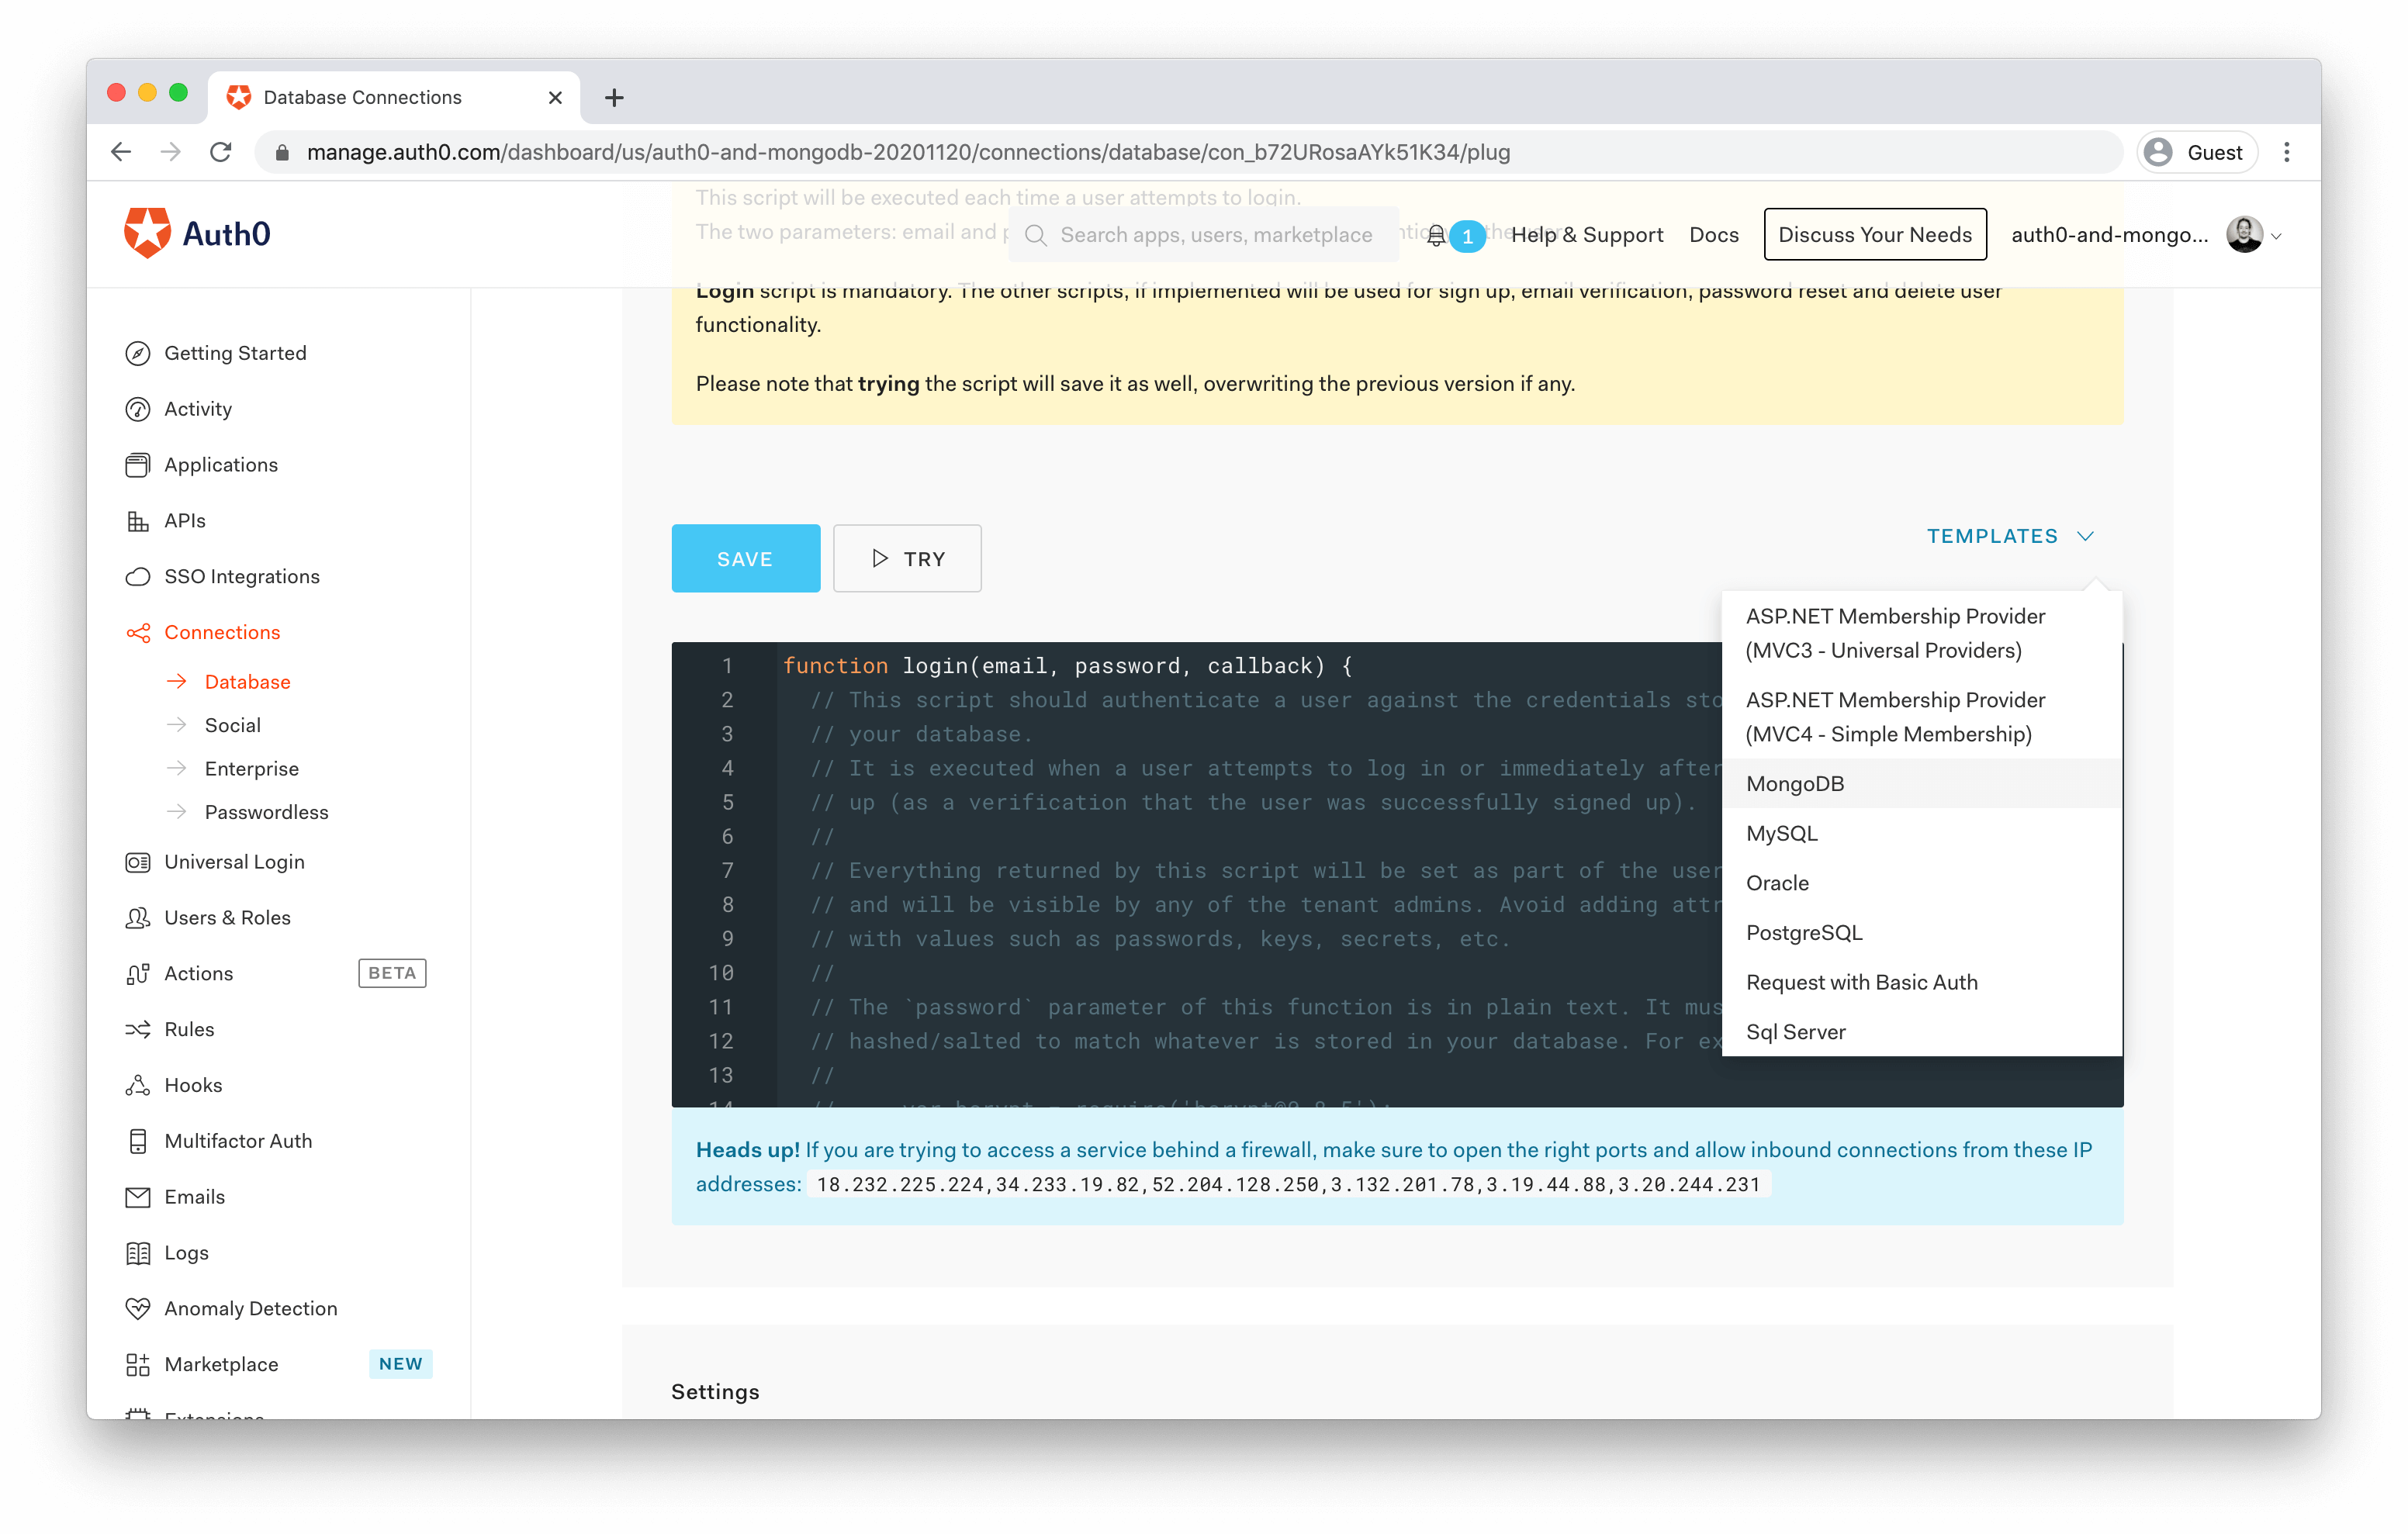
For each of these scripts, you'll see a Templates drop-down above the code editor, and MongoDB is one of the options that come out of the box. You'll come back to this later.
Setting up a MongoDB Cluster
Before you do that, though, set up your MongoDB instance. Assuming you already have an account at https://mongodb.com/, head to your dashboard and go to the Projects tab. Then create a new project, and in that project, create a new cluster. The free, shared clusters with the default settings are sufficient for our purposes, but you might want to consider one of the paid options if their features better suit your needs.
This guide should also work fine if you're using an existing database, but you might need to tweak some of the upcoming instructions to your specific circumstances.
Once the cluster is built, which can take up to three minutes, you need some connection details to use in the scripts back in the Auth0 dashboard.
Click on the Connect button, and configure the IP Addresses that can connect to your cluster. If you look back in the Auth0 interface, you'll see a list of IP addresses under the code editors for any of your scripts. Add these in using the Add a different IP Address button in MongoDB.
The next thing you need to do is define a user that's allowed to connect to the system. Choose a username and sufficiently strong password, and continue.
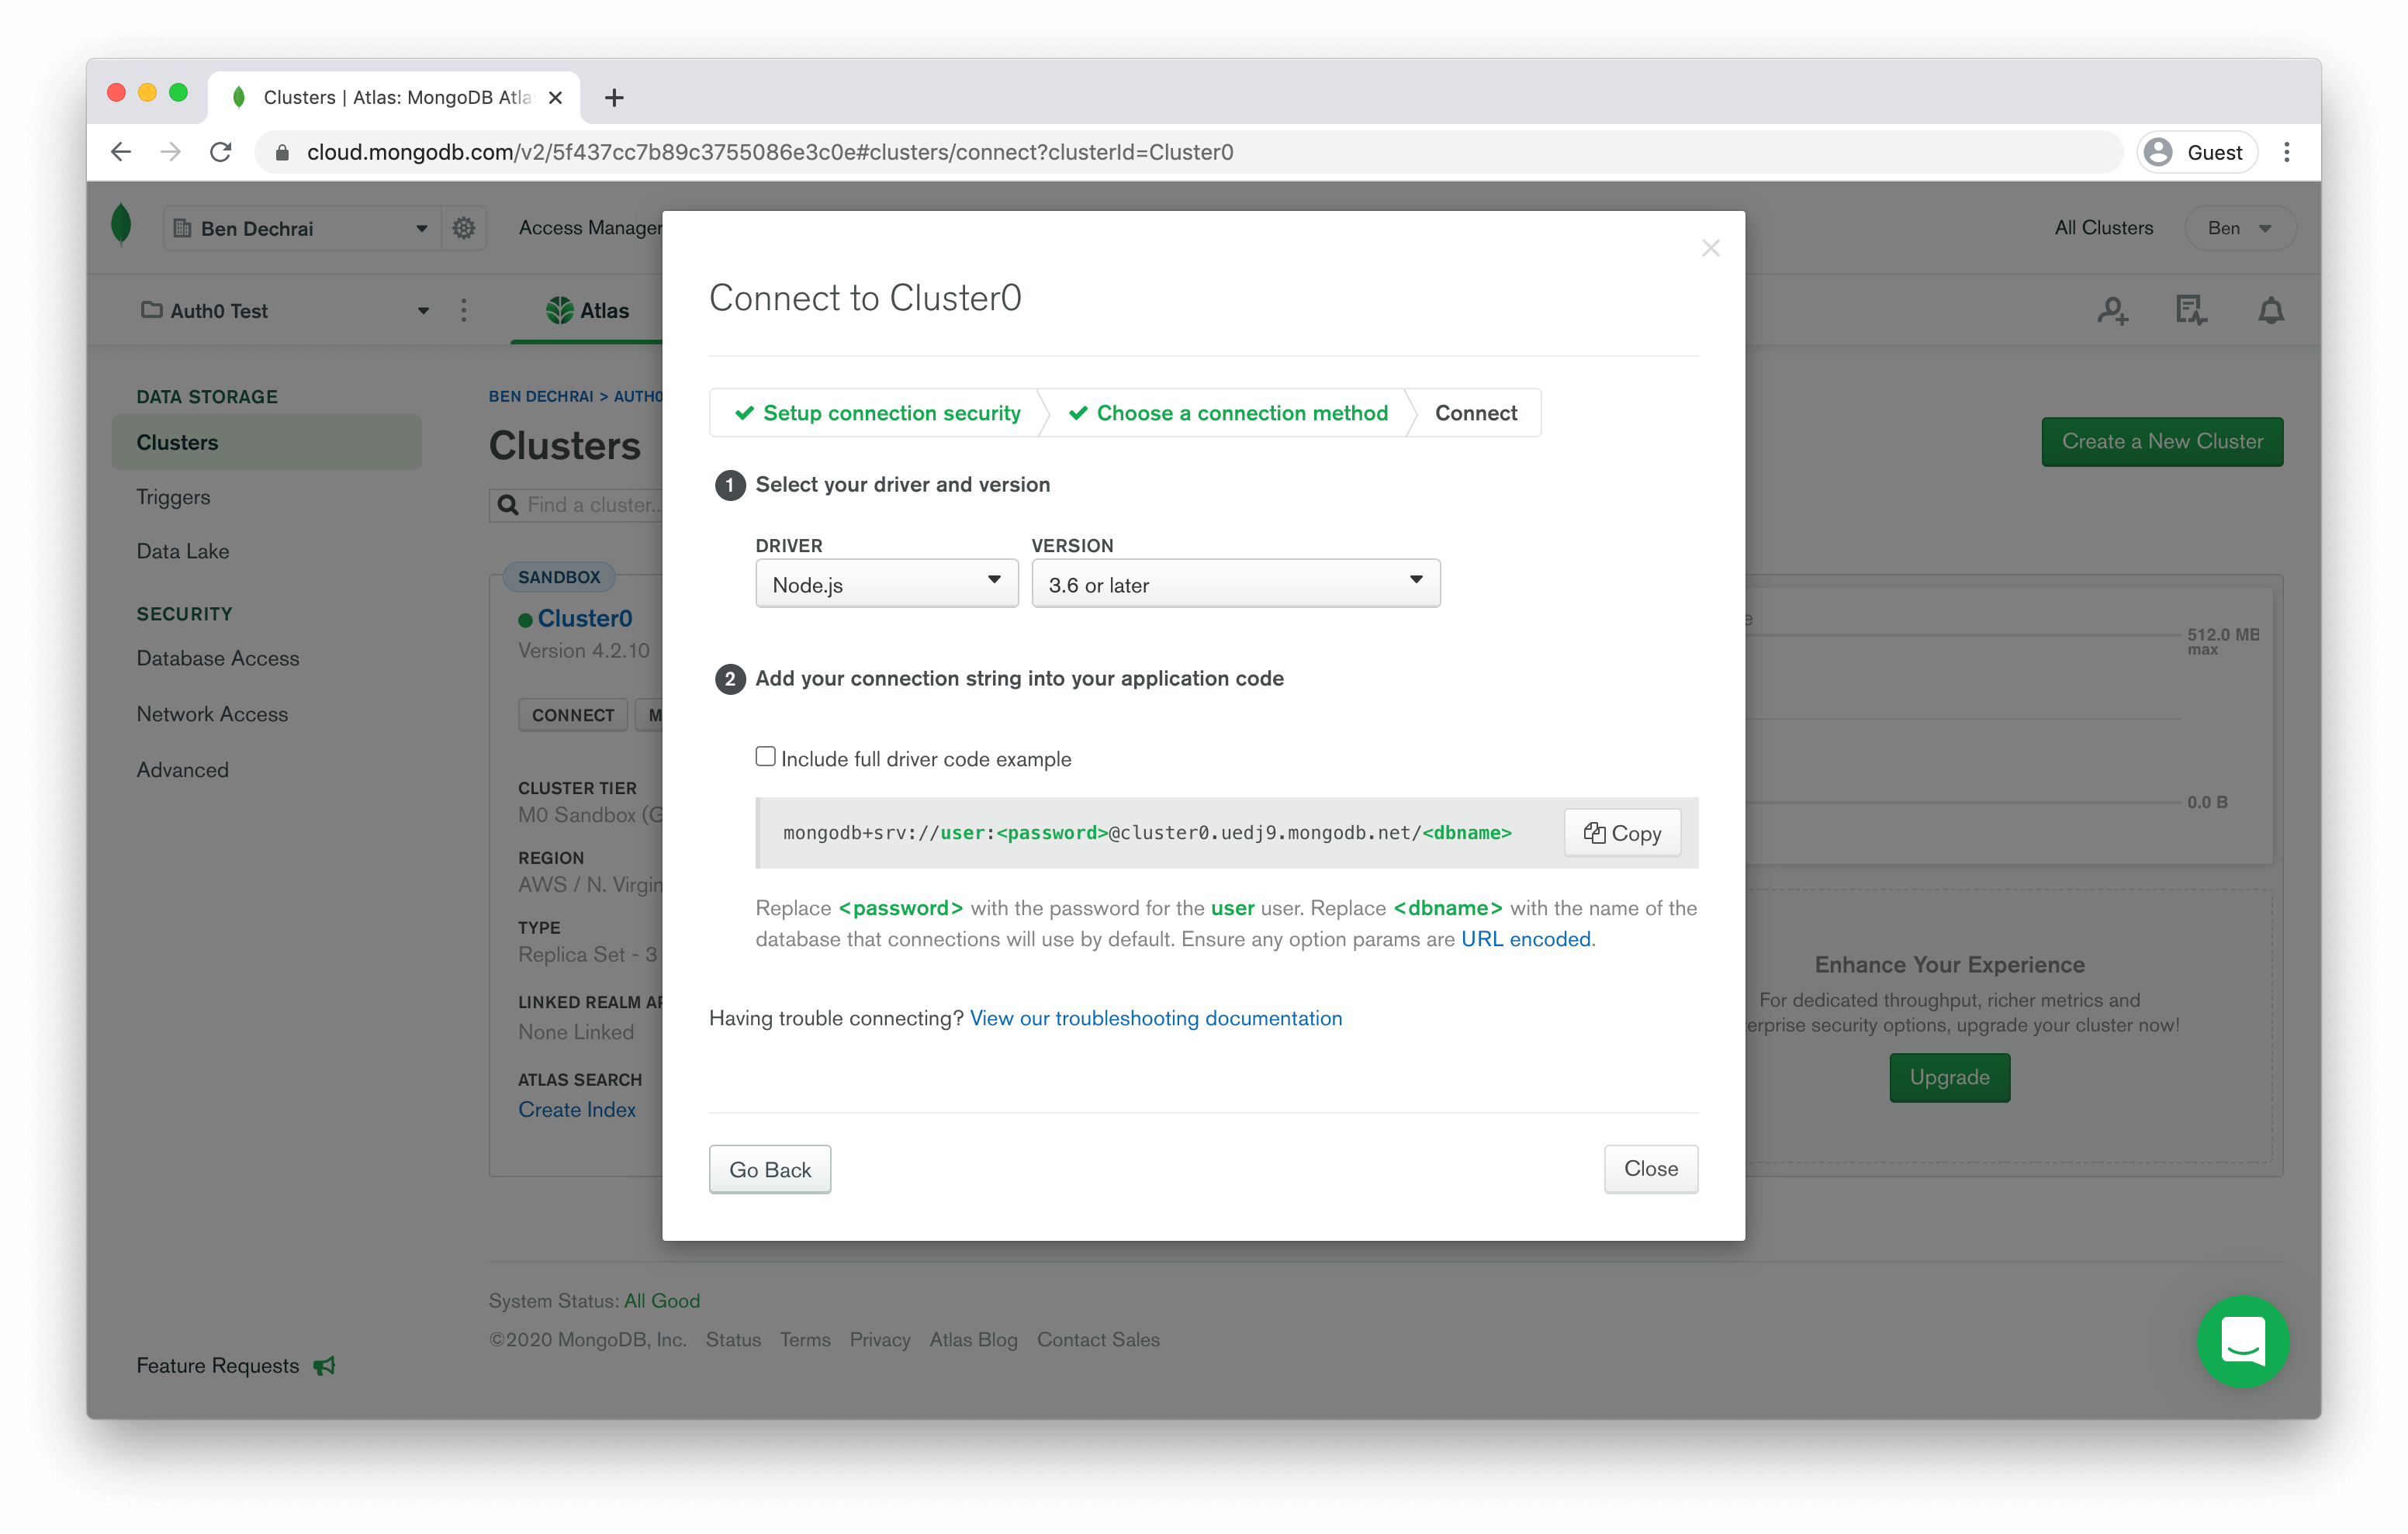
Finally, you get to choose a connection method. The scripts you're configuring in Auth0 fall under the Connect your Application scenario, and clicking on this will reveal the connection string you need to use in your scripts.
Defining the Auth0 Custom Database Scripts
Copy the connection string from MongoDB, and switch back to the Auth0 interface. Select to edit the Login script, and choose MongoDB from the templates drop-down.
You'll see the following line in the code:
const client = new MongoClient('mongodb://user:pass@localhost');
Replace the entire connection string with the value you just copied from MongoDB, and you'll see something that looks like:
const client = new MongoClient('mongodb+srv://user:<password>@xxx.mongodb.net/<dbname>?...');
You can remove
<dbname>const client = new MongoClient('mongodb+srv://user:<password>@xxx.mongodb.net/?...');
Now you need to replace
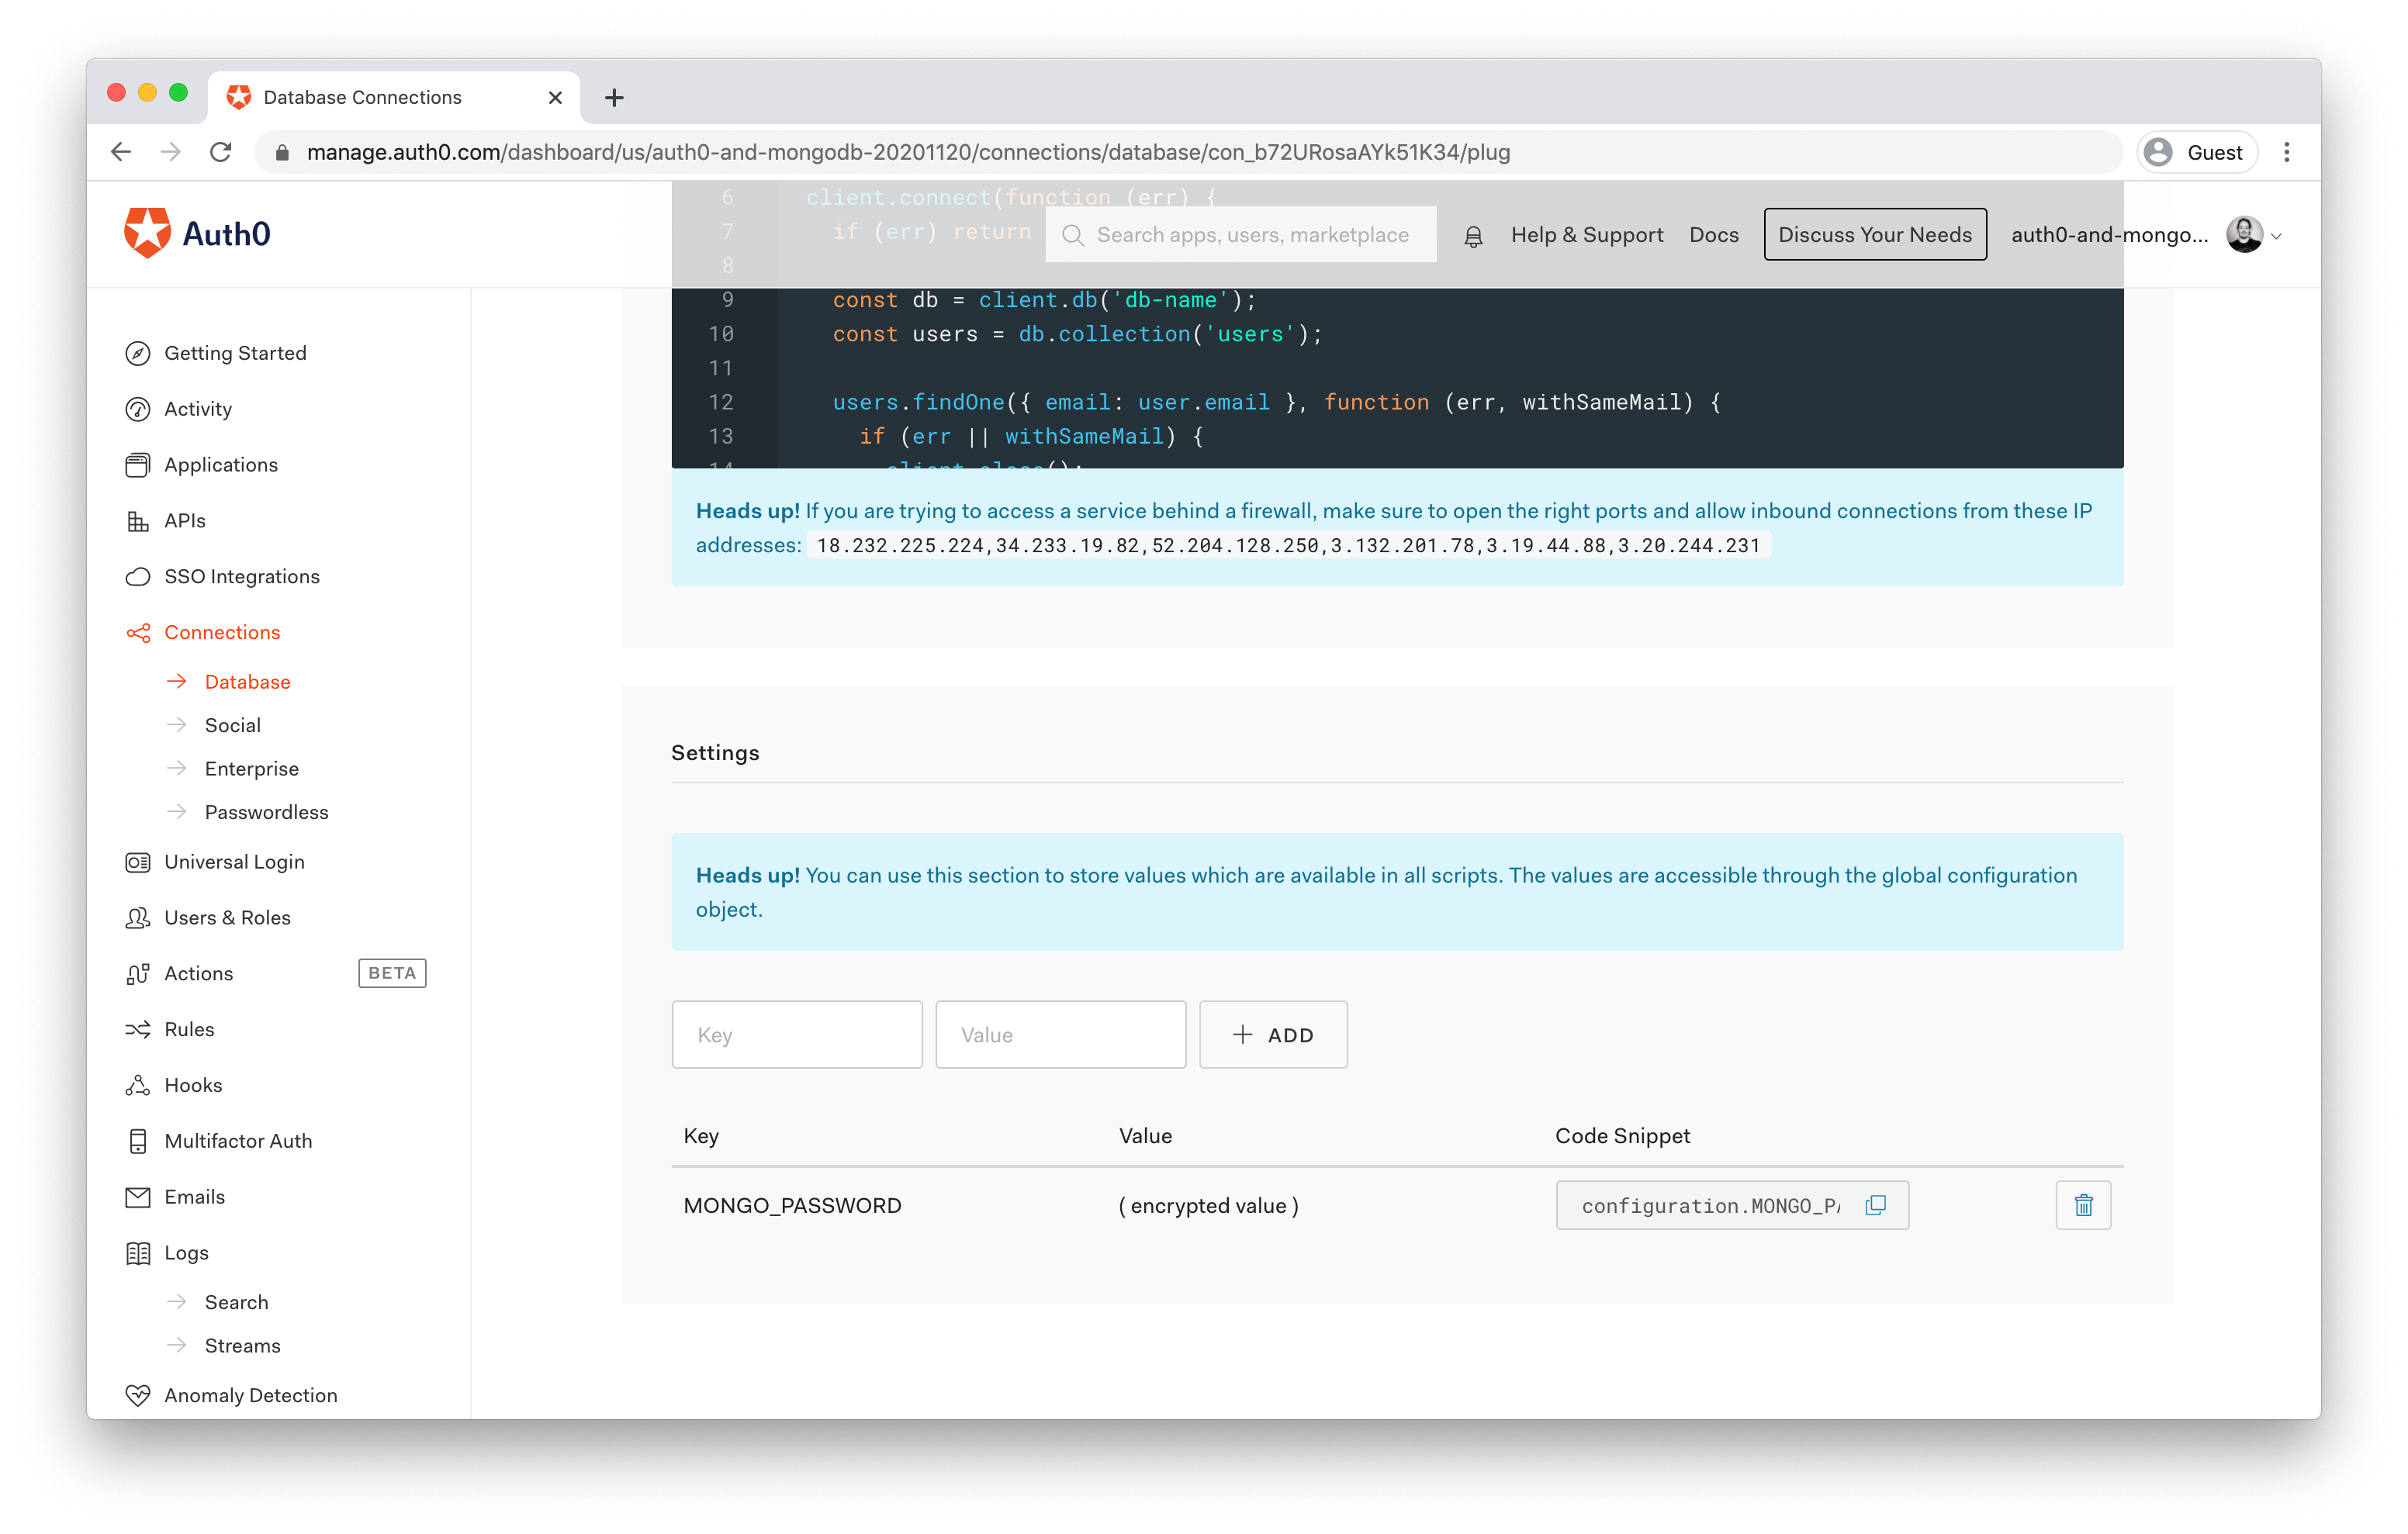
<password>There's a solution for this, though. Under the script editor, you'll see a Settings section that allows you to store data exposed to all the scripts via environment variables. This is a much more secure way to store the password.
Add a key/value pair with the key
MONGO_PASSWORDYou'll then be able to copy the Code Snippet from the new entry, and use that in your connection string instead:
const client = new MongoClient('mongodb+srv://user:' + configuration.MONGO_PASSWORD + '@xxx.mongodb.net/<dbname>?...');
Creating the Mongodb Database to Store Users In
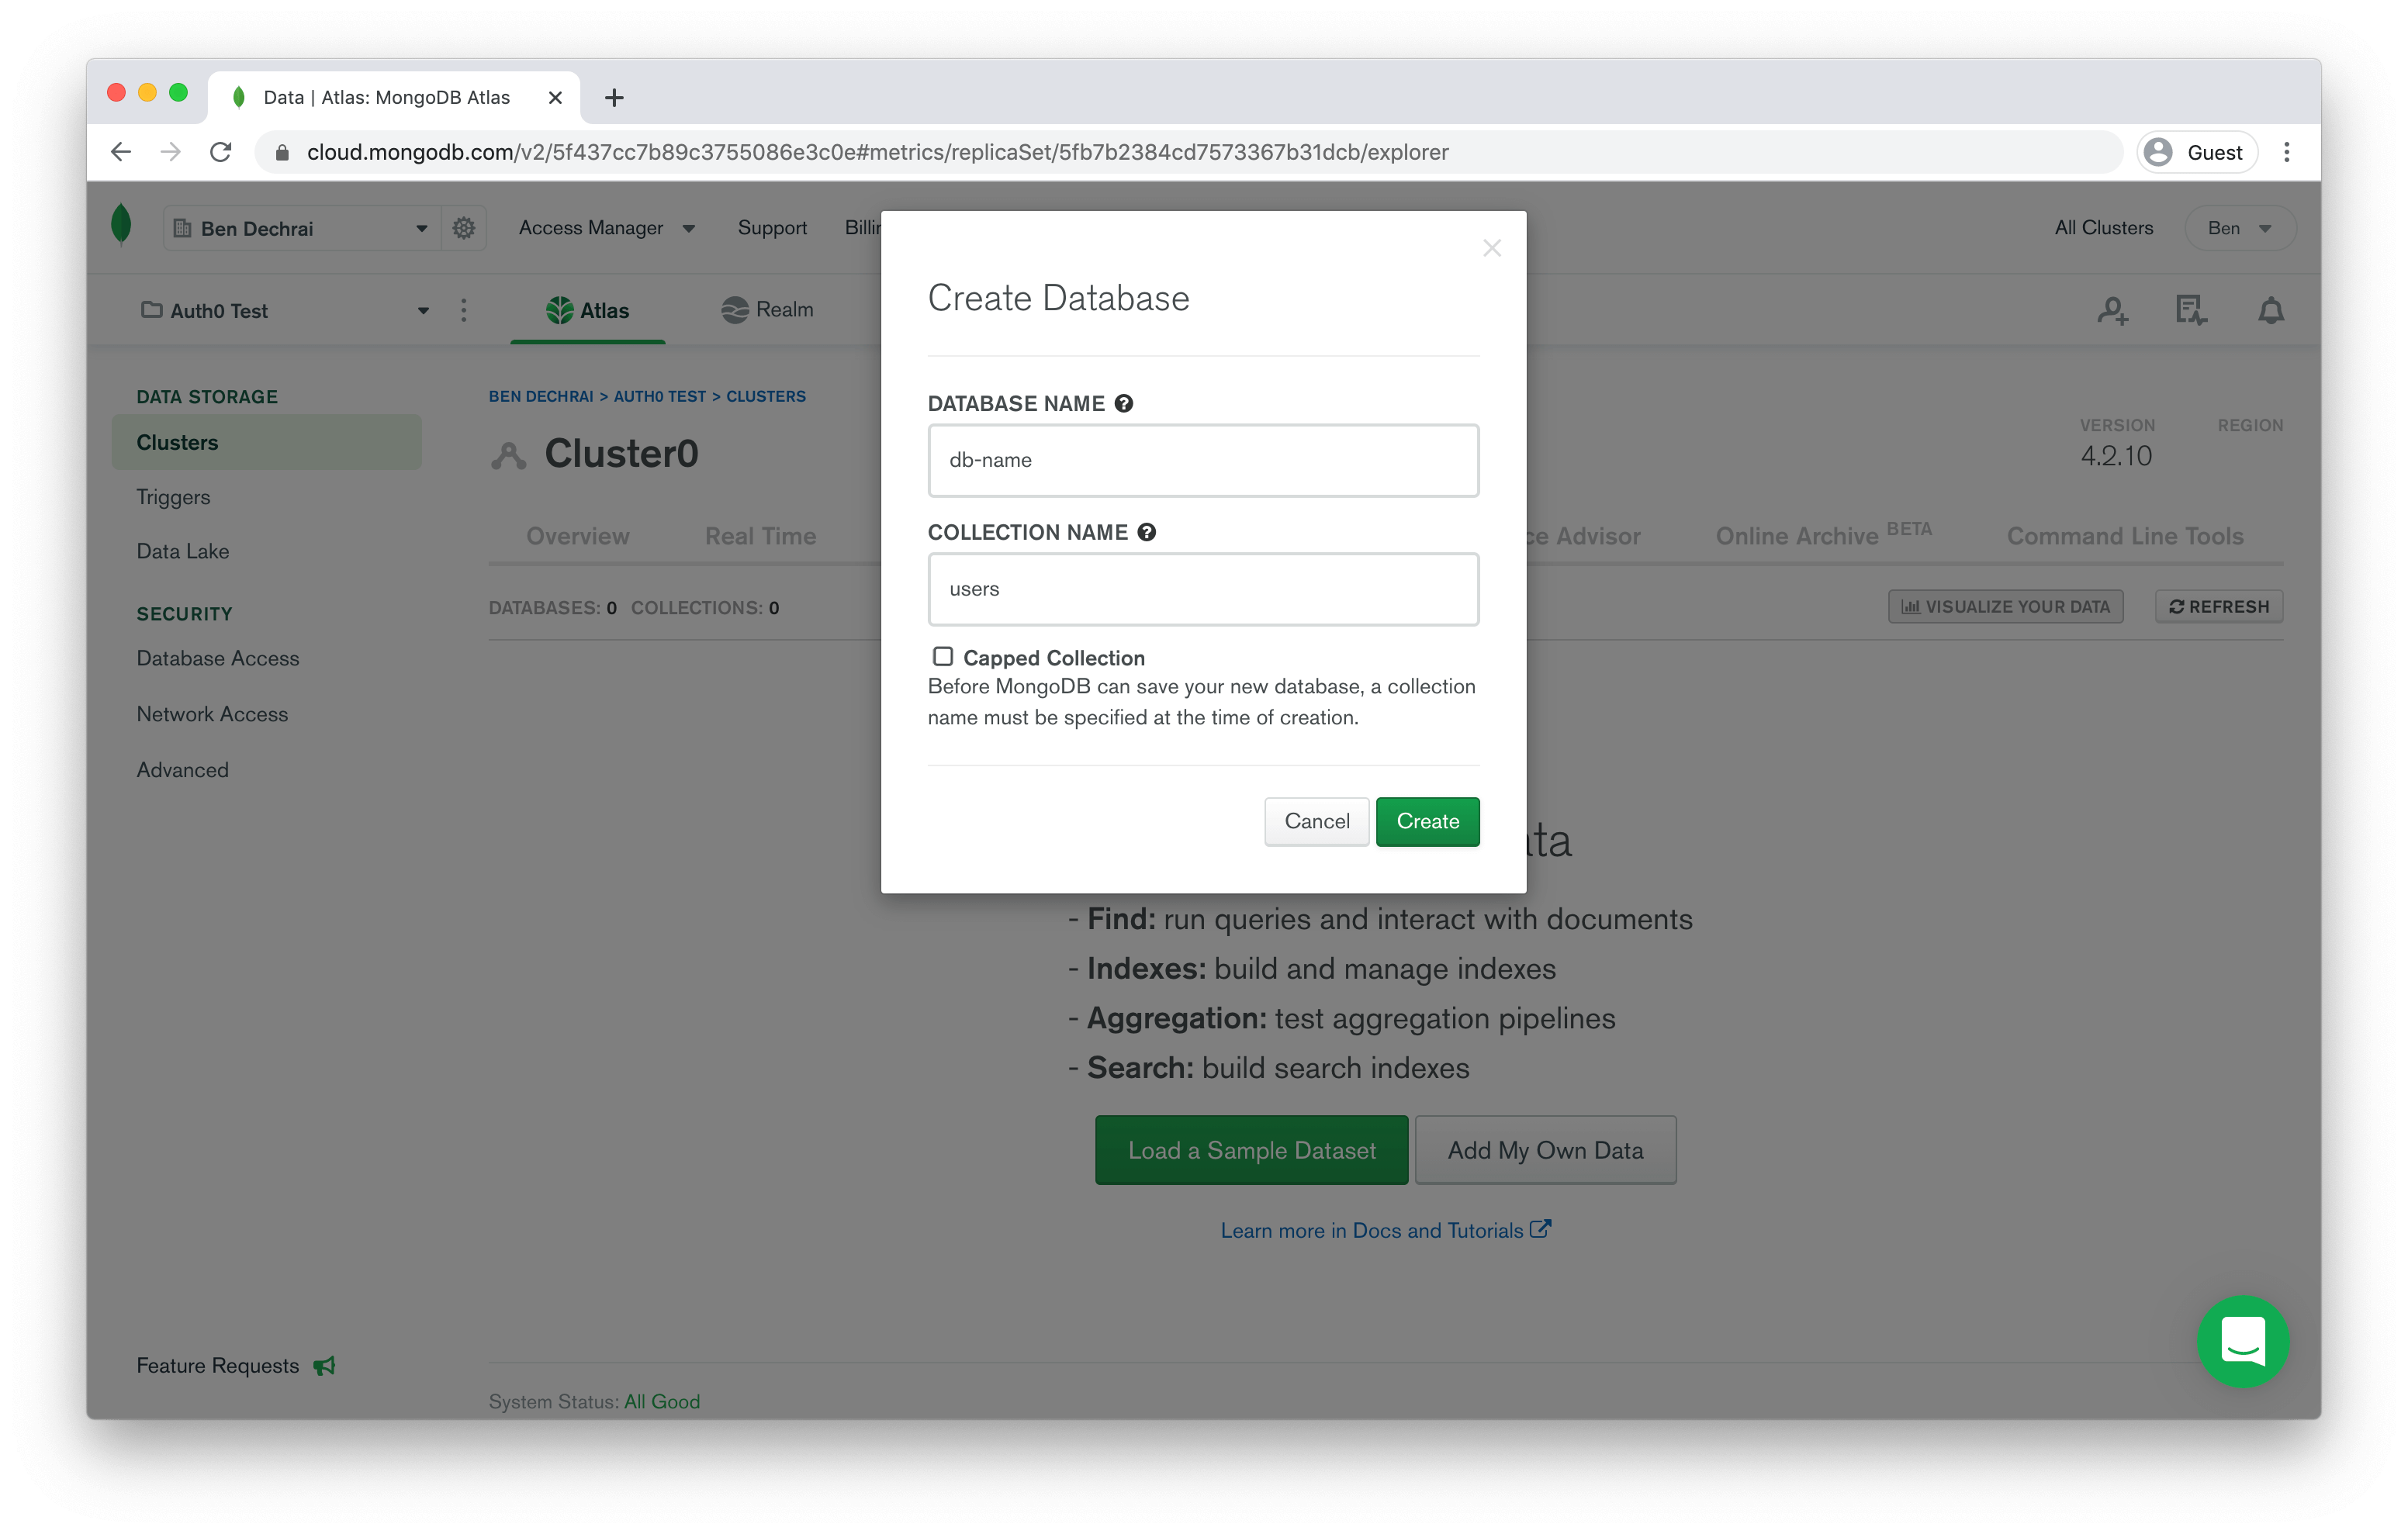
The next thing you'll need to do is create a database and collection in MongoDB. Jumping to the MongoDB interface again, close the dialog box containing the connection information and click on the Collections button.
On the Collections page, click the Add My Own Data button, and provide the database name
db-nameusersThat's it for this step! The database is ready, and you just need to finish up the Auth0 custom database configuration.
Finalizing the Auth0 Custom Database Scripts
Switch back to the Auth0 interface again and you should see the Login script editor. The script is already connecting to the
db-nameusersBefore you move on, copy line 4 into your clipboard, which instantiates the client with the correct connection string.
To configure the other scripts, simply iterate through each one, select MongoDB from the templates dropdown, and replace the client instantiation line with the one you just copied from the Login script.
There are just two more little changes you'll need to make to make everything work.
By default, each new user won't have an
email_verifieduser.passworduser.password = hash
This is probably line 24. Directly after this line, add the following:
user.email_verified = false
Now, when someone creates a new account, the new user object in MongoDB will be created with the
email_verifiedThe second change is to the Delete script. On around line 11, you'll see the line that tells MongoDB to delete the user:
users.remove({ _id: id }, function (err) {
The issue here is that the value of
id_idemailusers.remove({ email: id }, function (err) {
Clicking on the Save button above the code editor will save all changes in all the scripts. So hit that, and you're done!
Testing the Database
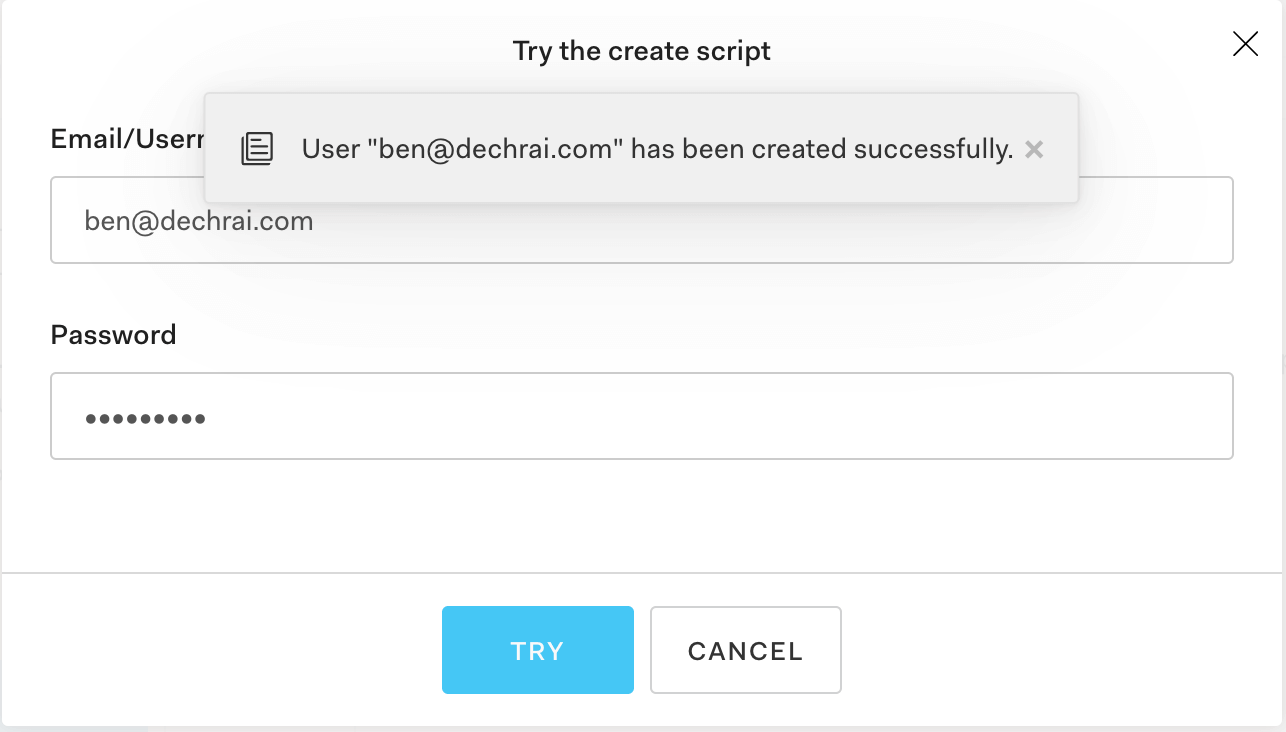
You can use the Try button to test each of these scripts out now. If you're starting with a new database, try the Create script first, and go from there.
If you're using an existing database, you can try logging in with an existing user's credentials. If you're having authentication issues, make sure the Login script is using the same hashing mechanism as the code that generated these users in the first place.
And if you're having trouble, head over to our Community Forum and drop your request below.
About the author

Ben Dechrai
Developer Advocate (Auth0 Alumni)

