Configure Client-Initiated Backchannel Authentication
Learn how to configure Client-Initiated Backchannel Authentication (CIBA) for your application. To learn more, read Client-Initiated Backchannel Authentication Flow.
Prerequisites
Before configuring CIBA for your application, make sure you complete the following prerequisites:
Integrate Guardian SDK into your application
To use the CIBA flow with push notifications, you need a mobile application that integrates the Guardian SDK. This allows the authorizing user to approve push notification challenges initiated by the CIBA flow.
To learn how to install the Guardian SDK for your application, read Auth0 Guardian and the relevant sections for your mobile device platform.
Enable Auth0 Guardian push notifications for your tenant
To submit a CIBA push notification, you must enable the Auth0 Guardian push notifications for your tenant. To approve a CIBA push notification challenge, the authorizing user must also be enrolled in the Auth0 Guardian push notification factor. To learn more, read User Authentication with CIBA.
Use the Auth0 Dashboard to enable the Auth0 Guardian Push Notification factor for your tenant.
In the Auth0 Dashboard:
Select Security>Multi-factor Auth.
2. Enable Push Notification using Auth0 Guardian. This may require some MFA configuration settings. To learn more, read Configure Push Notifications for MFA.

Configure CIBA for your application
You can configure CIBA for your application with the Auth0 Dashboard or Management API.
To configure CIBA for your application with the Auth0 Dashboard:
Navigate to Applications > Applications in the Auth0 Dashboard.
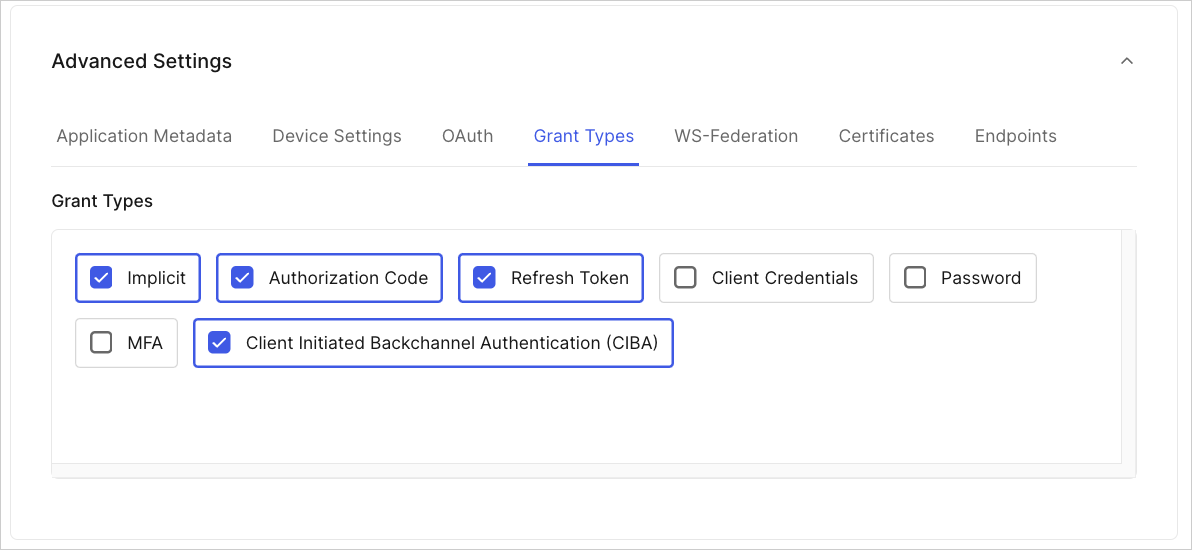
Create an application and then enable Client Initiated Backchannel Authentication (CIBA) under the Grant Types tab:

3. Click Save Changes.
To configure CIBA for your application using the Management API, use the Update a Client endpoint to add the urn:openid:params:grant-type:ciba grant type to the list of grant types on the client object:
curl --location --request PATCH 'https://[YOUR TENANT].auth0.com/api/v2/clients/[CLIENT ID]' \
--header 'Content-Type: application/json' \
--header 'Authorization: Bearer [MANAGEMENT ACCESS TOKEN]' \
--data '{
    "grant_types": [
        "authorization_code",
        "refresh_token",
        "urn:openid:params:grant-type:ciba"
    ]
}'
Was this helpful?
You can also use our Go Management API SDK library. To learn more, read SDKs:
myClient := &Client{
		Name:        auth0.Stringf("CIBA-enabled-client"),
		Description: auth0.String("This is a CIBA enabled client."),
		GrantTypes:  &[]string{"urn:openid:params:grant-type:ciba"},
	}

	err := api.Client.Create(context.Background(), myClient)
Was this helpful?
There are some restrictions on the types of clients that can use the CIBA grant type. You can only use the CIBA grant type if:
The client is a first-party client i.e. the
is_first_partyproperty istrue.The client is confidential with an authentication mechanism, i.e. the
token_endpoint_auth_methodproperty must not be set tonone.The client must be OIDC conformant i.e. the
oidc_conformantmust betrue. This is the default for all new clients.